Tomato Bruschetta on Crostini

When I saw the movie Julie/Julia, I really wanted that recipe for the bruschetta Julie and her husband eat in the first scenes.  Of course, he was acting, but the way he went over the moon for the crisp slices of baguette topped with fresh tomato made it all the more appealing.
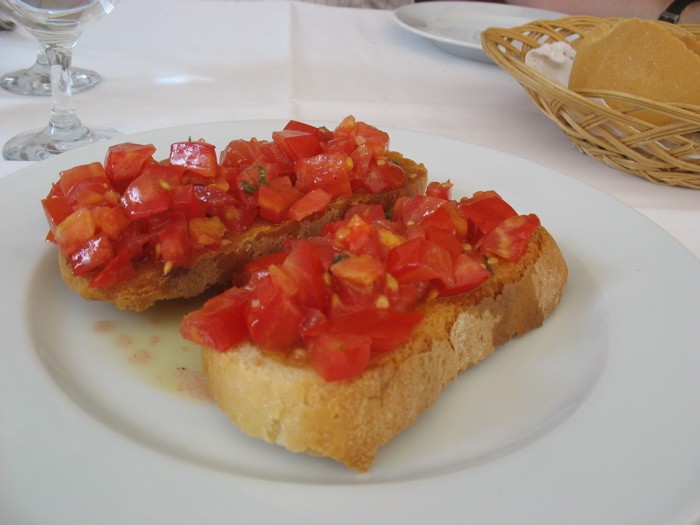
We’d had some “bruschetta pomodora” together, Dave and I, on our last trip to Italy in Montepulciano–a little town in the hills (above).
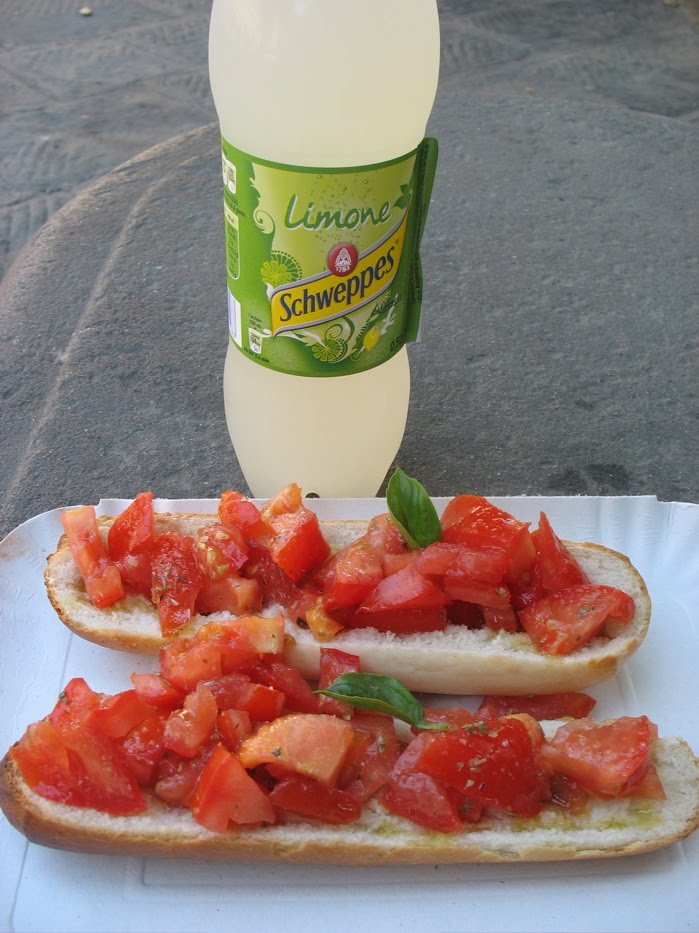
I’d also had a wonderful version earlier, while lunching in Florence (above). All of those appeared to depend on fresh tomatoes (not grocery store), good quality bread, and high-grade olive oil, and not much else.

Fast forward to today.  A perfect trio of happenings all conspired to deliver to our dinner plates the same meal.  First, some ciabatta bread from Kneaders Bakery in Orem, Utah had survived the trip home, and after a sojourn in the freezer, Dave pulled it out trying to decide what to do with it.  Second, our neighbor, Julie, had too many tomatoes and brought over two large red toms along with a handful of little yellow pears tomatoes.  Third, a version of this recipe appeared in the Sunday Magazine and I ripped it out immediately.

Ingredients:
2 large red tomatoes, handful of golden pear tomatoes, or 2 lbs. assorted heirloom/garden tomatoes, diced
2 cloves garlic, chopped or pressed through a press (if you do that, scrape what’s left behind, and press it through again)
1/4 to 1/2 cup basil leaves, thinly sliced (adjust as needed–we used about 10 leaves from our garden plant)
3 Tbsp red-wine vinegar (or several splashes)
1/4 cup olive oil
salt and fresh pepper

Crostini

Place the tomatoes, garlic, vinegar, 1/4 cup olive oil and the basil into a medium bowl and stir to combine.  Season with salt and pepper and let sit at room temperature for 30 minutes to allow the flavors to meld.

Prepare the crostini. You can either follow the directions in the linked recipe (it’s on this site), or grill it on the outside barbeque grill, or do what Dave did: lay out the thinly sliced bread (about 3/8″ thick) on a cookie sheet.  Brush with olive oil, and broil under high heat until golden brown and crisp.  He took out the center crostini that were done first and redistributed the others more evenly under the heat.

Build your bruschetta: mound the tomatoes, including some of their juices, up onto the bread and eat immediately.  We made each delicious serving at the time of eating, as the bread quickly soaks up the juices and would get soggy if it sat at all.

Optional: add in about 1/2 thinly sliced red onion.  We decided that our servings in Italy didn’t have onion, so we left it out.

Another Optional: place a slice of fresh mozzerella cheese (the kind that’s sold with liquid around it–a soggy looking thing) on top of the crostini before you place the tomatoes over it.  We had that, and the meal was amazing.  And we weren’t even acting!

History of the Terms (from Wikipedia):
Bruschetta (Italian pronunciation: [brusˈketta]) is an appetizer from central Italy whose origin dates to at least the 15th century. It consists of grilled bread rubbed with garlic and topped with extra-virgin olive oil, salt and pepper. Variations may include toppings of spicy red pepper, tomato, vegetables, beans, cured meat, and/or cheese; the most popular recipe outside of Italy involves basil, fresh tomato, garlic and onion or mozzarella. Bruschetta is usually served as a snack or appetizer.

And this interesting note: Following a semantic shift, some Americans use the word “bruschetta” to refer to the topping instead of the dish. Many grocery store chains in the United States sell bottled “bruschetta,” which is typically tomatoes, onion, garlic, and herbs.

Definitely not as good as the one we enjoyed tonight.

Peach Upside-down Cake

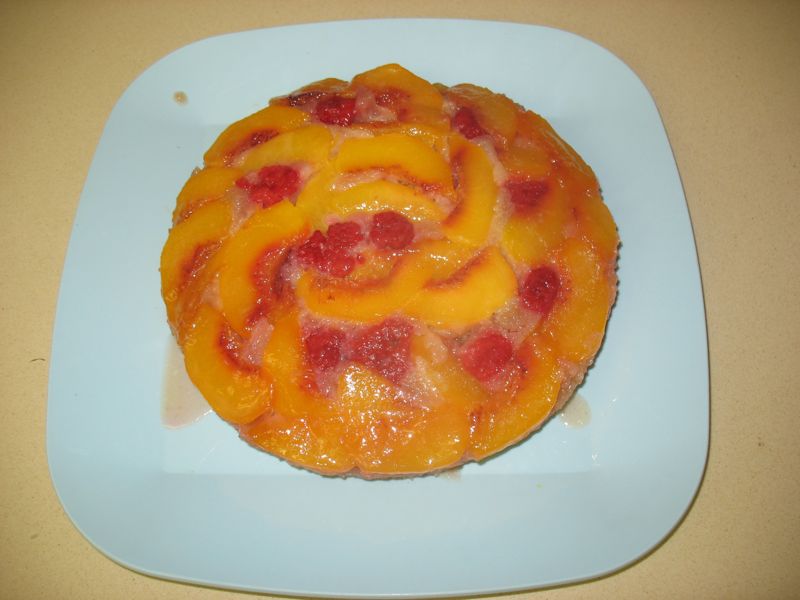
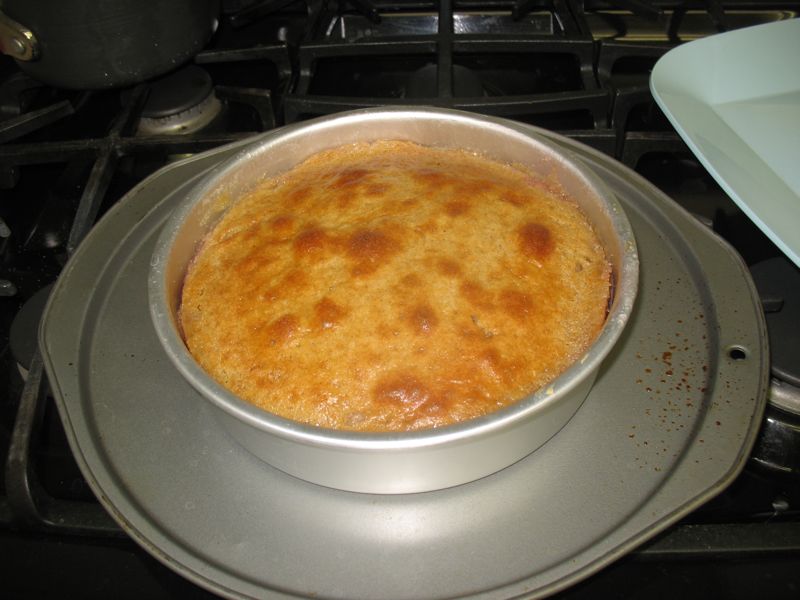
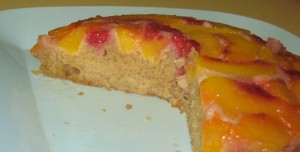
Once again, Dorie Greenspan writes a winner recipe.  This time it is a recipe for a peach upside-down cake, but it’s lighter than usual, and uses a granulated sugar mix for the fruit, rather than a brown-sugar mixture.  We had a few extra peaches (okay–confession–I bought extra just so I could make this), a few raspberries and when it came out of the pan, Dave and I couldn’t resist taking a small slice.  (Okay.  Confession.  We each had one more right then, promising to save the rest for later on tonight.)  I like the lightness of this–not so gooey, sicky sweet like that old pineapple standby.  (But I confess I liked that too, in its day.)

Ingredients:
1 cup all-purpose flour
1 teaspoon baking powder
1 teaspoon ground cinnamon
1/4 teaspoon salt
1 3/4 sticks (14 Tablespoons) unsalted butter, at room temperature (mine was neither unsalted nor room temperature)
granulated sugar, divided into 6 Tablespoons (part I) and 1/2 cup (part II)
2 large eggs
1/4 teaspoon almond extract
3/4 teaspoon vanilla extract
1/3 cup whole milk (we only have skim milk around here, so I poured in about 1 Tablespoon cream into a measuring cup and filled up the rest with skim milk)

3 large peeled and pitted peaches, sliced
a few raspberries for color (optional)

Center a rack in the oven and preheat the oven to 350 degrees F.  Put an 8×2-inch pan on a baking sheet.  Warning!  This is taller than the usual pan we have in our cupboards.  I bought mine at Michaels last time they included a coupon in the newspaper.

Whisk together dry ingredients.

Melt 6 TBLS of the butter in a small saucepan.  Sprinkle in 6 TBlS of the sugar and cook, stirring, until the mixture comes to a boil.  Pour this evenly over the bottom of the cake pan, then scatter the raspberries over the butter mixture.

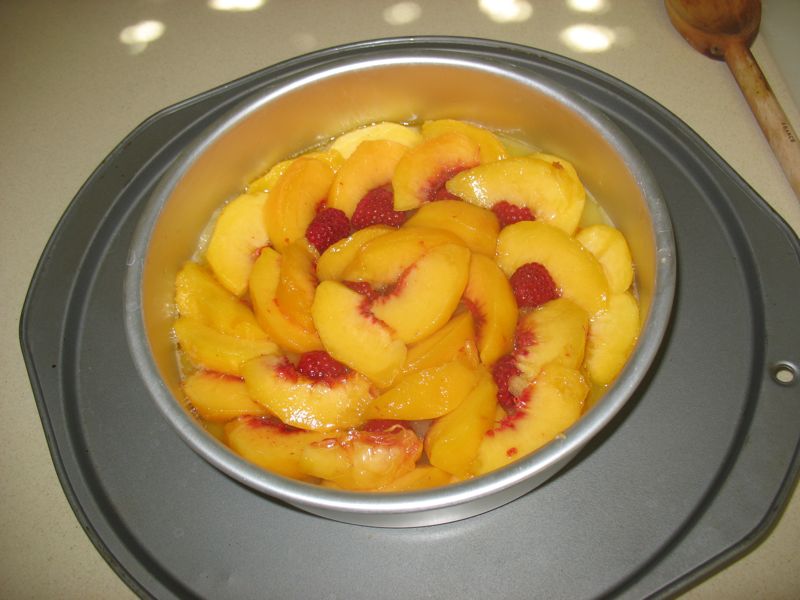
Beginning at the outer edge, ring the pan with the peach slices, ending at the center, fitting the raspberries in and around as you go.  (I had to take a picture of this step–it looks very pretty just sitting there.)  Set aside.

Working with a stand mixture, fitted with a paddle attachment (or with a hand mixer in a large bowl), beat the remaining stick (8TBLS) of butter on medium speed until smooth.  Add in the remaining 1/2 cup of sugar and continue to beat until pale and creamy, about 3 minutes.  (Don’t fret if yours doesn’t do this–mine didn’t either, but I think it was because the butter was cold.)  Add the eggs one at a time, beating for 1 minute after each addition and scraping down the bowl as needed.  Pour in the vanilla/almond extract.

Reduce the mixer speed to low and half of the dry ingredients, mixing only until they disappear into the batter. Mix in the milk, then the rest of the dry ingredients, scraping the bowl as needed.  Spoon the batter over the fruit, and smooth the top with a rubber spatula.

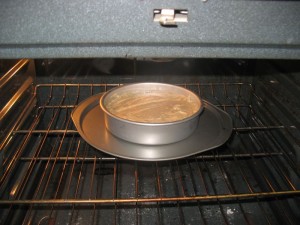
Bake for 40-45 minutes, or until the cake is golden and a thin knife inserted into the center of the cake comes out clean.

Remove it from the oven and run a blunt knife between the sides of the pan and cake.  Let sit for at least 15 minutes to allow the peach juices to absorb into the cake, then invert on a serving platter.

Yum! This is one of those recipes that isn’t terribly glamorous, but that will disappear very quickly, as you can see by our photo above.  Very quickly.  Greenspan, who wrote the book from which this recipe was taken (Baking From My Home to Yours), made this first in a cranberry-nut version.  You can bet I’m going to try that come fall, when the cranberries hit the shelves.  Check back for that one, but in the meantime, go buy Dorie Greenspan’s book.

Quinoa, Corn and Edamame Salad

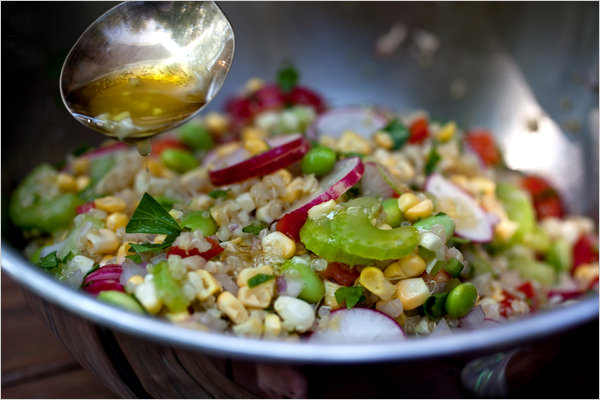
I first read this recipe in the New York Times, in a special article on summer salads with recipes by Martha Rose Shulman.  I subjected Dave, my husband, to a series of these, and he declared this one to be a winner.  It’s pretty–green and red–and crunchy, but not a wildly out of control crunch–just pleasant fresh vegetable munching.  While this is a summer salad, I could also see it served as cold side dish at a holiday buffet, as the colors are so beautiful. Regarding the “optional” feta cheese: we tried it both ways–with and without.  Adding the feta cheese brings a creaminess, a certain “mouth” satisfaction to the dish.  I recommend it.

For the salad:
1 cup quinoa, cooked (I made it with chicken broth, but water works as well.  Click **here** for basic quinoa cooking directions.)
1/2  of a 16-ounce bag of WHITE frozen corn
1 small red onion (about 1/3 cup), cut in small dice
1 red bell pepper, cut in small dice
1/2 cup thinly sliced celery, from the tender inner stalks
4 or 5 radishes, sliced
1/2 cup fresh or thawed frozen edamame
2 ounces mild feta, cut in small dice (about 1/2 cup), or crumbled.  I buy the bricks, then crumble it.
1/2  jalapeño chile, seeds and membranes removed, minced finely
1/3 cup chopped cilantro

For the dressing:
2 tablespoons fresh lime juice (about 1 small lime, depending on size)
1 garlic clove, finely minced or pureed
1/4 cup extra virgin olive oil
Salt to taste

Soak the onion in cold water to cover for five minutes. Drain, rinse and drain on paper towels.  **I have no idea why this step is here, but I did it.  Must be some kitchen chemistry.

Combine all the salad ingredients in a large bowl. Whisk together the dressing ingredients and toss with the salad. Serve.

Yield: Serves four main dish, and six side dish servings.

Advance preparation: The quinoa freezes well and the assembled salad will keep for a day in the refrigerator.

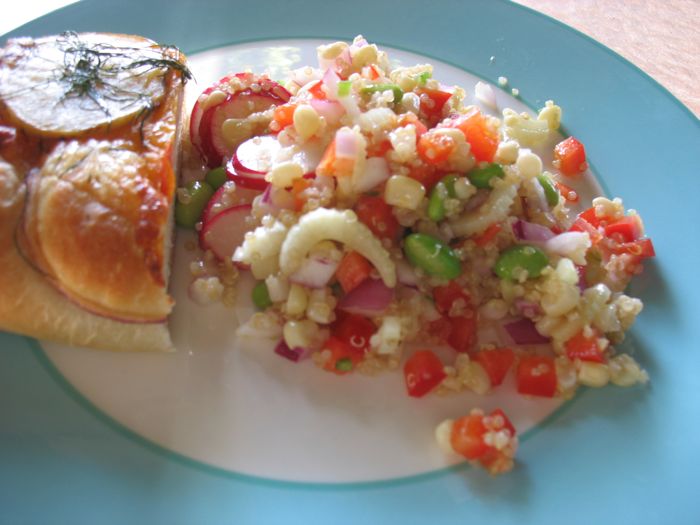
Here’s our version. I served it with a delicious foccacia from the local bakery, which was topped with tomatoes, potatoes and dill.  We were full after our meal, and our leftovers the next day were even better.

Nutritional information per serving (four servings): 359 calories; 18 grams fat; 2 grams saturated fat; 0 milligrams cholesterol; 43 grams carbohydrates; 6 grams dietary fiber; 25 milligrams sodium (does not include salt added during cooking); 10 grams protein

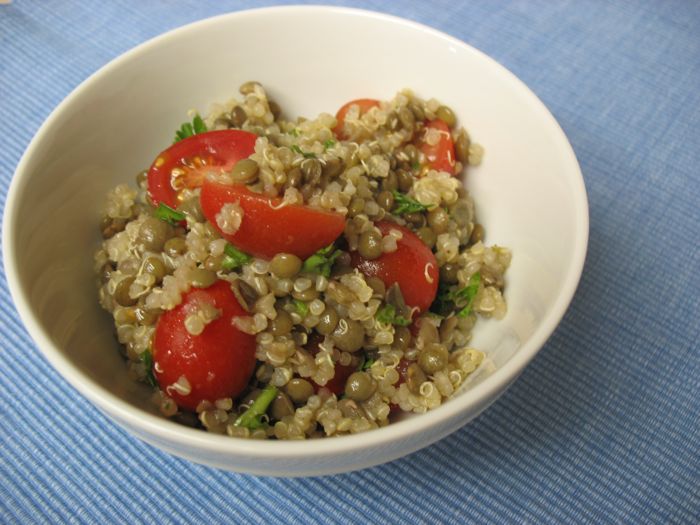
Quinoa Lentil Salad with Tomatoes

First off, this is taken from the Los Angeles Times, from an article written about the Immaculate Heart Center and their new cookbook.  That’s just to keep the copyright gods squared away.  I think I’d like to buy this cookbook as this recipe was such an intriguing and interesting standout, that I can’t wait to try some of their others.

I’ve cooked so much with the Lemon Vinaigrette recipe on this site, that the shift of the acidic flavor in this one to an apple cider vinegar was very refreshing and I quite liked it. Where to buy Lentils de Puy, the small French lentils called for?  Amazingly, my Ralph’s supermarket has been carrying them in the specialty food section.  They cook up quickly and keep their shape.  I’ve become a fan.  If you want to store this for another day, I’d not add the tomatoes until you serve it.

Total time: 50 minutes, plus cooling and chilling times
Servings: 6

Ingredients:
1 cup French green or brown lentils, sorted and rinsed
Salt and pepper
1/4 cup white wine vinegar or cider vinegar, plus more for drizzling
1 cup quinoa, rinsed and strained
1/2 cup olive oil, plus more for drizzling
1 large garlic clove, minced
1/4 cup chopped fresh mint
1/4 cup fresh parsley
2 cups cherry or other little tomatoes, halved

Place the lentils in a large saucepan and fill with water to cover by 2 inches. Simmer until tender, about 20 minutes, then drain the lentils and transfer them to a medium bowl. Season the lentils with one-fourth teaspoon salt and several grinds of pepper and drizzle over about 1 tablespoon of vinegar. Taste the lentils, and adjust the seasoning or vinegar, or both, if desired. Set aside the lentils to cool, stirring occasionally.

In a large saucepan, combine the rinsed quinoa with 2 cups water and bring to a boil over high heat. Cover the pot and reduce heat to a gentle simmer, cooking until the grain is soft and translucent, about 15 to 20 minutes. The water should be absorbed; if not entirely absorbed, drain any excess. Remove from heat and fluff the quinoa with a fork. Transfer the quinoa to a large bowl, drizzle about 2 tablespoons of oil on the grain and stir gently.

In a small bowl, whisk together the garlic, one-fourth cup vinegar, one-half cup olive oil, one-fourth teaspoon salt and one-eighth teaspoon pepper. Taste and add additional seasoning if desired.

Stir the cooled lentils in with the quinoa in the large bowl. Stir in the dressing, then cover and chill the salad for at least 1 hour.

Just before serving, stir in the mint, parsley and tomatoes and check the seasoning. Drizzle with a bit more vinegar and oil.

Each serving: 387 calories; 13 grams protein; 40 grams carbohydrates; 10 grams fiber; 20 grams fat; 3 grams saturated fat; 0 cholesterol; 3 grams sugar; 202 mg. sodium.

“A Place at the Table” is available for $35 plus shipping at http://www.immaculateheartcenter.org.

Olive + Gourmando Chickpea Salad


It was about 104 degrees that day in Montreal.  We were pretty weary tourists and it was only one o’clock in the afternoon.  We found Olive et Gourmando (351 rue St-Paul ouest) and stood in line only briefly before being awarded a table.  Then we went up and chose from the menu written above the counter on a blackboard, or looked at the specials lined up in their case.  We both pointed to this salad because it looked so fresh, so refreshing. We handed them our ticket with our table number written on it, and in about 5 minutes they delivered our food.  I took a photo and hoped to recreate it at home.  I think I have a reasonable facsimile.  It goes together in about 10 minutes.  Serve with a good French loaf, or that package of mini-pita pockets from Trader Joe’s from the back of the freezer (which we did).

Have on hand:
1 14 oz. can garbanzo beans (also known as chickpeas), rinsed and drained
1 medium zucchini, scrubbed and cut into 1/2″ chunks
thin slices from the end of a washed fennel bulb, about 3/4 of a medium bulb
red grapes, about 15, sliced in half
roasted red peppers in a jar (from Trader Joe’s, or equivalent)–about 3-4 pieces, julienned
chopped tomatoes
feta cheese, about one-half of an 8 oz. brick, crumbled and rinsed (about 1 cup’s worth)
flat leaf parsley (also called Italian parsley), chopped coarsely
curly leaf parsley, chopped finely

one recipe of Lemon Vinaigrette
extra olive oil for sauteing

As ingredients are assembled, place into medium bowl (in no particular order), although you may want to keep the tomatoes separate and put on top, in case you want to keep this for another day.

In a small skillet, pour 1 Tablespoon olive oil and lightly saute the zucchini until just barely golden.  You want them firm, but with the edge of crispness taken off.  Repeat for the fennel slices, so they are on the verge of soft.  Place into bowl.  Add in all  of the rest of the ingredients; toss with vinaigrette and serve.

This is mine, below.  Theirs is above (and prettier, with all that parsley).

Angel Food Cake

The first time I made this was when my parents were visiting.  It was summer and we needed a light dessert for a hot day.  Gale Gand’s recipe seemed to fit the bill: it’s a from-scratch angel food cake speckled with fresh blueberries with a bit of lemon to freshen the flavors.

Dave has requested it often for his birthday, preferring this to his other old favorite of German Chocolate Cake (I never could make that one very well–his mother did it better than I, I’m sure).

The taste of the homemade angel food cake is different than the store bought, although that one has its merits.  It’s like the difference between any manufactured object and something that has had a human touch.  Try it and see what you think.

I’ve included a lot of photos to show how the mixture begins to peak; my apologies to those who find photos tiresome.

Blueberry Angel Food Cake–yield 8 servings (although we always get more out of it)
Gale Gand, from Cooking Light

Cake:
1 1/2 cups sugar, divided
1 cup sifted cake flour (I used regular)
12 large egg whites (about 1 1/2 cups)
1 1/4 teaspoons cream of tartar
1/2 teaspoon salt
1 teaspoon vanilla extract
1 1/2 cups fresh or frozen blueberries
2 Tablespoons sifted cake flour
1 Tablespoon grated lemon rind

Note on grating rind: you want to just skim the yellow rind off the lemon, leaving the white pith behind (it can be bitter).  If I have a whole crop of lemons, I grade the rind onto a square of wax paper, then fold it up to the inside, place the packet into a small ziploc sandwich baggie and label it with the date.  I’ve used frozen rind for as long as 9 months without noticeable drop in quality.

Glaze:
1 cup powdered sugar
3 Tablespoons fresh lemon juice

Preheat oven to 375°F.

Sift together 1/2 cup sugar and 1 cup flour (I just whisked them together).

In a large bowl, beat egg whites with a mixer at high speed until foamy.

Add cream of tartar and salt; beat until soft peaks form.

Add 1 cup sugar, 2 Tablespoons at a time, beating until stiff peaks form.

See the tip of the peak bending over like a wave?  Not quite done.

This peak stands straight up–it’s done.

Sift flour mixture over egg white mixture, 1/4 cup at a time; fold in.  Here’s a video on folding egg whites into another mixture; it’s the same technique.

Fold in vanilla. . .

. . . and blueberries. If you’ve never seen an angel food cake pan before, it has three tabs sticking up from the sides, and a removable bottom (to which the center tube is attached).


Combine 2 Tablespoons flour and lemon rind; toss to coat. Sprinkle over egg white mixture; fold in.

Spoon the batter into an UNGREASED 10-inch tube pan, spreading evenly. (Note:the recipe says to smooth out the top, but I like mine with more peaks and valleys, as shown here.  But I was a good girl, and smoothed it out so you could see what the end result looks like in a later photo.)

Break air pockets by cutting through batter with a knife. Bake at 375°F for 40 minutes or until cake springs back when lightly touched.

Invert pan; cool completely.  Yes, turn it upside down and balance it on those tabs until it is REALLY COOL to the touch.  No warmth anywhere.  That’s why it’s best to make this in the morning, if you plan to serve it that night.

Loosen the cake from sides of pan using a narrow metal spatula.

Invert cake onto plate. (I re-invert it so the top will show.)

To prepare the glaze, combine powdered sugar and lemon juice in a small bowl; stir well with a whisk. Drizzle over cooled cake.

Calories: 297 (1% from fat)
Fat: 0.2 grams (sat. fat 0g, mono 0.1 g, poly 0.1 g)
Protein: 6.6 grams
Carb: 68.2 grams
Fiber: 1 gram
Cholesterol: 0 mg
Iron: 1.1 mg
Sodium: 232 mg
Calcium: 8 mg

Quick French Berry Tart

So, the church was having a Pie Judging Contest, and my husband said, “Why don’t we bring a French pie–a French tart?”  Ever one to encourage individualism, especially at church, I agreed.

So we got busy and I made the tart crust (from the French Pear Tart recipe, found on this site), then the almond cream, because that was oh-so-delicious.  We picked up some raspberries, blackberries and blueberries on sale at our local grocer’s and carefully placed them all around.  A trip to another store and we found the red currant jelly for the glaze (recipe follows) and we carefully toted this off to the church social.

For some reason, it was awful. So, take two.

This time we followed Dorie Greenspan’s directions (recipe is from her book  Baking: From My Home to Yours–buy it!!)  and used the Pastry Cream for the filling, then put on our berries and glazed it.  Divine!  It was so good, we had to share it, so we delivered a plate to a friends who’d had a death in their family, a plate to our pastor (we call him a Bishop) and a plate to the woman (and her husband) who’d organized the church social.  Besides, we COULDN’T have all this yummy tart around–we’d eat it all.

Ingredients for French Berry Tart
We used two 6-oz containers of raspberries, one 6 oz-container each of blueberries and blackberries.  Taste your blackberries first to make sure they are young and tender–not all seedy and crunchy-ish (ick).
9-10 inch tart shell made with Sweet Tart Dough (see earlier post)
1 1/2 cups Pastry Cream, recipe follows (see note about quantity used)
1/3 cup red currant jelly mixed with 1 teaspoon water, for glazing

Smooth the pastry cream by giving it a couple of strong turns with a whisk.  Spoon enough of the pastry cream into the tart crust to come almost to the rim, then even the surface with a rubber spatula.  Carefully lay the berries on the cream.

[Dave’s method: place the raspberries about 1″ apart all over the surface.  Fill in with the blackberries.  Fill in, again, with the blueberries.]  If you are using strawberries, either halve them from top to bottom or slice them, depending on the size of the berries and your whim.

Bring the jelly and the water to a boil in a microwave oven or on the stovetop.  Working with a pastry brush, dab each berry with a spot of jelly, or glaze the entire surface of the tart, including the bit of pastry cream that peeks through the berries.

Pastry Cream
This makes two cups–you can pile it all on one tart (we did) or split it into two and make two tarts.  It keeps, tightly covered,  for up to three days in the refrigerator.

2 cups whole milk
6 large egg yolks
1/2 cup sugar
1/3 cup cornstarch, sifted (I didn’t)
1 1/2 teaspoons pure vanilla extract
3 1/2 tablespoons butter, cut into bits, at room temperature

Bring the milk to boil in a small saucepan, stirring so it doesn’t scorch.

Meanwhile, in a medium heavy-bottomed saucepan, whisk the yolks together with the sugar and cornstarch until thick and well blended.  Still whisking, drizzle in a bout 1/4 cup of the hold milk–this will temper, or warm, the yolks so they won’t curdle.  Whisking all the while, slowly pour in the remainder of the milk.  Put the pan over medium heat and, whisking vigorously, constantly and thoroughly (making sure to get the edges of the pot), bring the mixture to a boil.  Keep at a boil, still whisking for 1 to 2 minutes, then remove the pan from the heat.  [Note: ours thickened up mightily at this point, so we jumped ahead.]

Whisk in the vanilla extract.  Let sit for 5 minutes, then whisk in the bits of butter, stirring until they are fully incorporated and the pastry cream is smooth silky.  Scrape the cream into a bowl.  You can press a piece of plastic wrap against the surface of the cream to create an airtight seal and refrigerate the pastry cream until cold or, if you want to cool it quickly,–as I always do–put th ebowl into a larger bowl filled with ice cubes and cold water, and stir the pastry cream occasionally until it is thoroughly chilled, about 20 minutes.

Halibut Steaks with Creamy Saffron Sauce

When I was in high school, our Spanish teacher, Miss Azevedo, corralled the class to join her at another teacher’s house for some real paella.  She’d provide the ingredients, one of which was saffron.  We talked about this spice as she stood and stirred the seafood, the broth and the rice together, and she admitted that she couldn’t afford the REAL saffron.  Instead she had a packet of “fake” saffron that she’d bought in Spain on her last trip home and brought it back with her.

That idea–that saffron was expensive beyond belief–stuck with me for more than 40 years.  This belief was confirmed by sightings of jars of saffron in the store–a regular sized jar with a thread or two of saffron for a whopping price.  It never made it into my spice cupboard, until one day in Trader Joe’s I saw Spanish saffron in a small jar with a cork for a lid at a very affordable price.  I bought two.

So when I went hunting for a new recipe to make tonight with my frozen Costco halibut steaks, I found this in Mark Bittman’s book How to Cook Everything. Creamy Saffron Sauce.  Given that I was now the proud possessor of some actual saffron threads (as well as having leftover Greek yogurt from dinner at the beginning of the week) I was in business.  We enjoyed it–hope you will too, as it’s another quick and easy dinner.

Sauce:
1 cup yogurt, preferable whole milk
salt and freshly ground pepper
small pinch cayenne pepper
1 shallot, minced
1/2 teaspoon saffron threads
Juice of 1/2 lemon, or more to taste (roughly 1-2 Tablespoons)

In a small bowl, whisk the yogurt with some salt and pepper, the cayenne and the shallot.  Rub the saffron threads between your fingers to crush them, then stir it into the yogurt miexture.  Let sit for about 20 minutes.  [It’s like watching a Polaroid photo develop–the sauce starts to turn this fabulousy yummy shade of yellow from the saffron.  I kept giving it a whisk or two to help it along.]  Alternatively you can let it sit for up to 2 hours in the refridgerator.  Just before serving, add the lemon juice, then taste and adjust the seasoning.  It mainly needed more salt, in my estimation.

Halibut:
2 halibut steaks (about 3/4 pound)
1 tablespoon butter
1 tablespoon olive oil

If halibut is frozen, let thaw, then rinse and pat dry.
Sprinkle the halibut with salt and pepper.  Put the butter and olive oil in a large [nonstick] skillet over medium heat.  When the butter melts, swirl it around the pan, then add the fish and cook gently, turning once or twice until a thin-bladed knife meets little resistance when inserted into the thickest part; this weill generally be less than 10 minutes.

Note: we served this with Baked Asparagus and Pearl Couscous with Pine Nuts and Sultanas.

Baked Asparagus

Sorry I don’t have a picture of the asparagus all on its own, but I forgot to take a photo.  But here’s what it looks like when I served it with Halibut Steaks with Creamy Saffron Sauce.

Rinse your bundles of asparagus until cool water, then lay on some paper towels to drain.  Snap off the ends, placing your hands close to the end of the stalk so as not to snap off too much.  It should naturally break where it needs to most of the time.  Don’t be alarmed if it goes higher.  If the asparagus is thick, use a vegetable peeler and peel off the outer skin on the lower edges, as shown.  It also provides such a lovely green color when they’re cooked.

Place them on a rimmed baking sheet and drizzle with some olive oil.  Grind on some pepper and salt, then slosh them around a little to recoat.

Slide into a 400 degree preheated oven, then turn the temp up to 425 and bake until the stalks are tender, about 10-12 minutes.  Check by seeing if a knife slides in and out easily in the stalk.  Serve immediately, or you can let them cool a bit and serve them room temperature.  This is a nice variation to the steaming, plus the color is much better (I think).

Pearl Couscous with Pine Nuts and Sultanas

Same dish!  Different position!  It’s so you can see the Pearl Couscous up close, and see the pine nuts and sultanas–which are really just golden raisins.  You can buy all three of these items at Trader Joe’s (my apologies if you don’t have one. . . Mom?  Let me know and I’ll send you some).

Look for this box.  It’s called “Israeli Couscous” on the box, but I knew if I put that in a post, I’d be deluged with spam–not the eating kind.  Next to it is a bag of Toasted Pignolias (toasted pinenuts).  Don’t buy the un-toasted kind–this is so much better.

Ingredients:
1 8 oz. box pearl couscous, aka Israeli Couscous
1 shallot, finely minced
1 tablespoon butter
1 tablespoon olive oil
handful (about 1/4 to 1/3 cup) of pinenuts (can substitute shelled pistachios if you like)
handful of sultanas (golden raisins–I buy those at Trader Joe’s as well–much fresher)
1 can chicken broth (about 1  3/4 cup)

Melt the butter and olive oil together in a medium pan over medium heat.  Add the finely minced shallot and stir until tender, but not brown.  Add the package of couscous, stirring for 1-2 minutes until it is well coated and blended with the shallots.  Pour in a can of chicken broth, cover with a lid, and simmer over low heat for about 10-12 minutes until pearl couscous is tender.  You may need an extra minute or two–taste to see if it’s ready.

When couscous is tender, stir in the sultanas and the pinenuts, and recover for another 2-3 minutes (approx) until the raisins plump up and look integral to the mixture.  Yield: About 4 servings.