Summer Pasta Salad

Summer Pasta Salad with Asparagus and Tomatoes

Even though I call this Summer Pasta Salad, asparagus is typically a spring vegetable.  But I always make some version of this just as the heat begins to creep into our days, as it’s easy and delicious.  Add some bread, and bowl of fruit for dessert and dinner’s done.

Ingredients
1 lb. package of high quality cheese-filled tortellini
about 8 ounces of golden cherry tomatoes (2-3 handfuls)
about 8 ounces of sweet red pearl-like tomatoes
bunch of asparagus, about 15 spears
pitted black Greek olives, about 10 very large ones, or 20 medium
extra-virgin olive oil
good quality balsamic vinegar
red wine vinegar
salt and pepper to taste
a light shake of cayenne pepper

Method
Toss the tomatoes with some olive oil and some salt and pepper, then spread out on a rimmed cookie sheet and bake at 425F for 15 minutes.  The tomatoes should still have their shape but be a little wobbly-looking.  Set aside to cool.

Blanched Asparagus

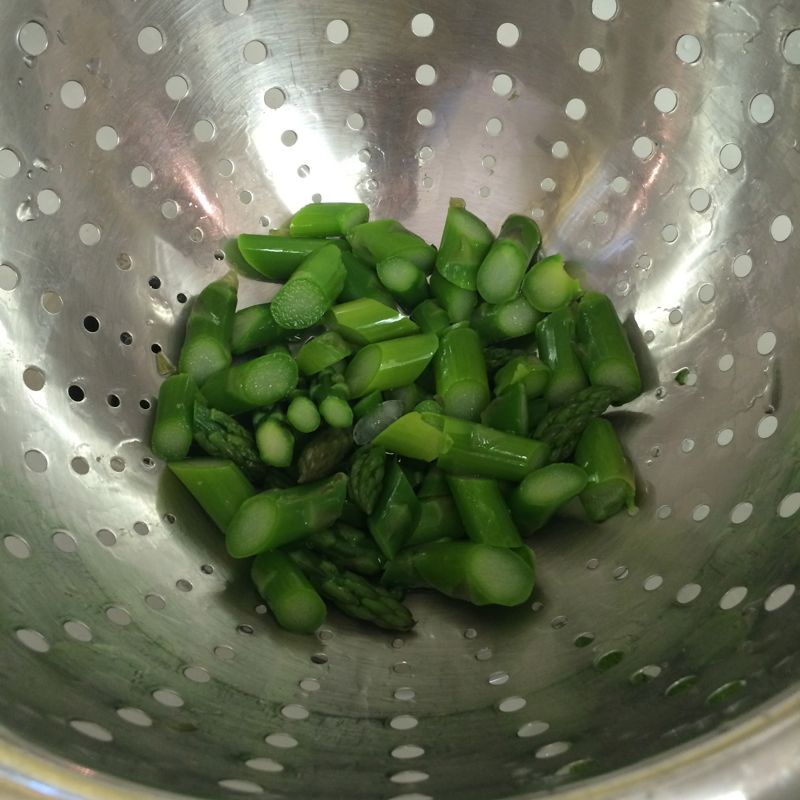
Wash, then prepare asparagus by snapping off the ends.  Hold your fingers at the end of the spear, letting it snap off where it wants to, then cut into 1″ pieces.  Cook in a gently simmering pot of salted water for 1 minute, then plunge into an ice-water bath to stop the cooking.  They should have some chewiness to them, but not crunchiness.  I always test first as some batches can take up to two minutes to be at the right texture.  To do that, grab one piece and put it in the ice water bath, then taste.

After each batch, place cooled asparagus to drain in a strainer or colander, then set aside.

Cooking Tortellini

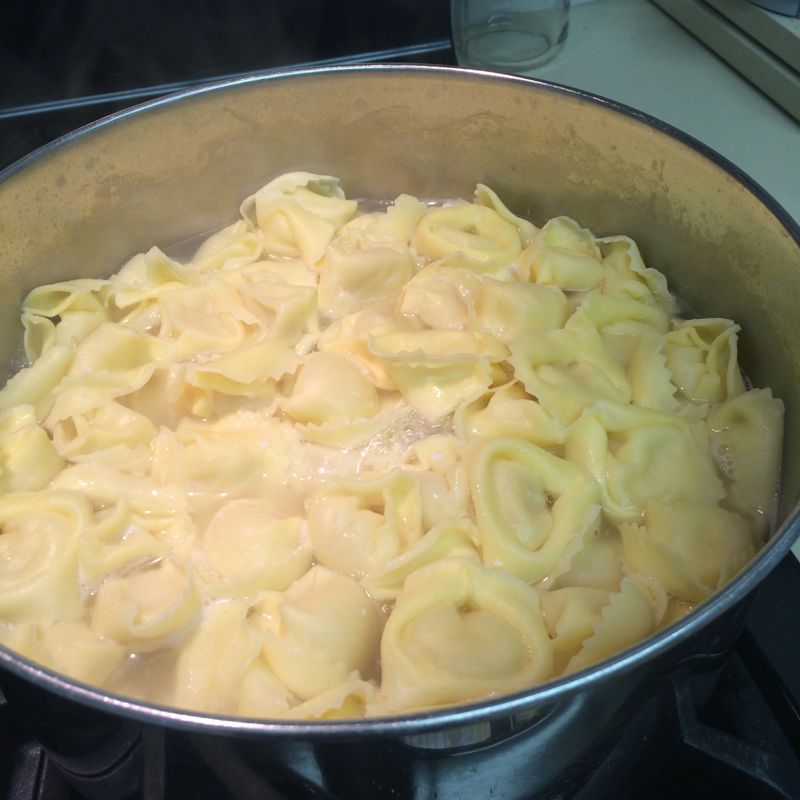
Cook the pasta in lightly salted water on a gentle boil until done, but not DEAD-done.  You don’t want the pasta to fall apart.  Tip into a colander in the sink and rinse with cool water. GENTLY.

In a large bowl, place drained pasta, tomatoes, blanched asparagus, Greek olives.  Splash more olive oil on the mix, then some balsamic and some red wine vinegar (about 2-4 Tablespoons combined for the vinegars) then grind on some fresh pepper and salt, then a light sprinkle of cayenne..  Toss gently, then taste.  Adjust as needed.

Serves a crowd.

Quickled Vegetables

Salad with QuicklesOnce, when we were in Halifax, Nova Scotia, we ate at a restaurant that had “quickles” as part of their salad course (above).  Quickles?  Vegetables that are quickly pickled, came the answer.

And then last summer Smitten Kitchen ran a post about making pickled vegetables, which I tried, and which we loved.  We would mound them up on summer sandwiches, changing the sandwich from ho-hum to wow! this is great!

Pickled Vegetables Quickles2

Here’s my first jar of quickled vegetables.  I have since bought fancier jars at the local Container Store, with nifty snap-on lids.  I love how these look, all layered up with color.

Pickled Vegetable Sandwich Slaw with Mustard Seeds

 Pickling Mixture

1 cup distilled white vinegar
4 tablespoons sugar
2 tablespoons Kosher salt
2 tablespoons yellow mustard seeds
1 cup cold water

Slaw mixture: 4 to 5 cups mixed slivered or julienned* firm, raw vegetables (see above for vegetable suggestions, below for slicing tips)

Heat vinegar, sugar, salt and mustard seeds to a simmer in a small, non-reactive pot over moderate heat, stirring only until sugar and salt dissolve. Stir in water, which should bring the mixture’s temperature down significantly. Let cool to lukewarm.

Divide vegetables between jars. (I used two 3/4 liter jars.) Pour vinegar mixture over vegetables and refrigerate until needed. You’ll find the vegetables to be lightly pickled within an hour, and deliciously pickled within a day. They will get slightly more pickled as they sit, but the change shouldn’t be too dramatic from the 24 hour level.  Keep the vegetables submerged in the brine for a longer shelf life (about 3-4 weeks).

*Smitten Kitchen used a mixture of radishes, red, orange and yellow bell peppers, carrots, fresh sugar snaps, ruffly cabbage and kirby cucumbers, but you can use any firm, crunchy vegetable you think would pickle well here. She noted that the red radishes changed everything to pink, so you may want to try a Japanese Daikon radish (it’s white).

This pickling idea must be the “new” thing, as now Sur La Table has a class in pickling.  Their display looks like more traditional pickling, with a soaking time and a canner/processesing time.  The recipe above is quick, easy and delicious.

mandoline

I did use a mandoline to help cut my vegetables as well as this tool, which looks like a reverse slotted vegetable peeler (shown below). Protect your fingers at all times!

Julienne Peeler

Strawberry Rhubarb Pie

Strawberry Rhubarb Pie with Ice Cream

I seem to be haunting Smitten Kitchen a lot these days, as this one is another of her recipes, updated and improved since she had the Strawberry Rhubarb Pie contest and didn’t come out so well.  Read the whole story on her blog–it’s in vintage Deb language, and I love reading it.  I was in the market, thinking about this pie, and luckily it was online, so I picked up the pound-and-a-half of rhubarb and the strawberries, then went home to make it.

Strawberries and Rhubarb

I’m sure hacking the rhubarb out of your own garden would be the Best Thing, but the local grocery store is the best I can manage, and it seems they only carry rhubarb for a very limited time, so I have to jump right on it, when it shows up.

Crust

You’ll also need your favorite recipe for a two-crust pastry pie. Here’s my favorite: Quick and Easy Pie Crust.   AVOID those nasty pre-made pie crusts in the grocery store.  It’s quick and easy to make your own.

3 1/2 cups (about 1 1/2 pounds, untrimmed) rhubarb, in 1/2-inch thick slices
3 1/2 cups (about 1 pound) strawberries, hulled and sliced if big, halved if tiny
1/2 cup granulated sugar
1/4 cup light brown sugar
1 tablespoon lemon juice
1/4 teaspoon salt
1/4 cup quick-cooking tapioca
2 tablespoons unsalted butter, cut into small pieces
OPTIONAL: 1 large egg yolk beaten to blend with 1 teaspoon water (for glaze — see below)

Preheat oven to 400 degrees. On a well-floured counter, roll half of pie dough into a 12-inch circle and carefully transfer to a 9-inch pie plate. (I like to roll it up over my rolling pin — gently — then lift it over to the pie plate and unroll it.  I then ease it into the plate.)

Strawberries and Rhubarb

Stir together rhubarb, strawberries, sugars, lemon, salt and tapioca in a large bowl.

Filled with Butter Dots

Mound filling inside bottom pie crust and dot with bits of unsalted butter. Trim bottom pie crust even with pie plate edge, then moisten the exposed edge by running your finger, dipped in water, over the dough.

Top Crust

Roll second half of pie dough into an 11-inch circle and cut decorative slits in it. (I used a tiny heart cookie cutter for my vent holes.)  Transfer it to center over the pie filling, as above. Trim top of pie dough so that it hangs over the pie plate by 1/2 to 1.”

Prebaked Pie

Tuck rim of dough underneath the bottom crust and crimp it decoratively.  (I sprinkle a little bit of sugar on top of the pie crust.  But others like to use the egg wash mentioned above.  Do one or the other.)

Place in preheated oven and bake for 20 minutes then reduce temperature to 350 degrees and bake for an additional 25 to 30 minutes, until the pie is golden and the juices bubble visibly.  Mine weren’t visible, so I lifted the pie to the stovetop, and listened — I could hear it bubbling.

Transfer pie to wire rack to cool. When full cool (several hours later) the juices gel.

Strawberry Rhubard Pie

She notes that pie can be made 2-3 days ahead.  But why?  Make it fresh and eat it all up.

IMG_1885

Something we like to do at our house is to place the cut pieces of pie dough on a cookie sheet, sprinkle with a mixture of cinnamon-sugar, then bake at 400 degrees until they are lightly golden, about 6 minutes.  We call them “crusties.”

Apple Galette

10_Finished Apple Galette

This recipe is another from the Smitten Kitchen website, who got it from Alice Waters, who got it from Jacques Pepin.  Smitten Kitchen calls it “Simplest Apple Tart,” but my husband, who lived two years in Belgium and France, calls it a “galette.”  I’m going with his title.

1_Cut Apples

I learned to cut chunks of apple like this from my sister Christine, a stellar cook who taught me a lot of Kitchen Truths.  None of this coring business–just whack if off from around the core. Now on to the recipe.

Dough:
1 cup (125 grams) unbleached all-purpose flour
1/2 teaspoon (2 grams) sugar
1/8 teaspoon salt
6 tablespoons (3/4 stick or 85 grams) butter, just softened, cut in 1/2-inch pieces
3  1/2 tablespoons (50 ml) chilled water

Filling:
2 pounds (910 grams) apples (Golden Delicious or another tart, firm variety), peeled, cored (save peels and cores), and sliced
2 tablespoons (30 grams) unsalted butter, melted
5 tablespoons (65 grams) sugar

Glaze:
1/2 cup (100 grams) sugar

˚˚˚˚˚˚˚˚˚˚˚˚˚˚˚˚˚˚˚˚˚˚˚˚˚˚˚˚

To make the dough:  Mix flour, sugar, and salt in a large bowl; add 2 tablespoons of the butter. Blend in a mixer until dough resembles coarse cornmeal. Add remaining butter; mix until biggest pieces look like large peas.

3_Galette Dough

Add a bit of water, toss, then add a little more water, until dough just holds together. Toss with hands, letting it fall through fingers, until it mostly holds together. If too dry, that is — it won’t be gathered into a ball — add another tablespoon water. Keep tossing until you can roll dough into a ball. Flatten into a 4-inch-thick disk and slip into a ziploc bag and then refrigerate. After at least 30 minutes, remove. Let soften so it’s malleable but still cold. On a lightly floured surface, roll into a 14-inch circle about 1/8 inch thick.

5_Greased small Tart Pan

I held up my pan to make sure it was the right size.

4_Dough Into Pan

Place dough in a lightly greased 9-inch round tart pan.  (You can go free-form, by simply using a parchment-lined baking sheet if you wish; that’s where my husband gets the name “galette”). Heat oven to 400°F.

6_Filling the Tart

And now the filling: Overlap apples on dough in a ring up to the sides if using the tart pan (or 2 inches from edge if going free-form). Continue inward until you reach the center.

7_Filled Tart Pan

I lay another layer in the center, as the first time I made it, the center collapsed.  I sprinkled some granulated sugar lightly over the apples, about 1 Tablespoon.  Then fold any dough hanging over pan back onto itself; crimp edges at 1-inch intervals.

8_ Brush with Butter

Brush melted butter over apples and onto dough edge. Sprinkle the remaining sugar over dough edge and apples.

Smitten Kitchen notes that if you can’t get that much sugar onto the apples, that’s fine, as it makes a lightly tart/sweet dish that way.  (I think by putting one Tablespoon on before folding the dough back, I was able to get all of my sugar on.)  And here’s my true confession: I forgot the butter and sprinkled the sugar all over everything, THEN remembered the butter.  So I just slathered on top of the sugar.  My first one of these I did it correctly, but they both turned out in the end to have the same amount of deliciousness.

10_Finished Apple Galette

Bake in center of 400-degree oven until apples are soft, with browned edges, and crust has caramelized to a dark golden brown (about 45 minutes), making sure to rotate tart every 15 minutes. Yes, do that.2_Apple Peelings to cook

In the meantime, while the galette/tart bakes, make the glaze by putting the reserved peels and cores in a large saucepan along with sugar. Pour in just enough water to cover; simmer for 25 minutes.

9_Appley Juice

She notes to strain syrup through cheesecloth. But I just used a pastry brush from the pan, pushing the peels to the side to get at the syrup.

Remove tart from oven, and set onto cooling rack. Let cool at least 15 minutes. (If you made the free-form galette, slide the parchment paper-with-galette onto the rack.)

Brush glaze over tart, slice, and serve.

Two-cup Measure

And just asking. . . but why don’t they make two-cup measures like this anymore?  It’s a treasure.

Fennel and Blood Orange Salad

Fennel Blood Orange Salad

I found this on Smitten Kitchen, who found it on the New York Times.  When I went looking for my typed file today, I found that it had been published in 2002.  I can’t believe it took me that long to finally try it and put it up here on the blog.  Well, don’t you wait that long.  It’s easy and quick and has miles and miles of flavor.

FENNEL AND BLOOD ORANGE SALAD
By Kurt Gutenbrunner
Published: January 23, 2002
Time: 30 minutes

1/4 cup very coarsely chopped walnuts
1 teaspoon walnut oil
1 medium-large fennel bulb, leaves and stems trimmed off
Salt and freshly ground black pepper
Juice of 1 lemon
2 large blood oranges
1 tablespoon paper-thin shallot slices
10 mint leaves
2 tablespoons extra virgin olive oil
1 teaspoon lime zest

1. Place walnuts in dry skillet and cook over medium heat, stirring, to toast. Toss with walnut oil, and set aside.

2. Slice about 1/2 inch from bottom of fennel and discard. Slice fennel very fine on mandoline, starting with flat bottom side. Put in a bowl. Season with salt and pepper, and add lemon juice.Fennel Blood Orange Salad_1

3. Trim all peel and pith from oranges. Holding peeled fruit over bowl containing fennel, use sharp knife to cut sections from membrane. Let them drop into bowl. Squeeze remaining membrane over bowl to add remainder of juice. Discard membrane.  (This is how it looks before tossing it with everything else.)

4. Add shallots, mint leaves, olive oil and reserved walnuts. Toss gently. Sprinkle on lime zest, and serve perhaps as a first course with smoked salmon or as a side dish with grilled fish..

Yield: 3 servings.


Chocolate-dipped Valentine Cookie

Chocolate-dipped Valentine Cookies

I had planned to make biscotti for the church ladies this week, then remembered that they all sort of nibbled around the corners of that cookie, not wanting to make it sound crunchy, even though outside of their happy mouths no one can hear the crunching, so thought I’d try and find a Valentine Cookie that was quieter.  I found this while searching and proceeded to make them up as directed.  Except I tripled them–Kids, Don’t Try This At Home!  Just make them in a single batch and you and your mixer will be much happier.

I also noticed in the comments that many substituted out the peppermint extract for almond extract.  I think that would be a better choice, as I found the peppermint in full strength to impart an almost bitter taste to the cookie.

I also have an ancient sugar cookie recipe that mixes the ingredients a little differently: cut the butter/cream cheese into the flour, add the eggs/liquids, and go from there.  I am thinking that would have been a lot easier than the mess I made in the kitchen today.

Ingredients:
1 cup butter, softened
1 (3-ounce) package cream cheese, softened
3/4 cup sugar
1 egg
1 teaspoon peppermint extract
3 cups all-purpose flour

Glaze
1 (12-ounce) package (2 cups) real semi-sweet chocolate chips
2 tablespoons shortening

Directions

Combine all cookie ingredients except flour in large bowl. Beat at medium speed, scraping bowl often, until creamy. Add flour; beat at low speed until well mixed. Divide dough in half; wrap each half in plastic food wrap. Refrigerate 2 hours or overnight until chilled.

Heat oven to 375°F. Roll out dough, one-half at a time (keeping remaining dough refrigerated), on lightly floured surface to 1/4-inch thickness. Cut out cookies with 2 1/2-inch heart-shaped cutter. Place 1 inch apart onto ungreased cookie sheets. Bake 7-10 minutes or until edges are very lightly browned. Remove from cookie sheets to wire cooling rack; cool completely.

Melt chocolate and shortening in 1-quart saucepan over low heat, stirring occasionally, 4-6 minutes or until melted. Dip half of each heart into chocolate. Place onto waxed paper-lined cookie sheets; refrigerate until chocolate is firm. Store refrigerated.

Orange-Cranberry Bread

CranberryOrangeBread

This is another of my mother’s great recipes, a moist bread so fresh-tasting with cranberries and orange flavor that you’ll find your day just won’t start quite right during cranberry season if you haven’t had a slice of this for breakfast.  But it’s also good for snacks, and a fairly guilt-free snack at that: with only one egg and two pats of butter, it’s low-fat, but with flavor.

CranberryOrangeBread_5

Although the recipe makes one loaf, why stop there?  All the photos below show me making up two loaves.

CranberryOrangeBread_1

To make two, I first mix up the dry ingredients for one batch in the food processor…

CranberryOrangeBread_2

…then transfer it to a bowl and start the second batch.

CranberryOrangeBread_3

I cut up, then. . .

CranberryOrangeBread_4

…pulse in the butter, then follow the recipe as written.

When you finish with one batch, scrape out the bowl well, then pour in the reserved dry ingredients and start again.  No need to wash up in between.

Cranberry Bread (makes 1 loaf)

Place in mixing bowl of food processor:
2 cups flour
1 cup sugar
1 scant tsp. salt
1/2 tsp. soda
1 and 1/2 tsp. baking powder
1 Tbls. zested orange peel, from 1 large orange

Mix briefly, then add:
2 Tbls. real butter.

CranberryOrangeBread_9

Pulse a few times to chop up butter, then add:
1 beaten egg, mixed with 3/4 cup orange juice.

CranberryOrangeBread_11

Mix just to moisten.  Add:
1 and 1/2 cups fresh cranberries
3/4 cup chopped walnuts.

Pulse 2 or 3 times, stirring in between pulses with spatula, if necessary.

CranberryOrangeBread_12

Spoon into greased, floured loaf pan and bake at 350°F for 60 minutes.  Cool 15 minutes in pan before removing.  Then it should pop right out.  Slice, wrap up for the freezer, or to share with a friend, and enjoy!

CranberryOrangeBread_7

I used freshly squeezed orange juice. 

CranberryOrangeBread_6

In front are the reject berries: soft, underripe, or nearly goners.

Mom’s Mint Surprise Cookies

IMG_1882

I don’t know where my mother got this recipe, or if she invented it herself, but it’s a cookie I always associate with her and with holiday baking. When I baked up a batch and brought them as a gift to each child at her 75th birthday party, all of us children nodding a knowing smile.

As a child I loved them warm, right out of the oven, or set in the sun on cooler day to warm the mint chocolate surprise waiting inside the spiced cookie.  I liked nibbling the edges of the cookie, freeing me to separate the two halves like those sandwich cookies, and lick off the chocolatey goodness before finishing up the cookie.  However you choose to eat them, they are a winner.

IMG_1871

You’ll need these: Trader Joe’s UFO’s Mint Chocolate Wafers.  Better get two bags because the wafers seem to disappear quickly.

UPDATE: I went in to Trader Joe’s yesterday (December 2013), and they no longer make, nor carry these.  I’m leaving this post up anyway, as it is a good childhood recipe, and maybe someone, somewhere, will make these again!

UPDATE, APRIL 2014: I found some Dark Chocolate Mint Wafers at Kitchen Krafts.  I’ll try them out and see if they work okay.

Barbara Sessions’ Mint Surprise Cookies

2/3 cup shortening
2/3 cup butter
1 cup brown sugar
1 cup white sugar
1/4 cup honey
2 eggs
1/2 cup whole wheat flour
3  1/2 to 4 cups white flour
2 tsp. each: salt, soda, cinnamon, cloves, ginger
12 oz. bag Trader Joe’s UFO’s Mint Chocolate Wafers

Cream shortening, butter, sugars and honey.  Add eggs, beating well after addition.  Mix together whole wheat flour, 1/2 cup white flour and spices.  Blend and add to creamy mixture.  Add the rest of the flour, depening on the size of eggs you used. Chill.

IMG_1872

Wrap one Tablspoon dough around one chocolate mint wafer.

IMG_1876

Bake 375 degrees F for 10-12 minutes.  Let cool on rack, if you can stand to wait.  They freeze well.

IMG_1883

Sugar Cookies

Sugar Cookies

This recipe is for plain old sugar cookies.  The kind that you roll out and cut with shapes, while your granddaughters (and you) try to sneak the dough.  I first made this recipe about 40 years ago while in high school, when we had to bake giant football-shaped cookies for the football players, a fund-raiser hosted by Girls for Gunn.  I was in leadership that year, so took over my mother’s kitchen making 8″ cookie footballs, decorating them with icing, cutting cardboard to fit and stretching plastic wrap over them to deliver on the morning of Homecoming. I have made it multiples of times since, first with my own children and now with my grandchildren.

You can make it ahead and store it in the refridgerator; it may need a few minutes to warm up a bit before you can roll and shape them.  These cookies are good with a shake of sugar over them just before putting them into the oven, or, if you leave them plain, decorated with frosting and sparkles/candycorn/M&Ms, or what have you.  These granddaughters were fascinated by the physics of placing candy corn on the uncooked cookies, then watching the corn melt into strange and unusual formations while in the oven.

Elizabeth Eastmond’s Sugar Cookies           

3 cups sifted (or stirred) flour
1 cup sugar
1 and 1/2 teaspoons baking powder
1/2 teaspoon salt
1 cup soft butter (don’t use margarine)
1 egg, slightly beaten
3 Tablespoons cream
1 teaspoon vanilla extract

400° F oven  Yield: approximately 72 cookies

Sift flour, sugar baking powder, salt into mixing bowl.  Using electric mixer (or pastry blender) cut in butter until particles are fine.  Add egg, cream and vanilla extract.  Blend thoroughly.  Gather dough into ball.  Chill, if desired, for easier handling.

Roll out on floured surface 1/2 at a time to a thickness of 1/8 to 1/4 inch.  (The thinner the cookie, the crispier.  The thicker the cookies, the softer they will be.)  Cut into desired shapes; place on ungreased cookie sheet. {If you don’t plan to frost them, sprinkle them with granulated sugar before baking.} Bake 400°F for 5-8 minutes or until golden.

Roasted Carrot Salad

Rstd Carrot Salad

Dave and I have gone twice to Sycamore Kitchen in Los Angeles for lunch, and had two different kinds of salads, with a sandwich.  Everything’s been top-notch.  I wanted to try and replicate the Roast Carrot Salad we had, as it was so unusual with its carrots peeking out from a frothy mixture of greens and toasted pecans.  I could tell the carrots had some sort of marinade on them, so started hunting on the internet for something comparable.  To my surprise, Sycamore Kitchen had posted their recipe on a Meatless Mondays column, written for the LAWeekly blog.

It has a really mellow flavor, this combination of avocado and roasted carrots, and I was happy to recreate it from their very own recipe, which is below.

Roasted Carrot and Avocado Salad with Pecans

From: Karen Hatfield
Serves: 4-6 people

2 ounces ginger root (I used a lobe about the size of my entire thumb)
1 ounce peeled garlic cloves (I used about 3-4 large cloves)
¾ cup soy sauce
½ cup rice wine vinegar
¼ cup lemon juice
2 tablespoons dark brown sugar
1 teaspoon chile flakes
24 young carrots with tops (about 1-inch in diameter, about 8-inch in length)
¼ cup vegetable oil
2 Hass avocados
4 cups arugula
2 cups tatsoi (didn’t have this, so substituted some baby spinach leaves)
2 heads red Belgian endive
12 large basil leaves (Opal basil recommended)
24 mint leaves
Lemon juice and olive oil to taste
Salt and pepper
1 cup toasted pecan pieces

1. Cut the ginger into 1-inch pieces. Using the back of a sturdy saucepot crush ginger and garlic and place in a large mixing bowl. Add soy sauce, rice wine vinegar, lemon juice, dark brown sugar, and chile flakes in a bowl; whisk until the sugar has dissolved. Reserve at room temperature for up to 4 hours. This will be the marinade for the roasted carrots.

2. Preheat oven to 425°F. Peel carrots and trim the tops to leave only one inch of green. Wash the area where the top meets the carrot as this is where dirt is the trickiest to remove. Dry well and spread carrots on a sheet tray (or two if needed) so that they are in a single layer, not touching.

3. Drizzle vegetable oil over and lightly season with salt (not too aggressive, the soy sauce with contribute more salt later). Roast the carrots in the oven until tender, turning only when the bottom side takes on a deep caramelization. The time will depend on the oven, but it usually takes between 12 to 25 minutes.

4. When the carrots are cooked, transfer them to a roasting pan large enough to snuggly fit all the carrots in a single layer. Pour marinade over and allow the carrots to stand in a warm place (like on top of the oven) for at least 15 minutes and up to 1 hour.

5. Meanwhile, peel, seed and slice avocados to about ¼-inch thick and reserve. Trim the red endive and separate into leaves. Place endive leaves in a bowl with the arugula and tatsoi. Tear the basil and mint leaves into large pieces and add to the lettuces. Season all with a little lemon juice, olive oil, salt and pepper and toss gently

6. Divide the carrots evenly among serving plates keeping them together and parallel. By now, the marinade should have coated the carrots; but if desired, spoon a little extra over the carrots, being careful not to include the crushed ginger or garlic pieces.

7. Place avocado slices on top of the carrots. Carefully arrange the salad in a perpendicular row over the carrots so that the tops and bottoms of the carrots are still showing. Sprinkle the toasted pecans over the whole salad and drizzle a little bit of olive oil over the top to finish. Serve immediately.

The biggest time-consuming part was the prep of the marinade, in terms of my labor.  The rest was merely waiting for the carrots to roast (I had to turn the oven up to 450 for the last few minutes to get them to carmelize properly).  You could do the carrots ahead of time, but after their resting time in the marinade, I would drain them if you are going to store them in the fridge overnight.  Trust me, the taste is still very strong, even without the soaking in the marinade.  We had more carrots than needed for our salads (I halved the recipe) and I enjoyed them as a snack, right from the fridge the next day.

The photo above is the one I took on the day we ate there.  Here’s the photo they submitted with their recipe:

roasted-carrot-salad