Gluten-free Tahini Chocolate Chip Cookie

It is the 14th of July, hotter than blazes, and over in France they are celebrating their national holiday, Bastille Day.  But here in the U.S. of A. I’m all about making a giant cookie that is really more like a cake, but in modern fashion, it is “everything-free.”  That means is is dairy-free, gluten-free, but not chocolate-free or taste-free.  Enjoy.

Ingredients

1/4 cup olive oil
1/3 cup maple syrup
1/4 cup tahini
1 large egg
1 teaspoon pure vanilla extract
1 cup gluten-free all-purpose flour blend (I used Bob’s Red Mill 1 for 1 blend)
1/4 teaspoon sea salt
1/4 teaspoon baking soda
2 handfuls dark chocolate chips or chunks (about 3/4 to 7/8 cup)
1/2 cup chopped walnuts (optional)

Instructions

NOTE: I didn’t have an 8-inch oven-proof skillet, so used an aluminum cake pan instead; it was fine.

Using a pastry brush, lightly grease an 8-inch oven-proof skillet with olive oil, brushing the oil around the sides of the pan as well. Set the pan aside.

In a medium bowl whisk together olive oil, maple syrup, tahini, the egg, and vanilla extract.  In a separate small bowl whisk together flour, salt, and baking soda.  Add the dry ingredients all at once to the wet ingredients and stir to combine completely.

Stir in the chocolate chips and nuts and place the mixture in the refrigerator to chill for 30 minutes.

Place a rack in the upper third of the oven and preheat oven to 350 degrees F.  When you’re ready to bake the cookie, spread the dough in an even layer across the prepared pan and bake.

Although the original recipe says to bake for 16 to 18 minutes, and until just baked through but slightly underbaked — my cookie-cake took about 25 minutes to get to that the-top-is-still-shiny, slightly underbaked, gooey status.  It could have been my use of the aluminum pan, or maybe not.

Remove from oven and allow to cool for about 10 minutes before inhaling.

Bastille Day Flyover

This is modified from Joy Wilson’s recipe of  Gluten Free Tahini Dark Chocolate Skillet Cookie, from her Joy The Baker website.

Crispy Rice with Shrimp, Bacon and Corn

When I posted this to Instagram, with an invitation to come to dinner, I had quite a few people accept my invitation; some even wanted the recipe.  It came from the New York Times, and was written by Genevieve Ko; however, I have modified it slightly as I’m making it for two.  Modifications are in the recipe below.  Serves 4 amply, especially if served with fresh ciabatta bread (or take-n-bake, whatever works for you).

INGREDIENTS

1/2  pound peeled and deveined shrimp, patted very dry
Kosher salt and ground black pepper
4-5  strips bacon
2  ears uncooked corn
6  scallions
pinch of red pepper flakes
1  pint grape tomatoes, cut in half
2-3  cups cooked rice — I used a mixture of brown rice and white rice

PREPARATION:

Prepare the shrimp by rinsing in cool water, and removing any shells.  Lay out on paper towels to dry; blot with another paper towel.  Grind salt and pepper over one side of the shrimp.  Set it aside for now.

Cut tomatoes in half; set aside.  Trim off ends of scallions (green onions), then slicely thinly on an angle, using nearly all of the green tops.  Reserve a healthy handful of green tops for garnish, and set the sliced scallions aside.  Slice the kernels off the cobs of corn; reserve.

Lay bacon strips out in heavy skillet over med-high heat, and cook until nearly crispy, turning as needed.  Remove strips to a plate covered with paper towels to cool.  Layer more paper towels on top.

Sprinkle a pinch of red pepper flakes in the hot bacon grease, then add the shrimp, stirring for one to two minutes per side, or until just cooked.  Using a slotted spoon, remove from grease and lay atop the paper towels that are on top of the bacon.

Keeping the heat on medium-high, add the corn, most of the scallions, and a pinch of salt to the skillet. Cook, stirring, until the scallions just wilt, about 1 minute.

Add the rice and stir until well-mixed and heated through, about 3 minutes. Press the rice evenly across the bottom and up the sides of the pan. Let cook, without stirring, as the rice and corn begin to crackle, until you smell a toasty scent and the rice browns, about 5 minutes. You can lift up a section of rice to peek and see if a golden brown crust has developed.

Layer on the bed of rice/corn, in this order:
•  halved tomatoes
•  cooked shrimp
•  crumbled bacon
•  handful of green scallion tops for garnish

With heat off, cover with a lid for about 2-3 minutes, letting the steam from the rice/corn soften the tomatoes.  Remove the lid to serve.

Note: While I realize that putting the lid on for too long might soften your “crust,” in our case, it did not.  We could still taste the crunch.  We stored the leftovers in the refrigerator and had them four days later; it was still amazing.

Low Sugar Strawberry Jam

Laurel brought me a jar of her Low Sugar Strawberry Jam, which prompted me to ask for the recipe, which then entailed a drive out to the neighboring town to get the very best strawberries, then a trip to the grocery store for the special Low Sugar Pectin.
It was worth it.

Low Sugar Strawberry Jam

Wash jars in hot soapy water, and turn upside down onto a rimmed cookie sheet.  Place in warm oven.  Place NEW lids and rings in hot water while you prepare the jam.

Prepare:
6 cups of strawberries – washed, hulled, and smashed
1 cup apple juice
3 Tbls  Ball Real Fruit Low or No Sugar Pectin (Don’t use regular pectin. Low or No Sugar Pectin really is necessary.)
2 cups sugar

Place prepared berries, apple juice, pectin, and sugar in a large pot and stir while you bring mixture to a rolling boil. Boil for 4 minutes, stirring constantly.  Use an immersion blender to thoroughly blend the strawberries.

Pour hot jam into jars, leaving about ½  inch of space at the top. Wipe rim clean. Place lid on rim and tighten with ring. Set out on counter until completely cool. You should hear the jars seal, but if you have any doubt, refrigerate or freeze the jars.

Note: It has a different consistency than regular jam, but the slightly-less sweet spread is delicious.

Italian Wedding Soup with Turkey Meatballs

Another surgery, another few weeks of recovery, but that doesn’t stop the longing for soup on a rainy, cold day.  This recipe, from the New York Times, fit the bill.  My husband helped in chopping and mixing and we worked together to put this together.  I like not only the delicious lemony flavor, but that it can be made very quickly.  One commenter wrote: “wedding soup is not so named because it is served at Italian weddings, but because the flavors of stock and bitter greens ‘marry’ well to produce a harmony of flavors: a Minestra Maritata.”  Sounds great to me.

I’ve made some minor changes, reflected below in the recipe.

Italian Wedding Soup With Turkey Meatballs, by Sarah Copeland

Ingredients
8 cups chicken broth
2 tablespoons olive oil, plus additional for greasing and serving
1 pound lean ground turkey
½ cup panko bread crumbs
⅓ packed cup fresh parsley leaves, finely chopped
1 egg, lightly beaten
3 to 4 garlic cloves, minced
1 teaspoon kosher salt
½ teaspoon black pepper
½ cup freshly grated Parmesan cheese, plus more for serving
¾ cup orzo, ditalini, acini di pepe or another small soup pasta (see Note, below)
2-3 carrots, peeled and sliced across into small rounds
1 onion, chopped finely, divided
3 packed cups baby spinach or kale, thinly sliced
1 lemon, zested and juiced
¼ cup fresh dill,  roughly chopped (optional)

Preparation
In a large pot, melt 1 Tbls. butter then add 2 Tbls. olive oil.  Saute 1/2 chopped small onion until just turning golden.  Add 2 quarts (8 cups) chicken broth to the pot and bring to a boil.

Meanwhile, add the turkey, panko, parsley, egg, garlic, salt, pepper and 1/2 cup Parmesan to a large bowl as well as 1/2 small onion, minced finely.  Mix with a fork or clean hands until combined. Gently roll the mixture into 12 medium (2-inch) or 20 small (1 1/2-inch)  or 40 walnut-sized (our preference) meatballs and transfer to a baking sheet lined with lightly oiled aluminum foil.

Heat the broiler to high and set an oven rack 3-4 inches from the heat. Broil the meatballs until brown on two sides, turning halfway through, about 5 minutes per side. Watch carefully so they don’t burn.

Add the carrots and the pasta to the boiling broth.  Cook over medium until the pasta is al dente, then lower the heat to a low simmer.  [Note: while this only calls for orzo, we thought more pasta presence would be better, say adding some farfalline, in addition.]

Add the meatballs to the broth and simmer on low until completely warmed through, 3 to 5 minutes, stirring occasionally. Remove from the heat, and add the spinach and lemon zest, stirring well, to wilt. Season with salt and pepper to taste.  Add coarsely chopped dill,  and lemon juice.

before adding cheese

When serving the soup, drizzle each with olive oil, sprinkle with more Parmesan.  Goes well with some crusty bread (heat and serve, or perhaps Mary’s Retreat Bread).

Note: we added double the spinach, but Dave said it looked like an algae bloom (he’s a scientist).  It was a better balanced flavor once we got past the greens and ate the yummy meatballs and lemony soup without excess spinach.  In my recipe, I didn’t double the spinach, but you could add an extra cup, if you want.

Peppermint-Chocolate Layered Dessert

This uses three ingredients.  Now that’s a quick dessert.  However, it does need to spend some time in the freezer.
So, please, begin this the night before your event, in order to let this freeze solid.

Ingredients
One 14 oz. package chocolate sandwich cookies (Oreo type)
1/2 cube (4 ounces) melted butter
One 1-1/2 quart container of peppermint ice cream

Preparation

Prepare the pan by lightly greasing the bottom only of a 9 x 13 inch pan.  Fold a length of parchment paper in half, creasing well.  Use that crease to center the parchment paper, then smooth out, letting the paper overhang the long edges by about 2-3.”  Set aside.

I’m crushing them more!

Put all the cookies into a zipper plastic bag, OR into a bowl OR into your food processor (easiest).  Crush them thoroughly, or if you have a food processor, pulse until the texture of fine gravel, or chunky sand.  The crumbs should be small, with no obvious big chunks of cookie.

Reserve one cup of the this pulverized mixture for the crumble topping, and if it’s not really fine, do some more crushing.  Set aside.

Place the remainder of the crushed cookies into a mixing bowl, and add 1/4 cup melted butter.  (I like the real thing.)  Mix well.

Pour into the prepared pan, and press firmly with the back of a spoon to even out the crushed cookies.  Place in freezer until solid, about 2 hours.

Set out one carton of ice cream on the counter for about 15 minutes, or until the carton yields slightly when squeezed.  Dump (squirt, sort of ) into a mixing bowl fitted with the paddle beater, let sit for about another 10 minutes.  Turn on mixer slowly, then up to medium, while you beat the ice cream into a creamy mixture.  If you don’t have a mixer with a paddle attachment, use a bowl and a sturdy spoon.  You don’t want the mixture to melt; it should be creamy, not runny.  Work fast if you are doing it by hand.

Spoon it out onto the frozen layer of crushed cookie in glops; spread evenly.

Sprinkle with the reserved cookie crumbs, and refreeze.  It will take at least four to six hours for the ice cream to freeze properly.

Why the overhanging parchment paper?  When you are ready to serve, lift it out onto a board, cut with a knife, then replace remainder back into the pan. Store dessert in the freezer, either with the lid to your 9 x 13, or with foil.  (This is shown just before it received its crumb topping.)

Pork Tenderloin wrapped in Prosciutto


Pork:
2 tablespoons minced fresh rosemary
4 teaspoons herbes de Provence
4 teaspoons olive oil
2 pork tenderloins (about 2 pounds)
Kosher salt, freshly ground pepper
16 thin slices prosciutto (Italian bacon; about 4 ounces)

Preparation
Stir rosemary, herbes de Provence, and oil in a small bowl. Rub all over pork; season with salt and pepper. Wrap prosciutto slices around pork and tie at 2″ intervals with kitchen twine to hold together. DO AHEAD: Can be made 1 day ahead. Cover and chill.

To make life easier, I spread out a length of wax paper, cut five piece of twine, and laid them out like railroad tracks.  I laid out the prosciutto in an area that I thought might match the length of the pork loin, plus double the width.  I placed the herbed meat on top of the prosciuttio, then brought the string up and tied it, which wrapped the prosciutto into place.  We flipped them over when we placed them in a lidded container, which we then put into the refrigerator overnight.

Spray a broiler pan with cooking spray (don’t forget the bottom of the pan that catches the drippings), place the pork loin on top.  Bake at 400 degrees for about 30 minutes, or until an instant-read thermometer inserted into the middle of each loin registers 145 F.  Tent and let it rest for 10 minutes.

Transfer tenderloins to a cutting board, slice thinly and serve with plum chutney, or cranberry sauce.

NOTE: If using a charcoal grill, build a medium-hot fire; push coals over to 1 side of grill. If using a gas grill, heat all but 1 burner to high. Grill tenderloins over hot part of grill, turning frequently, until a crisp brown crust forms on all sides, 8-10 minutes. Move tenderloins to cooler part of grill to gently cook through; cover and cook until an instant-read thermometer inserted into the middle of each loin registers 145°F, 15-20 minutes longer.

Cranberry Curd Pie

I first saw this on the New York Times website, then saw it again on the Bon Appetit website, then about a bajillion other bot-driven websites (all looking the same, all “authored” by a single-named woman, who promised hearth and home and happiness while inundating the viewer with ads-ads-ads).  What is it with these robot websites??

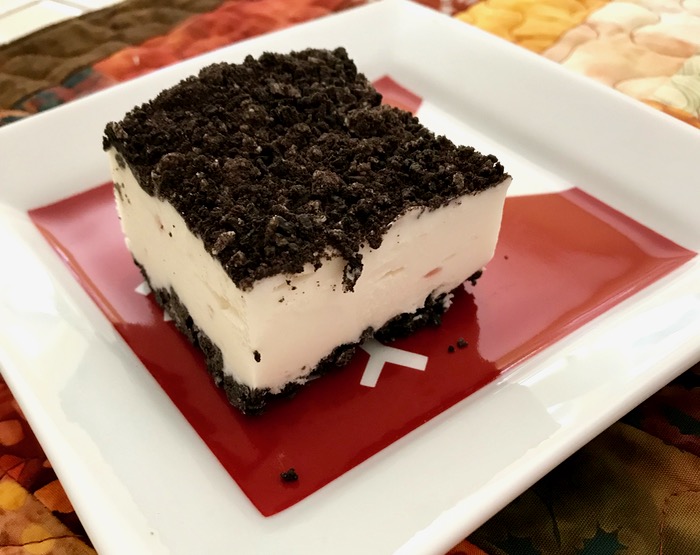
I read about 90% of the comments on the NYTimes recipe site pertaining to this recipe, and have incorporated my changes below.  This pie is gluten-free because I wanted to make it for a woman at my church who can’t eat gluten, and has not had a dessert at a church dinner in a millenia.  This is my holiday gift to her, and to you.  First, the recipe, then the photos (reverse of the usual).
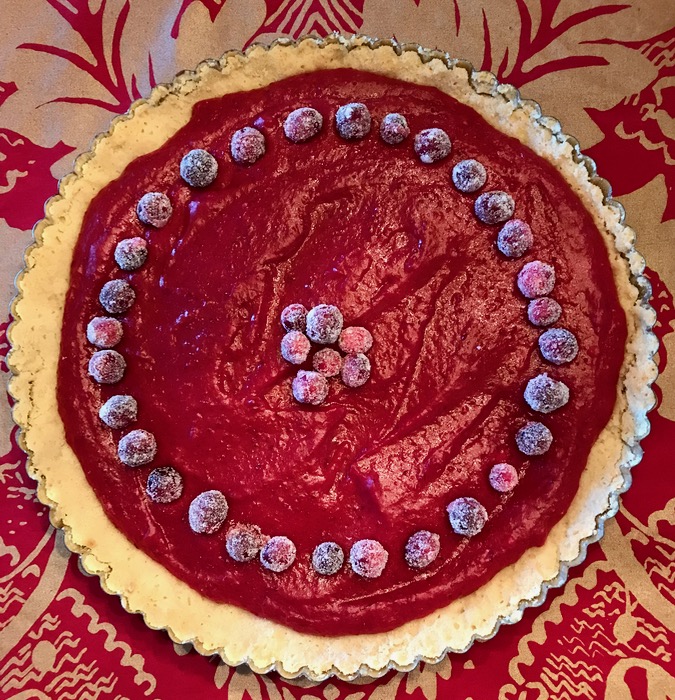
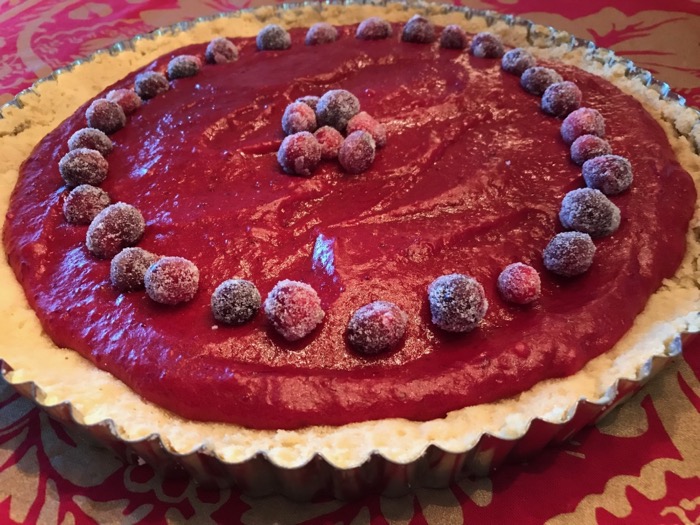
Cranberry Curd Pie

Almond Crust
2 cups almond meal
1/4 teaspoon salt
1/2 cup sugar
Place in medium bowl, stir to mix (or use food processor).

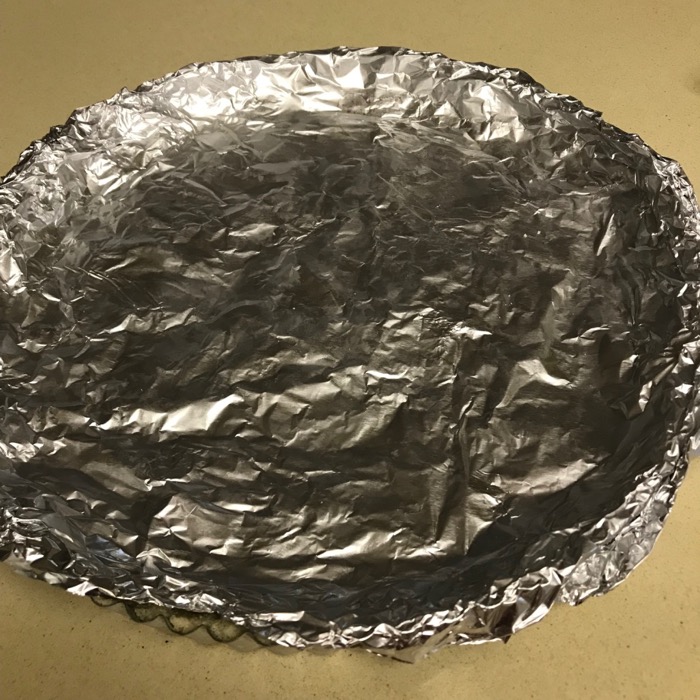
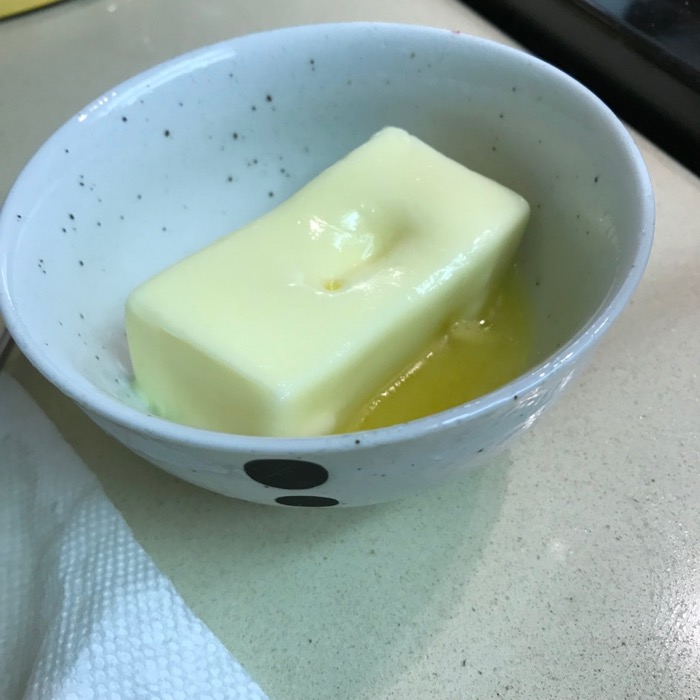
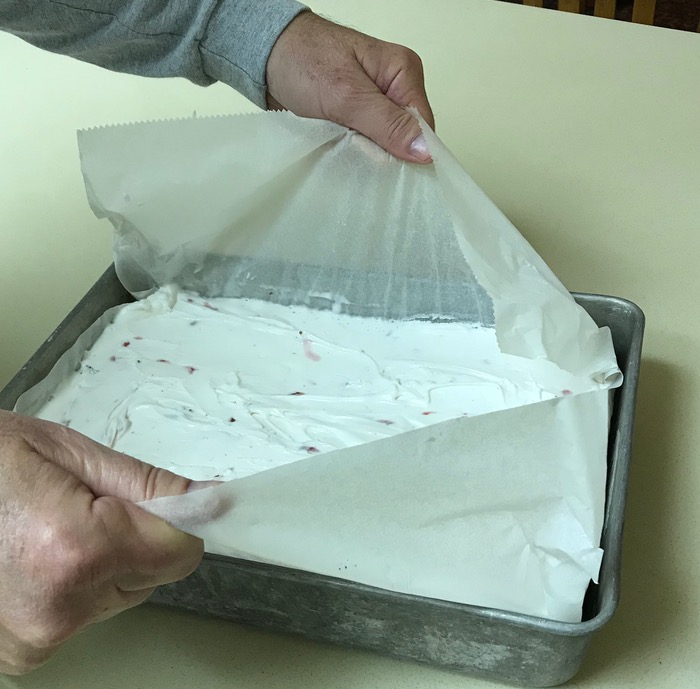
Cut in 6 Tablespoons of softened butter, until crumbs are fine, and you can gather the dough together in your hands.  If too dry, add 1-2 Tablespoons water, a bit at a time.  Press dough evenly into a 10-inch tart pan with removeable bottom; use half the dough for the sides and half for the bottom.  Prick all over with a fork.  Tear off a piece of aluminum foil the size of the tart pan, and butter the dull side.  Press onto your tart butter-side down; freeze for at least 30 minutes.  This can be made a couple of days ahead.  Just make sure the aluminum foil seals the tart well. (photos below)

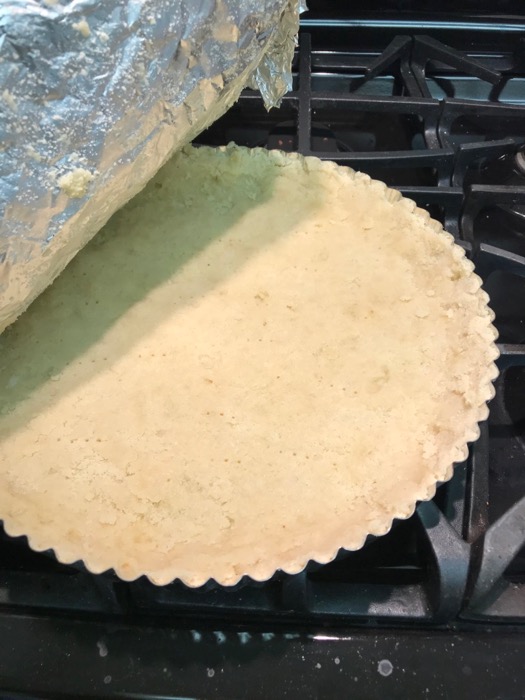
To bake, preheat the oven to 350 degrees.  Place the chilled tart shell with the foil into the oven and bake about 10 minutes. Remove from oven, and carefully take off the foil.  Finish baking for another 5 minutes.  Cool.

Cranberry Curd Filling
12 ounces cranberries, washed and picked over (almost 2 cups)
1 cup sugar
Peel of one orange, removed with a vegetable peeler, in strips (then rip into about 2″ pieces)
Juice of one orange, or 1/2 cup freshly squeezed orange juice
2 eggs plus 2 egg yolks
1-1/2 Teaspoons cornstarch
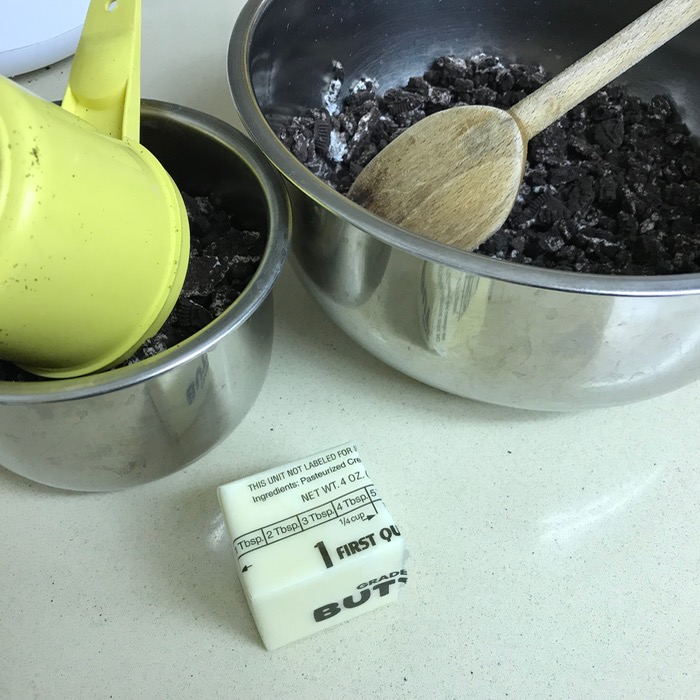
4 ounces (1/2 stick) butter, softened

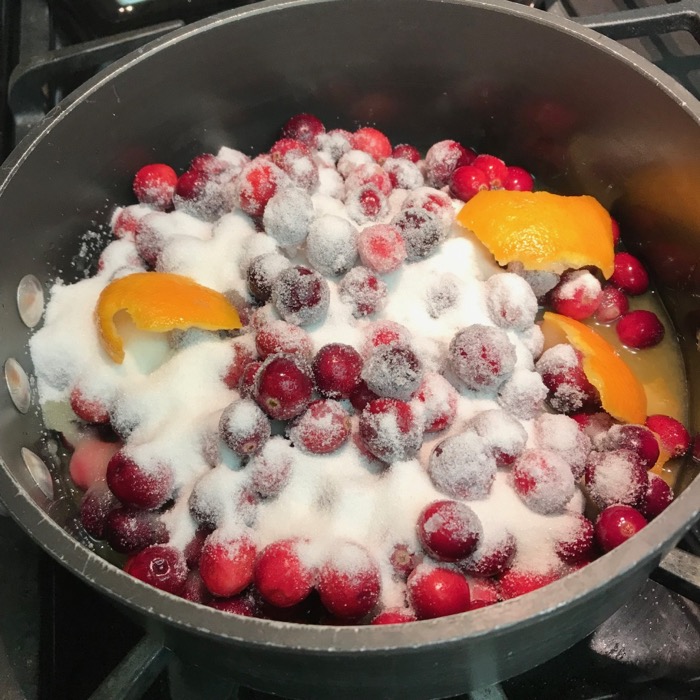
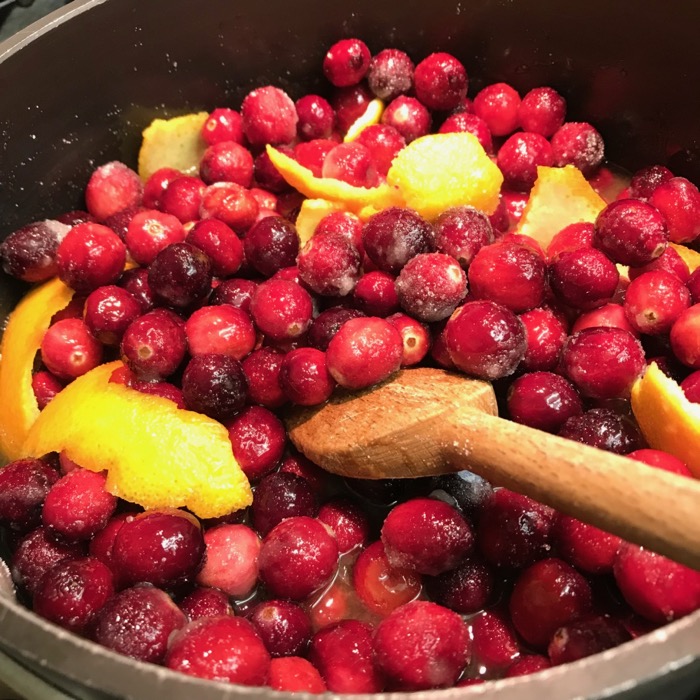
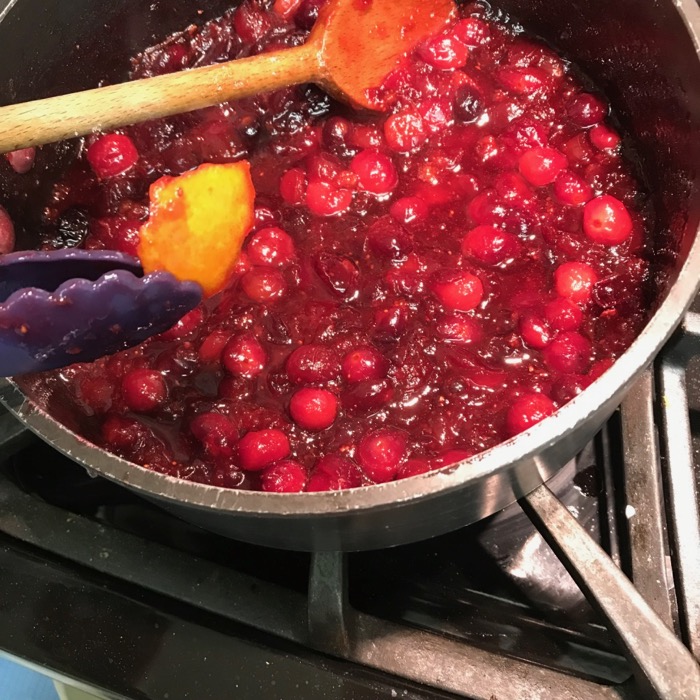
Put cranberries, sugar, orange juice and peel in a saucepan over medium heat.  Simmer until cranberries have popped and softened, and liquid has diminished, about 10 – 15 minutes.  Remove orange peels.  Using an immersion blender, blend the mixture until berries are not noticeable in the pan.

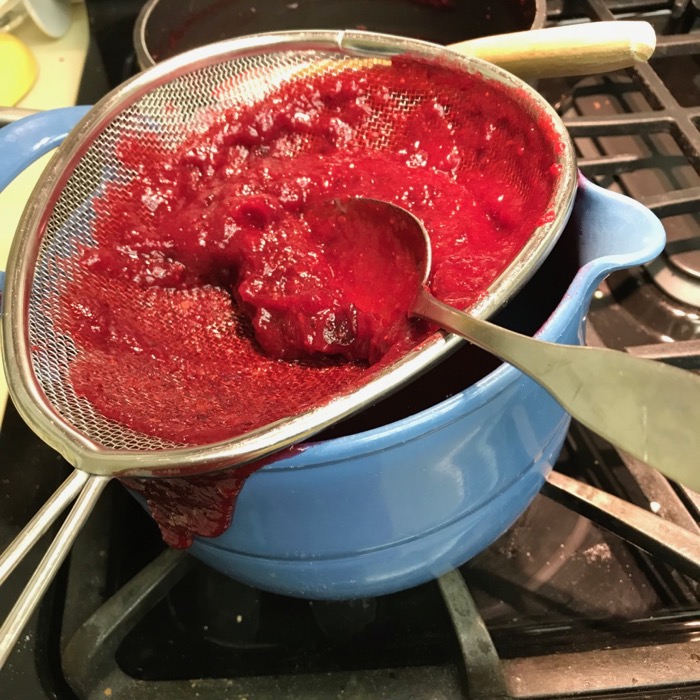
Set a medium mesh sieve over a bowl, and spoon the cranberry mixture into the sieve, pressing it into the bowl. (See note below about what remains in the sieve.)

Wash the pan (or get another).  Break in the two eggs, then add in the two egg yolks.  Stir to break up yolks.  Stir in 1-1/2 teaspoons (1/2 Tablespoon) cornstarch until blended.  You may see some white bumps; ignore.

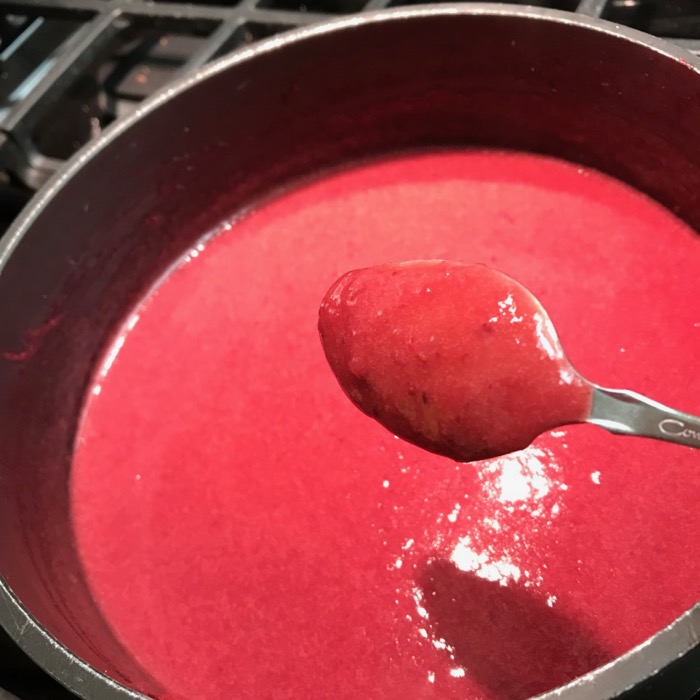
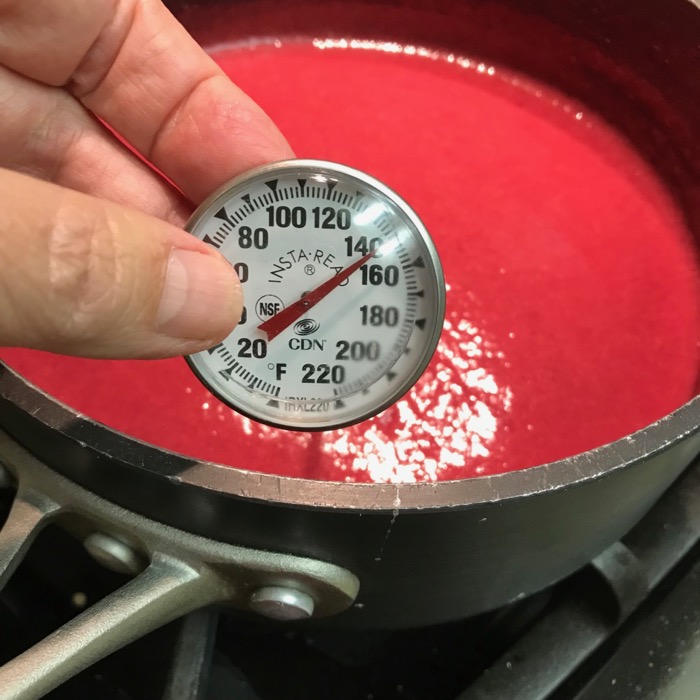
Spoon cranberry puree into the yolk mixture.  Set over low heat, and constantly whisking/stirring, bring mixture to a temperature of between 140 and 160.  The commenters noted that when properly cooked, the curd should coat a spoon.  This took me about 15 minutes.  I did keep it constantly stirring, but I wasn’t beating it.  I didn’t want to incorporate any air into the mixture and disrupt the anticipated color.

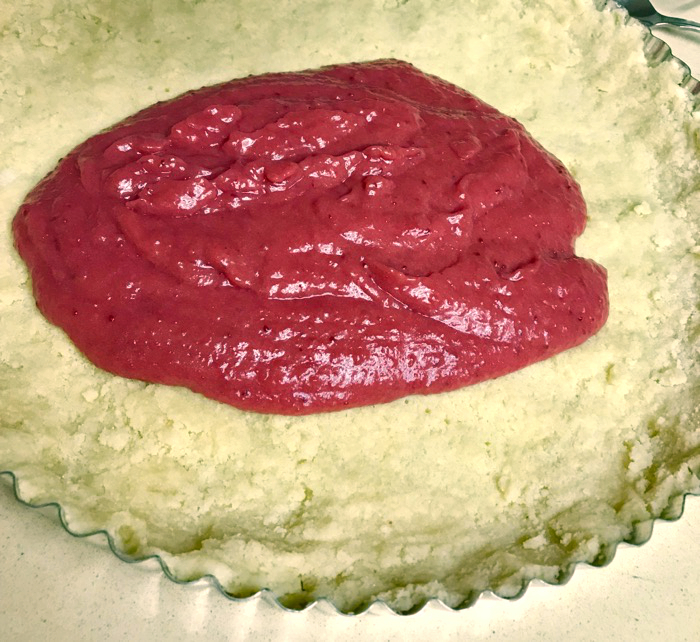
Remove from heat, and stir in the butter a bit at a time, whisking well in between each addition.  Again, don’t incorporate air in your mixing.  Let cool to room temperature (mine was a little warmer), and pour into the prepared pie shell.  Bake at 350 for 10 minutes, in order to set the curd.  Cool on a rack.  Store at room temperature for up to 2 days.

Sugared Cranberries for topping

Boil together 3/4 cup sugar and 1/2 cup water until mixture is at a full boil and looks clear.  If you have time, let the syrup cool.
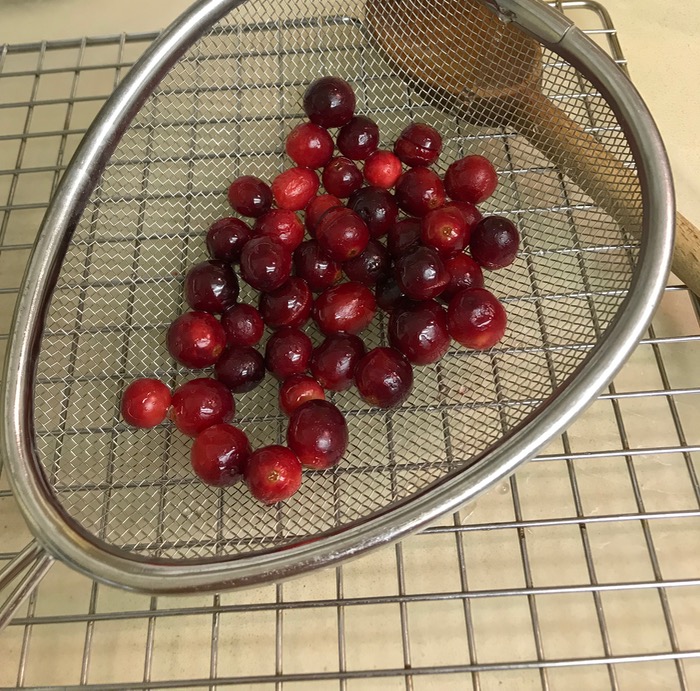
Wash and pick out your best handful of berries (3/4 to 1 cup), and stir into the syrup, making sure they are well coated.  Remove to a fine rack (or into a strainer).

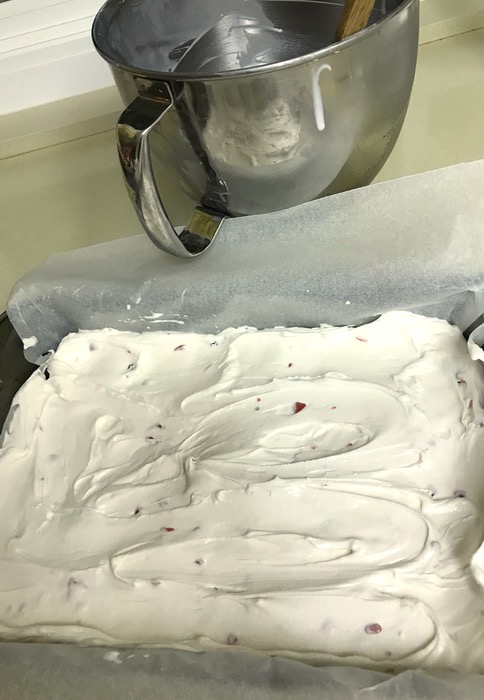
Sprinkle some sugar onto a square of waxed paper, and sprinkle some more over the top.  Then roll the berries in the sugar.  If they are well-drained, you won’t get clumps of sugar, but a nice, even coating.  Let cool and dry, then decorate the top.  I meant to clip some mint sprigs to place at the center berries; you might want to consider this.

Cooks Notes:

After all was said and done, I had about 1/2 cup left of the cranberry mash in my sieve from making the curd.  This went nicely with a slice of Cranberry-Orange Bread that I had in the freezer, as it’s like a jam. Store in the refrigerator.

If using the almond crust, best eaten on the day you make it.
Day One: it was perfection.
Day Two: crust was really soft, but curd was still good.

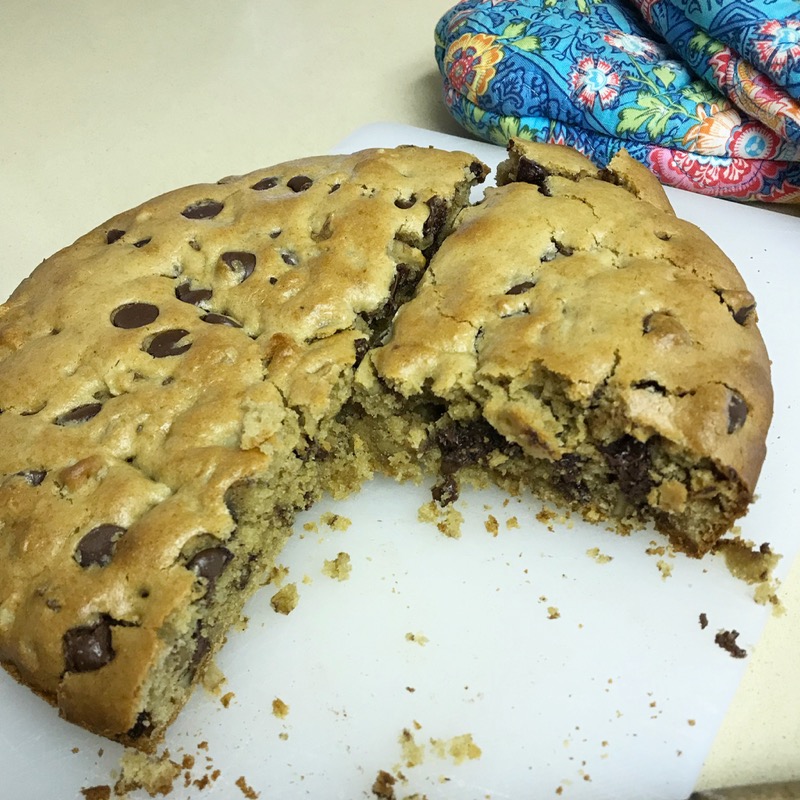
Alternate crust: Sweet Tart Dough (more like a shortbread cookie)

Curd can made be ahead.  Cover curd with plastic wrap (pressing it against the surface of the curd) and refrigerate up to one week.

Now the photos!

Roasted Root Vegetables (for Christmas Dinner)

vegetables before roasting

Roasted Root Vegetables

from the kitchen of Wendy Crockett

12 – 13 cups red potatoes chunks (4 lbs.)
6 cups sliced carrots (2 lbs.)
8 cups chopped onions (4 medium – about 2 lbs.)
2 ½ tsp. salt
1 ½ tsp. ground black pepper
2 tsp. dried thyme
2 tsp. dried oregano leaves
2 tsp. dried marjoram leaves
2/3 cup olive oil
2 Tbsp. melted butter

Cut up the vegetables (and photo, above):

  • Scrub potatoes.  Leave skins on but cut off any bad spots. Slice each potato in half lengthwise. Slice each half lengthwise again and slice once crossways.  (If a potato is unusually large or small, adjust cuts accordingly.) In other words, you’ll end up with 8 chunks per average size potato.
  • Peel carrots.  Trim small end on the diagonal.  Cut each carrot on the diagonal about 1 1/2” long and about ¾” wide. (Do not include the top end.)
  • Peel onions.  Cut each in half lengthwise.  Cut each half lengthwise two or three times so that the cuts are about 1” apart.  Cut these pieces across into about 1” pieces.  Don’t worry.  These will all cook down.

Place all of the vegetables in a large bowl and toss together along with melted butter,  olive oil and seasonings.

Meanwhile, place two large rimmed baking sheets in oven and preheat to 450F.  When oven is ready, remove baking sheets and spread half of vegetable mixture onto each one. (NOTE: If the vegetables are too crowded, they will steam, not roast.  Please give them room.)

Use a pancake turner or wide spatula to turn vegetables over and mix around about every 15 minutes for about an hour until nicely browned.  Switch the top pan to the lower rack and the bottom pan to the lower rack about midway to promote even browning.  Some of the onion pieces may get quite dark.  Don’t worry about.  It adds flavor and an earthy look.

Cover the pans with foil or combine the batches into one container to deliver to the church kitchen by 5:45 p.m..  From there we will combine all of the contributions into roaster ovens to keep warm. Please take your own pans to your car to take home to wash.

Thank you!

Brussels Sprouts with Hazelnuts

1 ½ – 2 pounds brussels sprouts
¼ cup olive oil
¾ teaspoon sea salt
¼ teaspoon (or 10 grinds) black pepper
2 tablespoons maple syrup
½ cup toasted hazelnuts, coarsely chopped

Preparation
Preheat the oven to 375 degrees.
To prepare the brussels sprouts, remove any yellow or brown outer leaves, cut off the stems and cut in half.
In a large bowl, toss the brussels sprouts, olive oil, salt and pepper together. Once all of the brussels sprouts are coated in oil, spread them into a 9-by-13-inch (or larger) baking dish or sheet tray to roast. Note: You may want to line your sheet tray with foil for easy cleanup because the caramelizing process leaves a sticky residue.
After 15 minutes, stir the brussels sprouts with a spatula or large spoon to even out the browning. After 30 minutes, stir in the maple syrup. Continue to roast the brussels sprouts for about 15 more minutes, or until they are fork tender (about 45 minutes total roasting time).  Toss the roasted brussels sprouts with the hazelnuts and devour!

NOTE: If your sprouts are on the smallish side, they may need less time overall.  Cook only until fork tender.

To toast hazelnuts, place in pan over low heat, tossing or stirring frequently so they don’t burn.  They should let off a fragrance when they are toasted, in probably no more than 5 minutes total time.

Carrot Cauliflower Soup with Miso

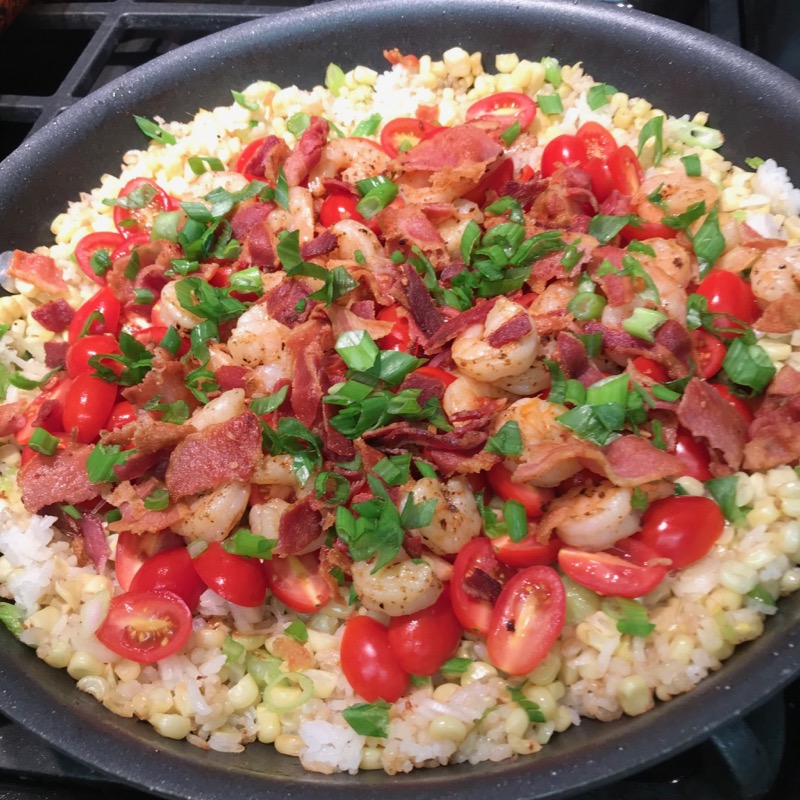
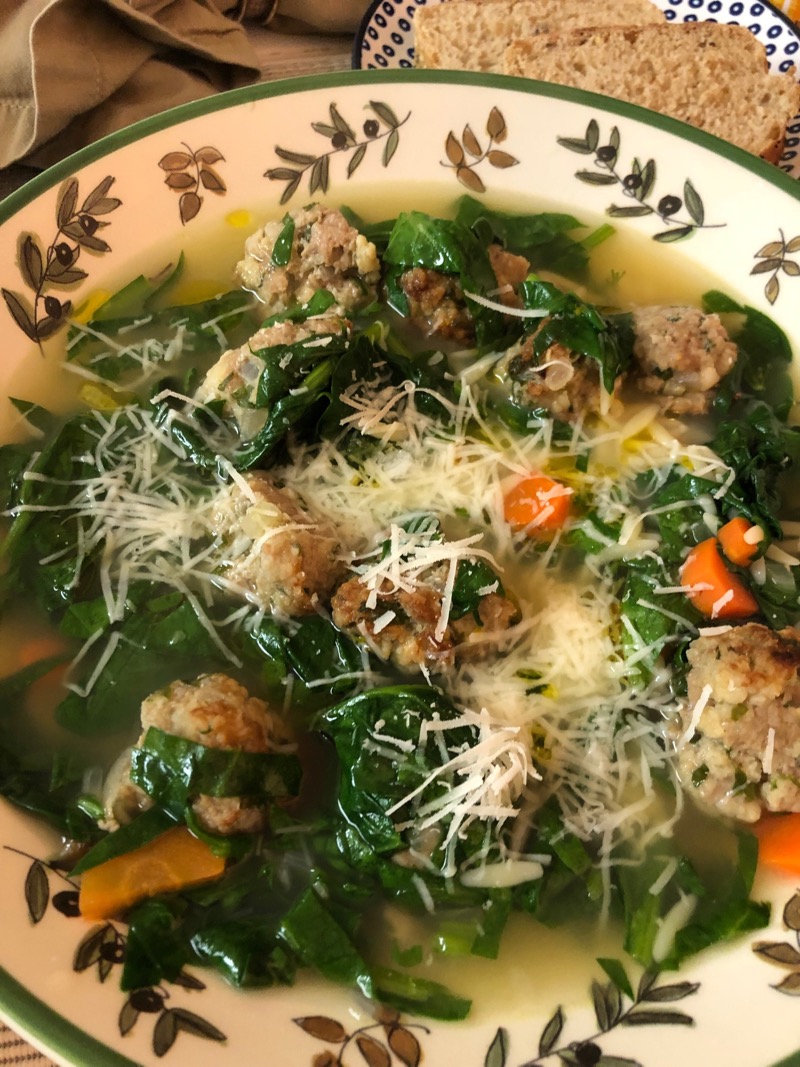
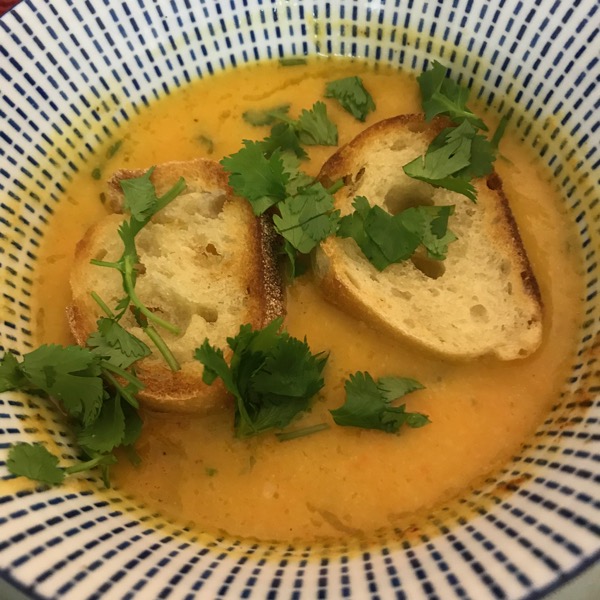
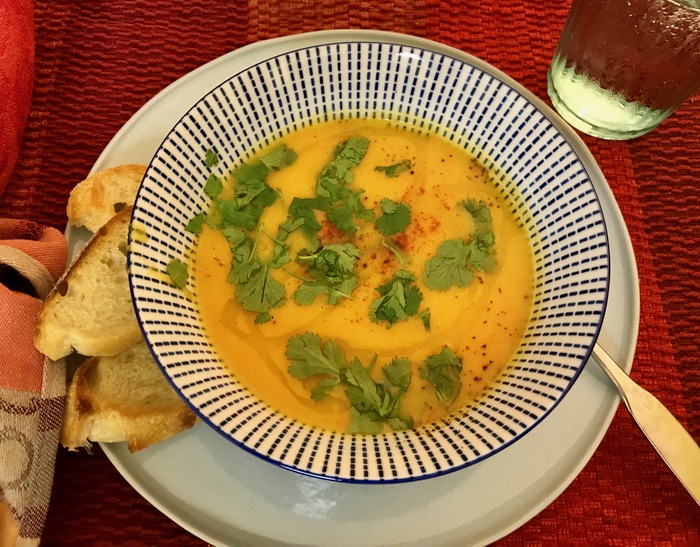
It’s fall, so anything fall-colored seems to make its way to the menu, and that means a new recipe.  While this has been published in several places, I read about it in the New York Times where it goes by the name of Lemony Carrot Cauliflower Soup, and is a recipe by the talented Melissa Clark.  But I didn’t think the amount of lemon in it (added at the end) warranted an inclusion in the title, although it is a necessary ingredient.

One of the more unusual ingredients is white miso, an item I’d never used.  In doing some internet reading, I found there were two main kinds: white miso and red. Apparently white miso has rice as the main ingredient.  It’s kind of a paste, easily scooped out with a spoon.

I bought some at the local grocery store, but it didn’t say whether it was red or white (the green label container).  So I searched online for “Asian food stores” and found a little convenience mart near me (who knew?) and called.  They had it. The website I read said the difference was how much rice it had (circled, above) but both of them seemed to have rice listed as the first ingredient, but I used the slightly lighter one on the left.  It is not a pronounced flavor, but it adds a depth to the soup, giving it a more “rounded” flavor than just carrots and cauliflower.  I will save the low-sodium miso for another use, as apparently they keep forever. There are recipes everywhere, once you start looking.

I have a spice grinder, but after toasting the coriander seeds, I went old-school and put them in a ziploc bag and crushed them with a food mallet.

I read through many of the comments and decided to make it as written, with the exception of using chicken broth as the base (original calls for water).  But the comments were right: it needs a bit of a flavor boost.  While Clark indicated adding cilantro, I would add more of the spices to the soup itself (rather than just a garnish at the end), and perhaps add some rotisserie chicken from the big box store.

We served it with crostini, and ended up throwing them in, to absorb the soup and fall apart into big soggy delicious chunks.  Enjoy!

Ingredients
1 tablespoon coriander seeds
2 tablespoons extra-virgin olive oil, more for serving
1 large white onion, peeled and diced (2 cups)
2 large garlic cloves, finely chopped
5 medium carrots (1 pound), peeled and cut into 1/2-inch pieces (2 cups)
1 ½ teaspoons kosher salt, more as needed
3 tablespoons white miso
1 small (or half of a large) head cauliflower, trimmed and cut into florets
½ teaspoon lemon zest
2 tablespoons lemon juice, more to taste
Smoky chile powder, for serving [note: I didn’t have this, so used smoked paprika and chili powder as a substitute]
Coarse sea salt, for serving
Cilantro leaves, for serving

Preparation
Toast coriander seeds until fragrant and dark golden-brown, 2 to 3 minutes, swirly often to keep them from burning. Coarsely crush.

In a large, heavy pot, add the oil and heat until warm. Stir in chopped onion; cook, stirring occasionally, until soft and lightly colored, 7 to 10 minutes. Stir in garlic and cook 1 minute.

Add carrots, crushed coriander, salt and 6 cups chicken broth to the pot. Stir in the miso until it dissolves (I was hesitant at first and only used half, but use the full amount). Bring mixture to a simmer and cook, uncovered, 5 minutes. Stir in cauliflower and cook, covered, over medium-low heat until the vegetables are very tender, about 10 minutes.

Remove the soup from the heat. Using an immersion blender, purée the soup until smooth. (Alternatively, you can let soup cool slightly then purée it in batches in a food processor or blender.) If necessary, return the puréed soup to the heat to warm through.

Stir in the lemon zest and juice just before serving. Drizzle with oil and sprinkle with chile, sea salt and cilantro leaves.

[Note: I added a wave of the paprika and a half-wave of chili powder to the soup, as well as the salt before serving.  We also garnished with the spices and the olive oil.  My favorite was using my lime-flavored olive oil, purchased from a local shop near me.]