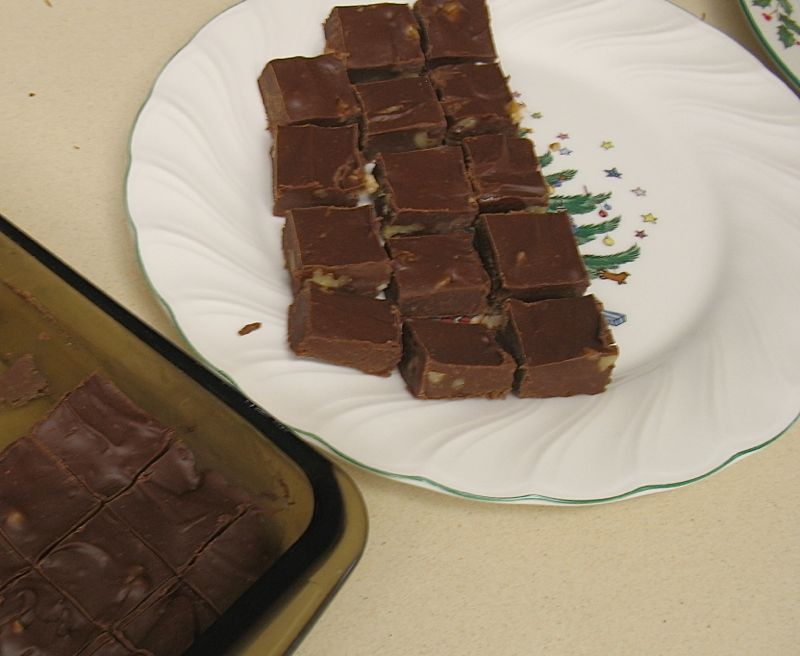
Creamy Chocolate Fudge

One year I was in charge of the Universe.  Just kidding.  But I was in charge of a Christmas event at church which included a video broadcast and Those In Charge wanted a big turnout.  So I hit on the idea of singing Christmas Carols before, then having a giant cookie feast afterward.  I think desserts is always a category where church-goers excel.

The tables were covered with all different plates and kinds of cookies, and then this one tin of fudge. I slipped a piece into my mouth.  Mmmm. It wasn’t the least bit sugary or dry.  It was creamy with the right amount of crunch from walnuts.  Manna, I thought.  I watched as the hoards of children hit the first table, piling up cookies in their napkins in spite of my best-practiced Withering Glance, the swarm getting closer and closer to this Bit of Heavenly fudge.  Just as the leading edge hit my section, I snatched up the tin.  “No,” I said.  “This is just for the adults.”  I then walked around offering a piece at a time to the grown-ups, trying to locate the owner and maker of this perfection.  I found her, and she sent me the recipe.  So, Monique–if you’re reading this blog–many thanks!

Creamy Chocolate Fudge

1 jar (7 ounces) of marshmallow creme
1  1/2 cups sugar
2/3 cup undiluted evaporated milk
1/4 cup butter or margarine
1/4 teaspoon salt
1 package (11 1/2 ounce) milk chocolate chips (~2 cups)
1 package (6 oz.) semi-sweet chocolate chips (~1 cup)
(Note: I have reversed the proportions of the chips on occasions for a slightly less-sweet fudge.  It works fine.)
1 cup chopped walnuts
1 teaspoon vanilla extract

In a large saucepan over medium heat, combine marshmallow creme, sugar, evaporated milk, butter and salt; bring to a full rolling boil, stirring constantly.  BOIL FOR 45 SECONDS ONLY!!  Otherwise it will be too grainy.  Remove from heat and stir in chips until melted, stirring vigorously.  Add vanilla and nuts and pour into buttered 9 x 13″ pan.  Cool 2 hours or until firm.

Christmas Caramels

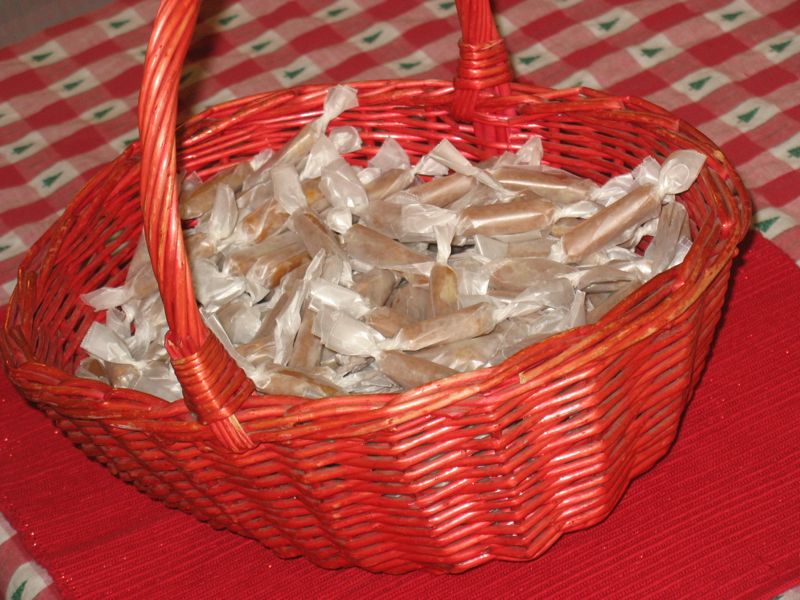
When I was nineteen several young women in my acquaintance were married and at each of their weddings was  large basket of wrapped, homemade caramels.  More than a few found their way into my purse for the drive home.  A older woman in our church, Mrs. Woodruff, made them.  She was our orthodontist’s mother, interestingly.

Right after Thanksgiving one year I called her up and asked her if she would teach me to make them.  I drove up to her house, bringing the butter, whipping cream and other ingredients with me.  The first thing she did was open up the cream and dump it all over the sugar. “Whoops,” she said.  She shook her head.  “That’s not right.”  She put the pan in her pantry and said, “That’ll be for something else later on,” and we started again.  I think of that now as I’m approaching her age.  Just say “Whoops,” when a kitchen mistake is made, and move on.

The trickiest thing about these caramels is finding the correct pan.  You need those cheapy pans from your local store–nothing fancy.  They’re a little smaller than the typical baker’s half-sheet that I normally use.  Known as a jelly-roll pan, it’s nice and shiny, and when it gets old, rusty and too full of cutting lines, toss it and start again.

Here’s the recipe, step by step.  The version without pictures is at the bottom of this post.

Caramels

2 cups granulated sugar
1/2 pint whipping cream
1/2 cup evaporated milk (1 small –5 oz.–can)
1 small bottle clear Karo corn syrup (2 cups)
1 cube of real butter
1 1/2 cups chopped walnuts
1 buttered jelly roll pan
1/2 teaspoon vanilla extract
 

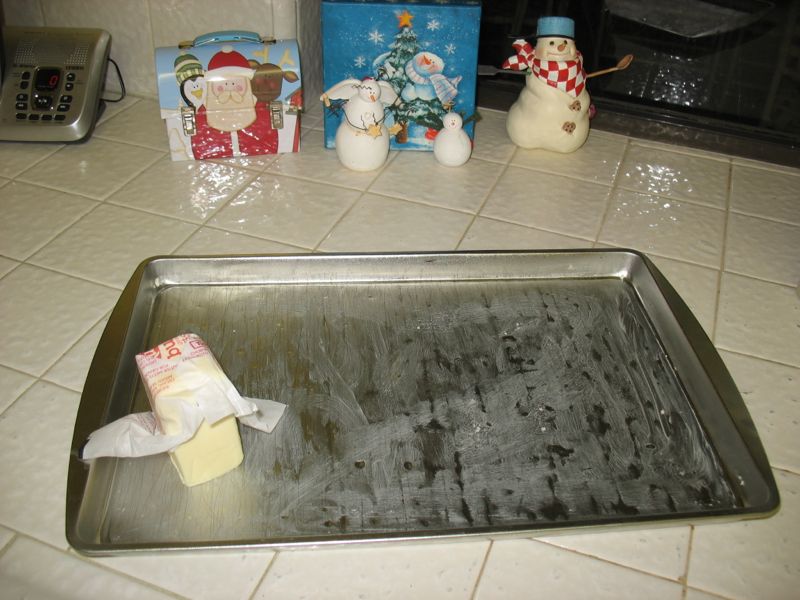
First step: butter the pan.  With real butter.

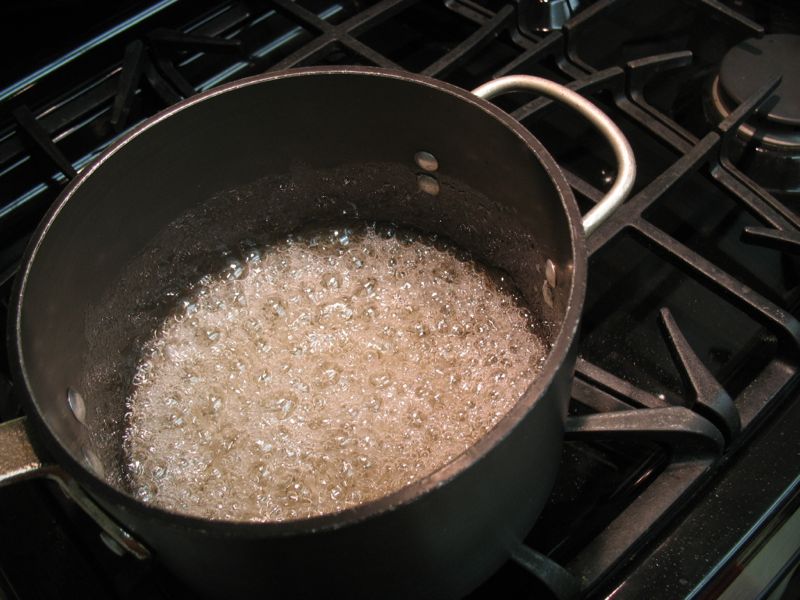
Combine the sugar and corn syrup. Cook until full boil and it turns a creamy color.

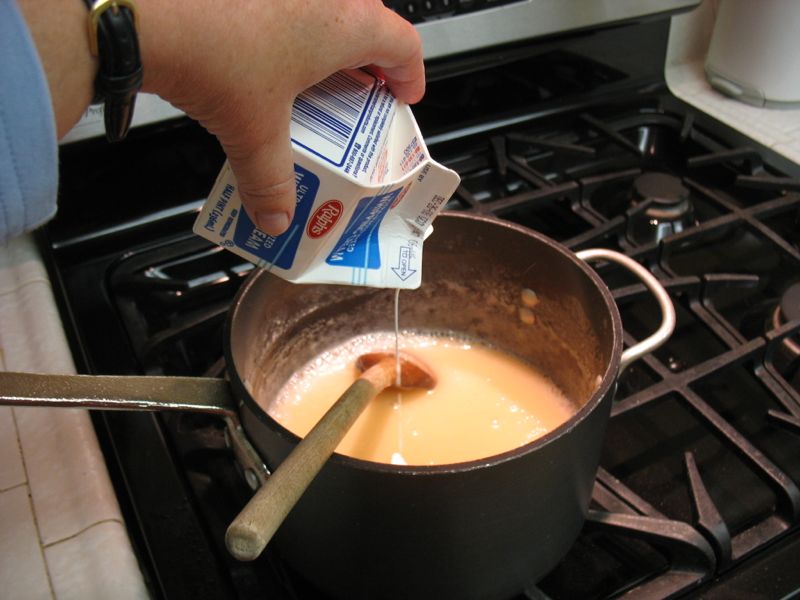
Add cream and evaporated milk (it will foam up; be careful, but keep stirring).

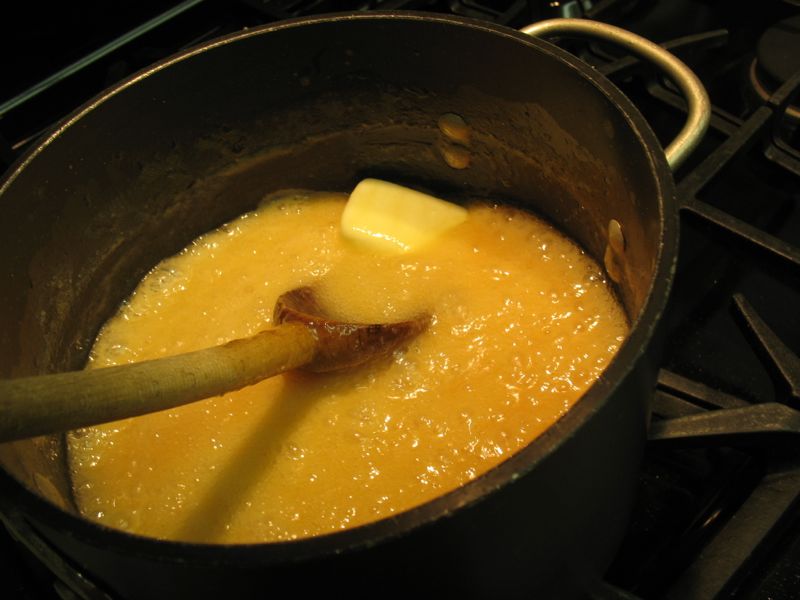
Bring to a boil, then add butter.  Normally most people would know what adding butter looks like, but this picture is for my friend Judy, who loves lots of photos in her recipe steps.

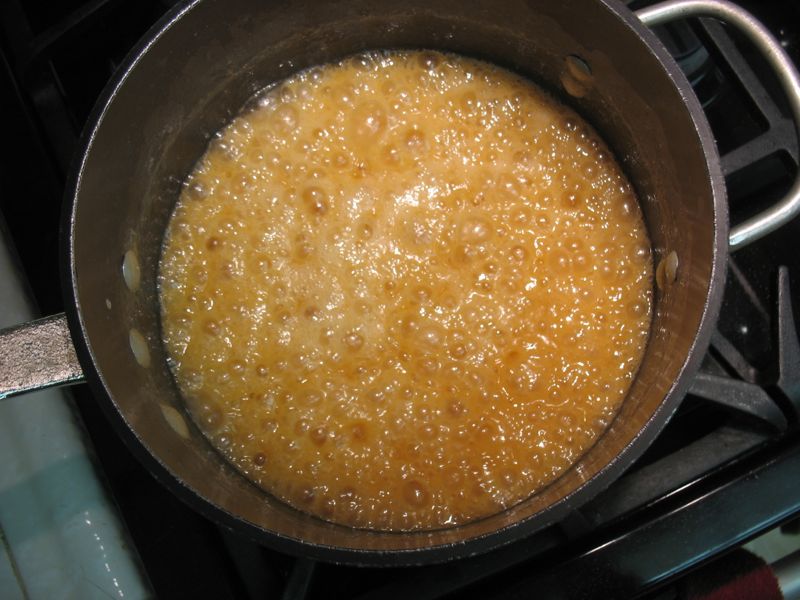
Is it done yet?  No.  If you yank them too early, they’ll be mushy-too-soft caramels. Like your neighbor’s.

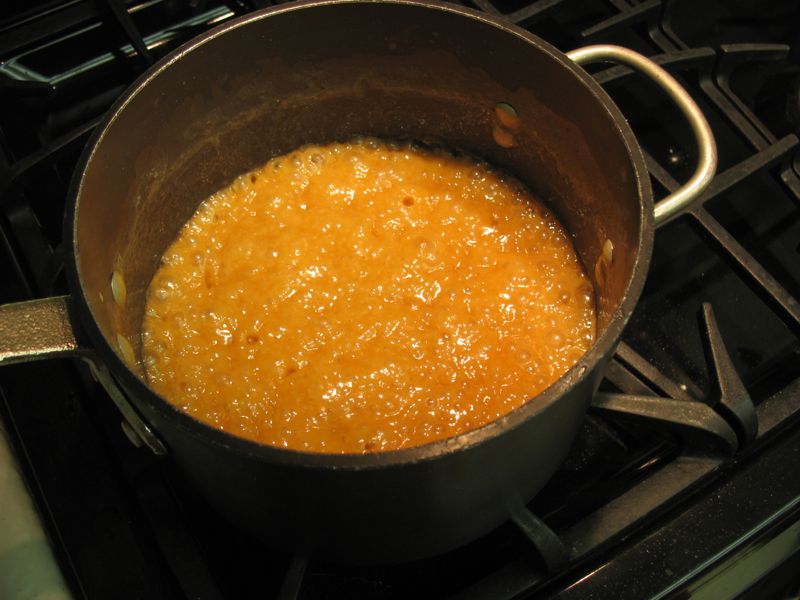
Now it’s done.  Color is a good cue, but really it’s the caramel-into-the-glass-of-water test that really is the determinant.

Cook until caramel hardness (3/4 to 1 hour) keeping it at a low boil the whole time, and stirring occasionally.  We test our caramel with the old-fashioned water-in-a-glass method.    Drizzle a bit of the caramel into the water, feeling it into a ball, and seeing if it’s the texture of a caramel.  (It doesn’t hurt to pop this sample into your mouth to see.)  Don’t get the water ice cold, or you can’t figure it out. With practice, you’ll know exactly when its ready.

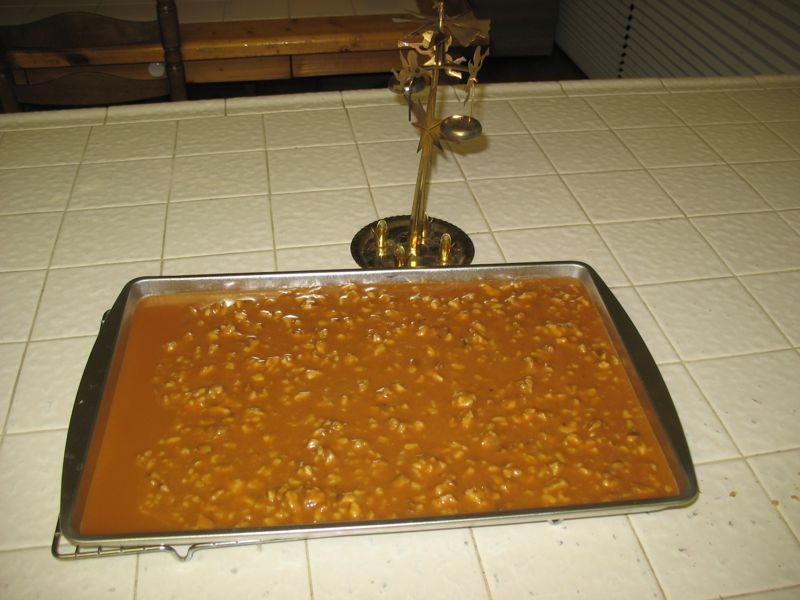
Remove from heat, then stir in nuts and vanilla and pour into the pan.  I always pour a little bit out on one end to give to those who don’t like nuts (I place a spoon underneath the opposite edge of the pan to keep it tilted), then after adding the nuts to the main caramel batch, I pour the rest in (and remove the spoon from underneath).  Let sit 24 hours, covered with a sheet of wax paper.

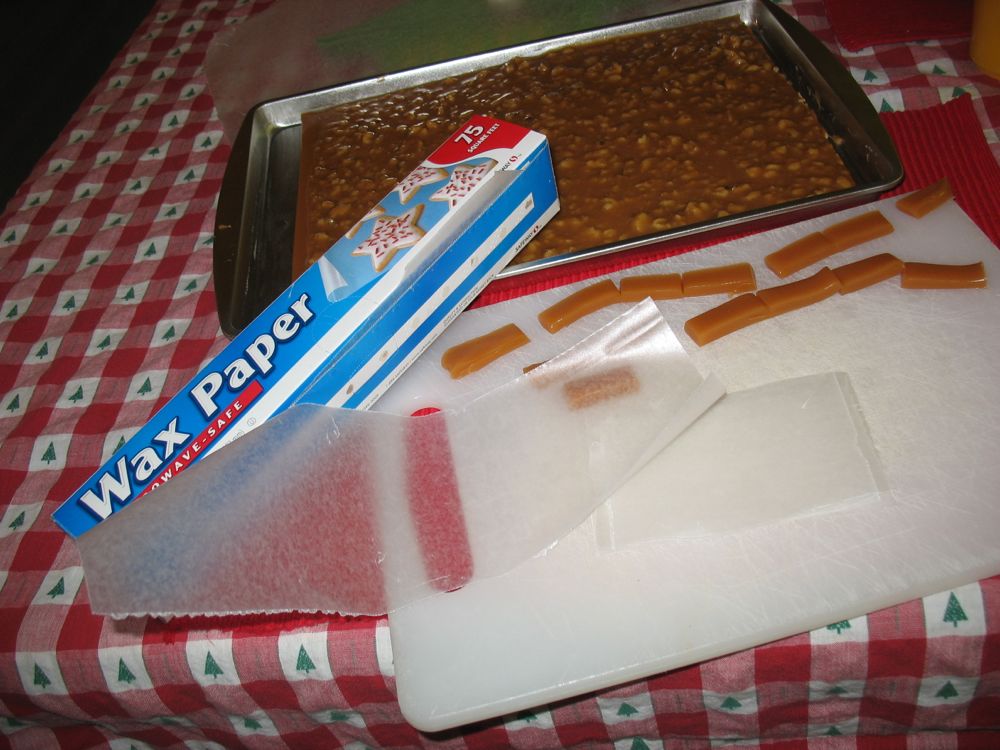
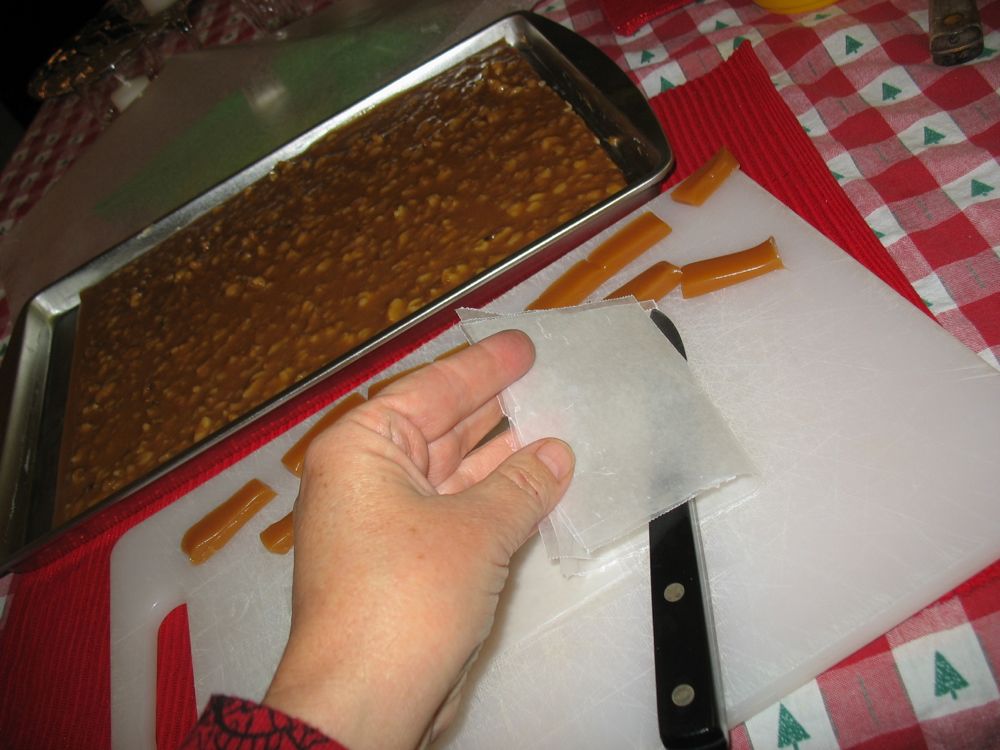
Cut pieces of wax paper, by ripping a three-inch strip off of the roll, then slicing into into half, then half again.

I do about 6 little strips at a time, making 24 little squares of wax paper.

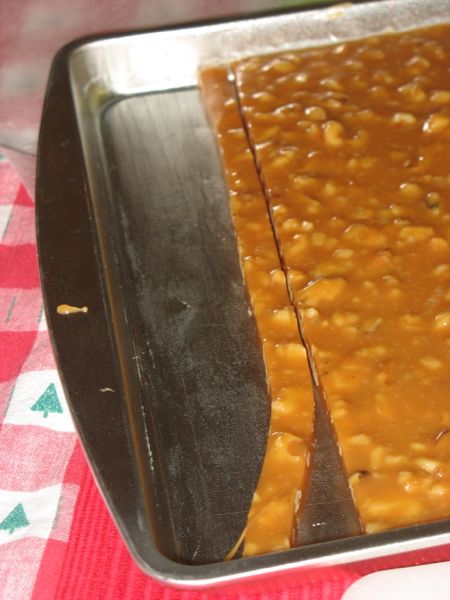
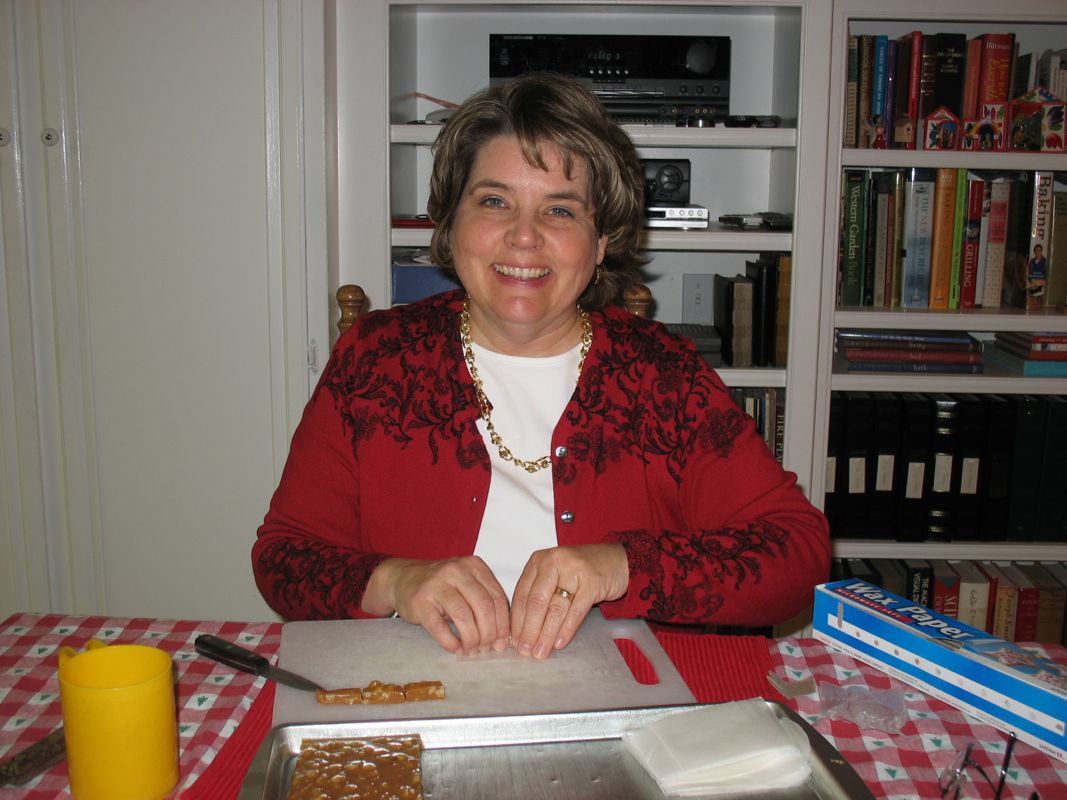
Cut across the short end of the pan making a long strip about 3/8″ wide.  No wider.

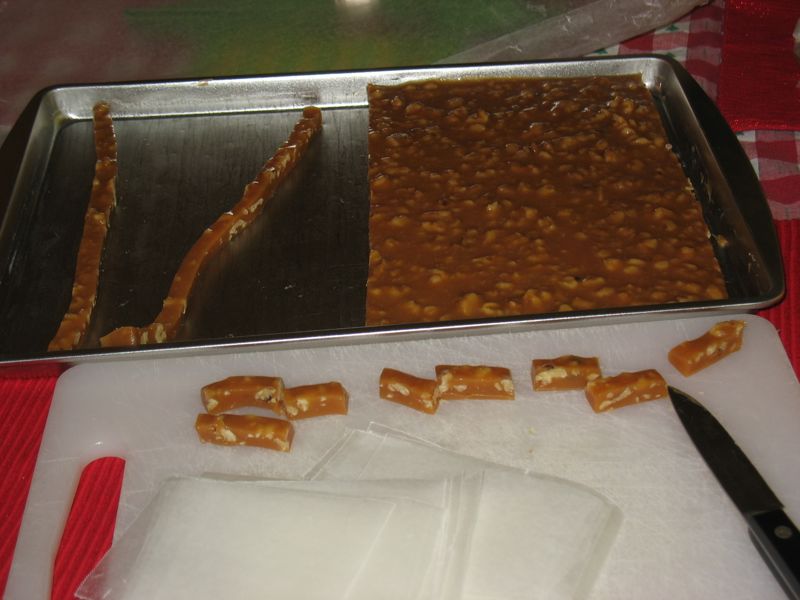
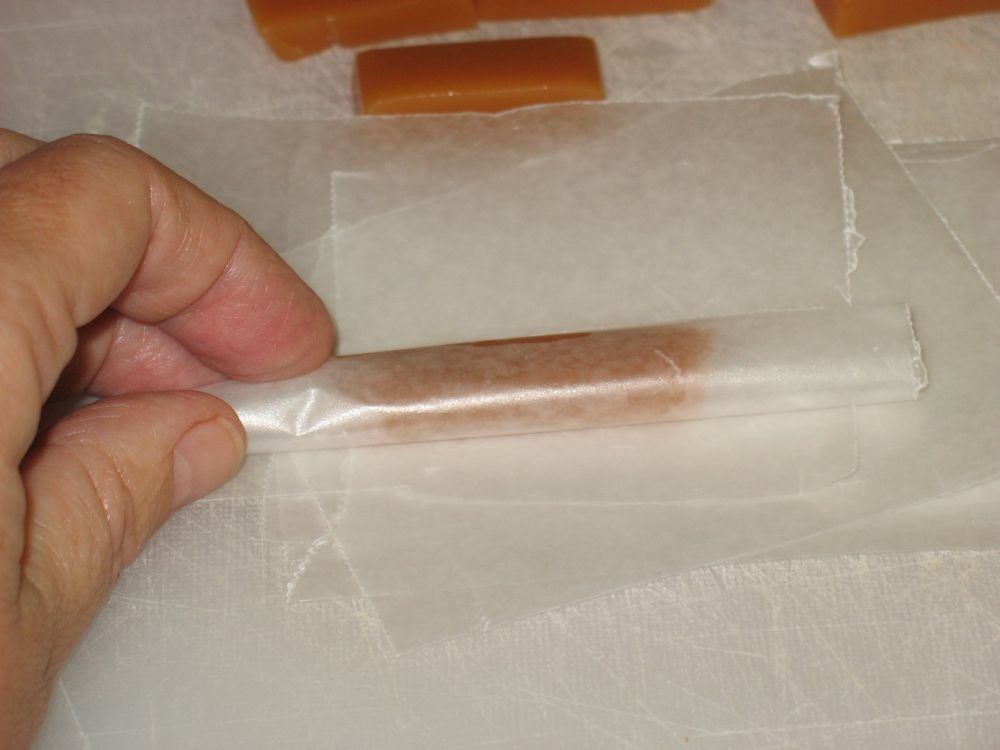
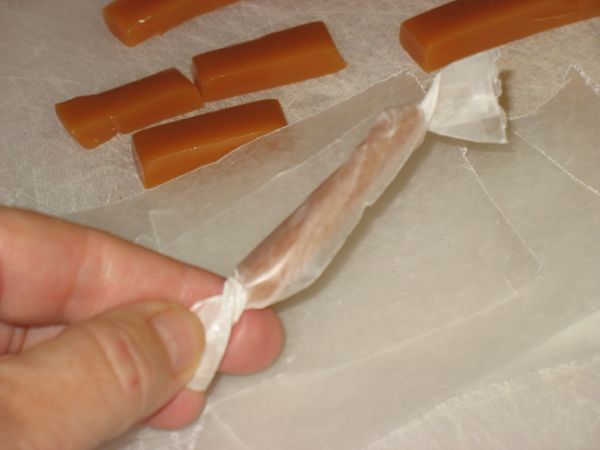
Cut this into about 7 equal pieces and wrap in squares of wax paper.  (Mine are usually longer and skinnier than this photo shows.)

They keep for a season, if they last that long.

Merry Christmas!

************************

Caramels  Yield: 2 1/2 pounds

2 cups granulated sugar
1/2 pint whipping cream
1/2 cup evaporated milk (1 small –5 oz.–can)
1 small bottle clear Karo corn syrup (2 cups)
1 cube of real butter
1 1/2 cups chopped walnuts
1 buttered jelly roll pan
1/2 teaspoon vanilla extract

Combine the sugar and corn syrup.  Cook until full boil and it turns a creamy color.  Add cream and evaporated milk (it will foam up; be careful, but keep stirring). Bring to a boil, then add butter.  Cook until caramel hardness (3/4 to 1 hour) keeping it at a low boil the whole time, and stirring occasionally.  We test our caramel with the old-fashioned water-in-a-glass method.  Don’t get the water too cold, or you can’t figure it out.  Drizzle a bit of the caramel into the water, feeling it into a ball, and seeing if it’s the texture of a caramel.  (It doesn’t hurt to pop this sample into your mouth to see.)  With practice, you’ll know exactly when its ready.  Remove from stir in nuts and vanilla and pout into the pan.  I always pour a little bit on one end to give to those who don’t like nuts, then after adding the nuts, I pour the rest in.  Let sit 24 hours, covered with a sheet of wax paper.

Cut across the short end of the pan making a long strip about 3/8″ wide.  No wider.  Cut this into about 7 equal pieces and wrap in squares of wax paper.  It keeps for a season, if it lasts that long.

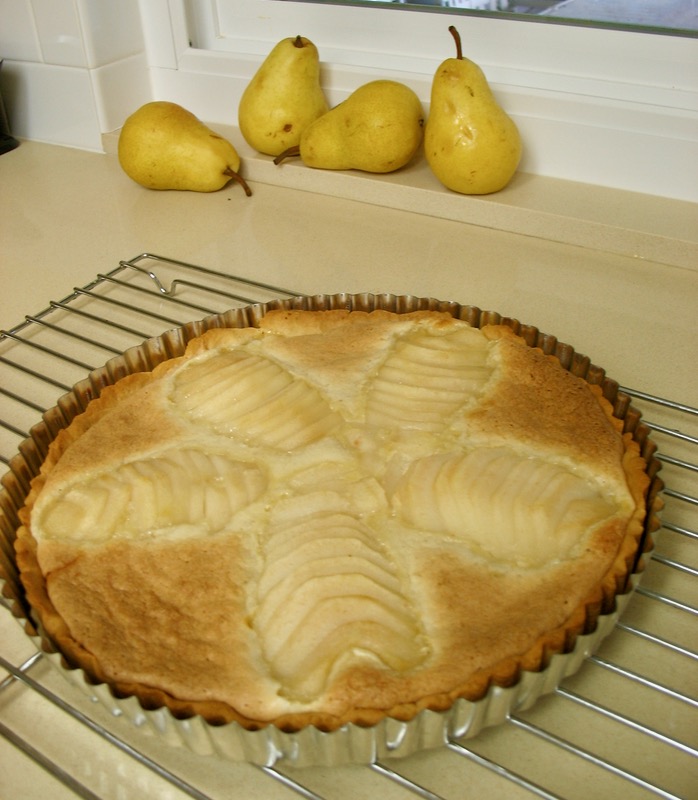
Pear-Almond Tart

First you make the tart shell, and I love her advice to freeze it first.  Then the almond cream.  Let me just say: Blanched almonds? Converting regular almonds to blanched involves dunking them in boiling water for 60 seconds (no more), then rinsing them in cold water.  Then the skins can be pinched off, using thumb and forefinger.  (Videos can be found online, or you can just purchased blanched almonds).

SWEET TART DOUGH (Adapted from Dorie Greenspan’s book BAKING FROM MY HOME TO YOURS)

1 1/2 cups all-purpose flour
1/2 cup confectioners’ sugar
1/4 teaspoon salt
1 stick plus 1 tablespoon (4 1/2 ounces) very cold (or frozen) unsalted butter, cut into small pieces
1 large egg yolk

To make the dough:  Put the flour, confectioners’ sugar and salt in the work bowl of a food processor and pulse a couple of times to combine.  Scatter the pieces of butter over the dry ingredients and pulse until the butter is cut in coarsely – the pieces will be the size of oatmeal flakes and pea-size pieces and that’s just fine.  Stir the egg, just to break it up, and add it a little at a time, pulsing after each addition.  When the egg is in, process in long pulses – about 10 seconds each – until the dough, which will look granular soon after the egg is added, forms clumps and curds.  Just before your reaches this clumpy stage, the sound of the machine working the dough will change – heads up.  Turn the dough out onto a work surface.

Very lightly and sparingly – make that very, very lightly and sparingly – knead the dough just to incorporate any dry ingredients that might have escaped mixing.

If you want to press the dough into a tart pan, now is the time to do it.

If you want to chill the dough and roll it out later (doable, but fussier than pressing), gather the dough into a ball (you might have to use a little more pressure than you used to mix in dry bits, because you do want the ball to be just this side of cohesive), flatten it into a disk, wrap it well and chill it for at least 2 hours or for up to 1 day.

To make a press-in crust:  Butter the tart pan and press the dough evenly along the bottom and up the sides of the pan.  Don’t be stingy – you want a crust with a little heft because you want to be able to both taste and feel it.  Also, don’t be too heavy-handed – you want to press the crust in so that the pieces cling to one another and knit together when baked, but you don’t want to press so hard that the crust loses its crumbly shortbreadish texture.  Freeze the crust for at least 30 minutes, preferably longer, before baking.

To partially bake the crust:  Center a rack in the oven and preheat the oven to 375 degrees F.  Butter the shiny side of a piece of aluminum foil and fit the foil tightly against the crust.  Bake the crust 25 minutes, then carefully remove the foil.  If the crust has puffed, press it down gently with the back of a spoon.  Bake for another 3 to 5 minutes, then transfer the crust to a cooling rack; keep it in its pan.

FRENCH PEAR TART (with my modifications) Makes 6 servings

3 medium pears, firm but ripe

For the almond cream:
6 tablespoons unsalted butter, at room temperature
2/3 cup sugar
3/4 cup ground blanched almonds
2 teaspoons all-purpose flour
1 teaspoon cornstarch
1 large egg
1 teaspoon pure vanilla extract

1 partially-baked 9-inch tart shell, made with Sweet Tart Dough (see above), at room temperature

Confectioners’ sugar for dusting, or apple jelly for glazing

To make the almond cream:  Put the butter and sugar in the workbowl of a food processor and process until the mixture is smooth and satiny.  Add the ground almonds and continue to process until well blended.  Add the flour and cornstarch, process, and then add the egg.  Process for about 15 seconds more, or until the almond cream is homogeneous.  Add the rum or vanilla and process just to blend.  If you prefer, you can make the cream in a mixer fitted with the whisk attachment or in a bowl with a rubber spatula.  In either case, the ingredients are added in the same order.  Scrape the almond cream into a container and either use it immediately or refrigerate it until firm, about 2 hours. (I had mine in the fridge for about 1 hour–worked fine.)

Getting ready to bake:  Center a rack in the oven and preheat the oven to 350 degrees F.  Have a lined baking sheet at the ready.  Peel the pears, cut them in half from blossom to stem and core them; rub them with lemon juice.  Then put them on some paper towels and pat them dry – really dry – so that their liquid won’t keep the almond cream from baking.
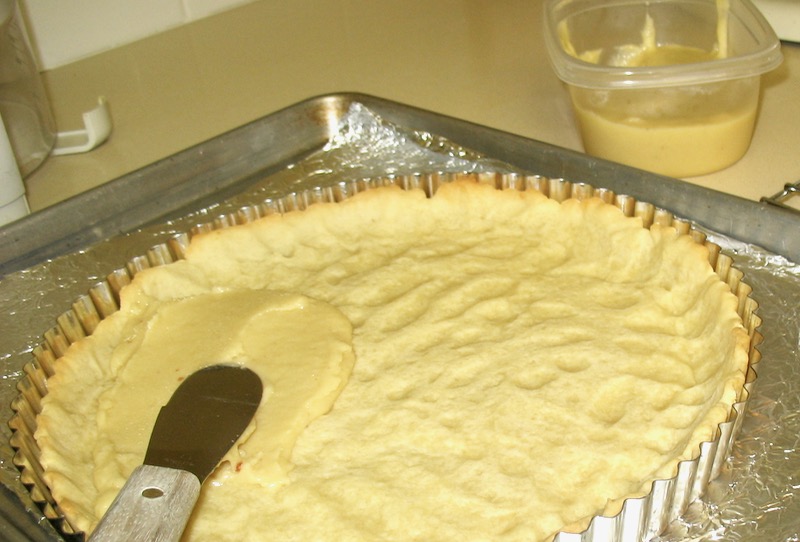
Fill the baked crust with the almond cream, spreading it evenly.
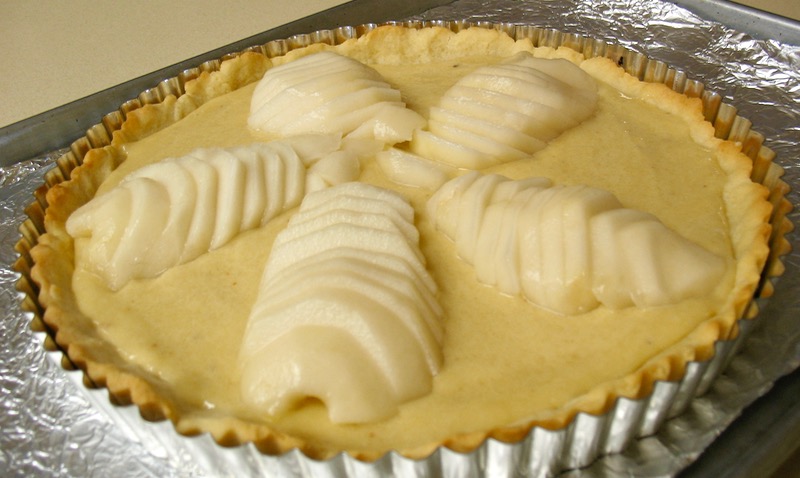
Thinly slice each pear half crosswise, lift each half on a spatula, press down on the pear to fan it slightly and place it, wide-end toward the edge of the crust, over the almond cream.  The halves will form spokes. (I only used five halves, using the other for a little cook’s snack.)

Put the crust on the lined baking sheet, slide the sheet into the oven and bake the tart 50 to 60 minutes, or until the almond cream puffs up around the pears and browns.  Transfer the tart to a rack to cool to just warm or to room temperature before unmolding.

Right before serving, dust the tart with confectioners’ sugar.

Her notes about storing:  You can make the almond cream up to 2 days ahead and keep it closely covered in the refrigerator, or you can wrap it airtight and freeze it for up to 2 months; defrost before using.  However, once you’ve baked the tart, you should be prepared to enjoy it that same day.
Torta di Pere

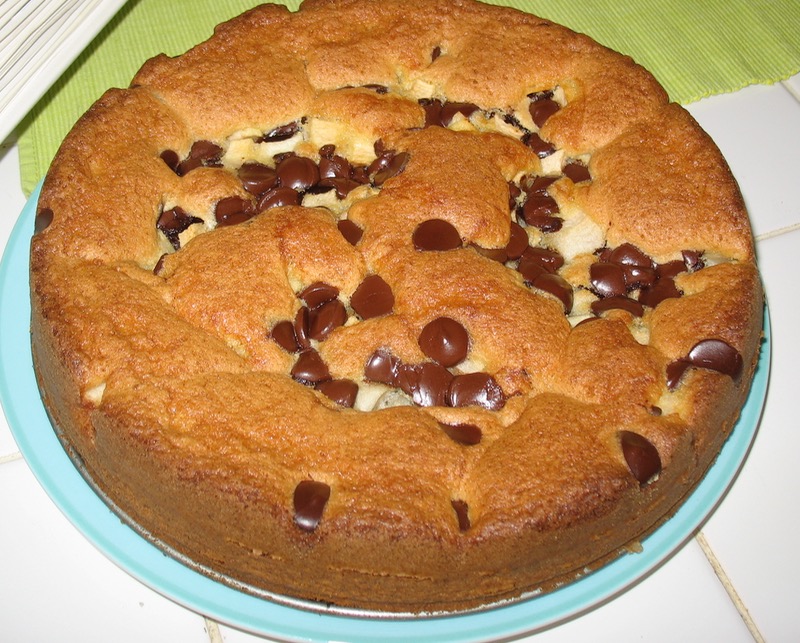
I found this one on one of my food blogs, who got it from another food blog, who got it from the restaurant that invented it.  While the original dish called for pears, I didn’t have any pears, so I used apples. If you do this, sautee the apples slightly, to the consistency of — what else? — pears.  The secret ingredients in this cake are brown butter and whole eggs that are beaten to the point of forming stiff peaks. When combined, they give the cake its springy texture and subtle nutty flavor. Serve this cake with whipped cream with a bit of almond extract.

Update: I made it again last night for the 21st Anniversary of Our First Date (an occasion if there ever was one) and used pears (Bosc–ripe, not crisp) and bit too many chocolate chips and IT WAS DIVINE.  We didn’t even use the whipped cream,  as it went freshly out of the oven and into Anniversary mouths.
(Makes one 9-inch cake, which serves about eight people)

1 cup all-purpose flour
1 tablespoon baking powder
1/4 teaspoon salt
3 eggs, at room-temperature
4 ounces (1 stick) unsalted butter
3/4 cup sugar
3 pears, peeled, in a small dice (I used apples, lightly tossed in a pan with 1 Tbls. melted butter)
3/4 cup bittersweet chocolate chunks (I used chocolate chips)

Lightly whipped cream with a touch of almond extract (optional)

Preheat the oven to 350°F. Butter a 9-inch springform pan and dust with flour; set aside. Stir the flour, baking powder and salt together, set aside.

Using a mixer fitted with the whisk attachment, whip the eggs on high speed until pale and very thick. (It will take about nine minutes to get sufficient volume–just below Stiff Peak Stage.)

While the eggs are whipping, brown the butter. Melt the butter in a medium saucepan (because it will foam a lot) and cook it until the butter browns and smells nutty (about 6 to 8 minutes). It helps to frequently scrape the solids off the bottom of the pan in the last couple minutes to ensure even browning. It turns all-of-a-sudden, so be ready.  Remove from the flame but keep in a warm spot. (I poured the butter into a spouted measuring cup for the next stage.)

Add the sugar to the eggs and whip a few minutes more. Just as the egg-sugar mixture is starting to lose volume, turn the mixture down to stir, and add the flour mixture and brown butter. Add one third of the flour mixture, then half of the butter, a third of the flour, the remaining butter, and the rest of flour. Whisk until just barely combined — no more than a minute from when the flour is first added — and then use a spatula to gently fold the batter until the ingredients are combined. It is very important not to over-whisk or fold the batter or it will lose volume.

Pour into prepared pan. Sprinkle the pear and chocolate chunks over the top, and bake until the cake is golden brown and springs back to the touch, about 40 to 50 minutes, or a tester comes out clean. (Try this a few times to make sure you’re not hitting a pocket of pear.) Serve with whipped cream.

Note: After licking the bowl, I decided it didn’t really matter what kind of fruit I used, as the batter had this amazing taste.  I used Ghirardelli bittersweet chocolate chips.

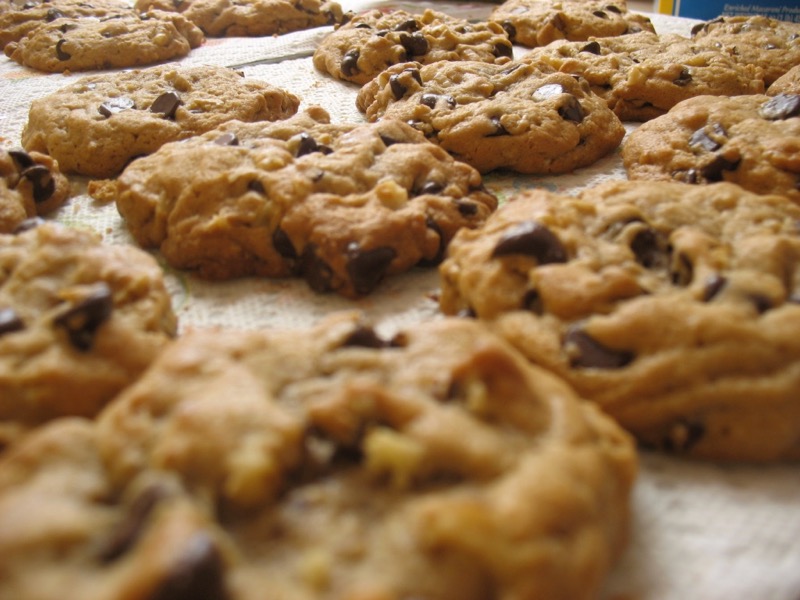
The Best Chocolate Chip Cookies


(My Favorite Recipe—from Sunset)
I’ve been making this for more than two decades and have made some changes along the way. Please see notes at the end of the recipe. Many changes I have incorporated into the recipe below.

1 cup solid shortening
1/2 cup (1 stick) butter or margarine, softened
1 cup granulated sugar
1 cup firmly packed brown sugar
4 extra-large eggs
1 Tablespoon vanilla
1 teaspoon lemon juice (freshly squeezed!!)
2 teaspoons baking soda
1 1/2 teaspoons salt
1 teaspoon ground cinnamon
1/2 cup old-fashioned oats (I use Quaker Oats brand.)
2 to 2 1/2 cups all-purpose flour
1 cup whole wheat flour
2 large packages (12 oz. each) semisweet chocolate chips–that’s about 4 cups [Note: I use 2 cups of regular semisweet chocolate chips, and 2 cups of Guittard Semi-Sweet Maxi Baking Chips, or similar. Sometimes I use the dark chocolate version.]
2 cups chopped walnuts

In a large bowl of an electric mixer, beat shortening, butter, granulated sugar and brown sugar at high speed until light and fluffy (about 5 minutes).  Add eggs, one at a time, beating well after each addition.  Beat in vanilla and lemon juice.

Add oats.  Mix together soda, salt, whole wheat flour, cinnamon.  Beat into creamed mixture until well combined; add rest of flour until dough is not too sticky when you pick up bit with your fingers.  Stir in chocolate chips and nuts.

For each cooky, drop a scant 1/4 cup dough on a lightly greased baking sheet, spacing cookies about 3 inches apart.  If you have one, use a cookie scoop, about 2-inch size.

Line one cookie sheet with parchment paper. Scoop out all the dough onto the cookie sheet, letting each scoop touch each other. Cover. Freeze, or give it a heavy chill in the freezer. When ready to bake, line a second cookie sheet with parchment paper, and place cookie balls about 3″ apart. I can get about 12-15 on one cookie sheet.

Bake in a 350 oven for 16-18 minutes or until golden brown.  (If they are just out of the freezer, it may take longer.) Remove from oven and set on a rack; let cool for 2 minutes (approx.). Grabbing the edge of the parchment paper, slide the cookies onto a wire rack, and let cool.  Makes about 3 dozen large cookies.

*Note: if you don’t have whole wheat flour, you can use all white (all-purpose) flour.