Red Pepper and Orzo Soup

OrzoRdPepperSoup_1

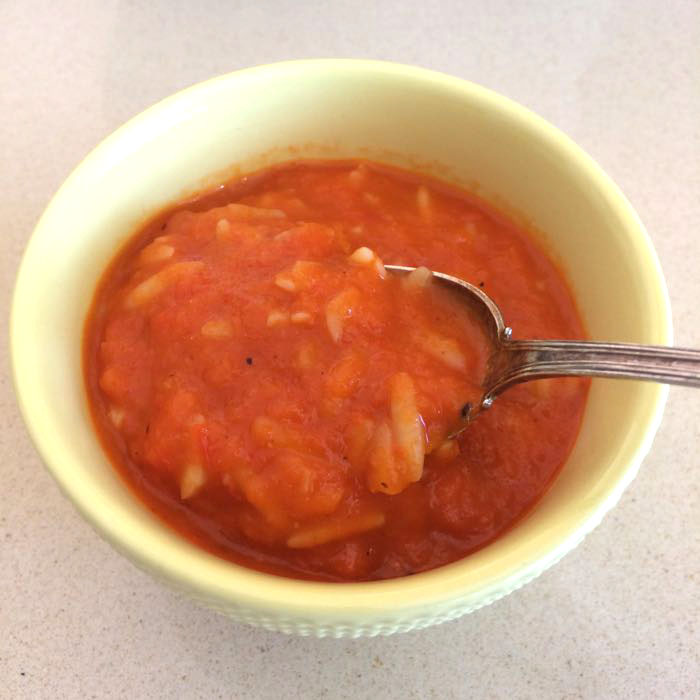
Think of this as a snappier version of tomato rice soup; the amount of pasta used here is just enough to temper the peppers’ bite.  I have modified this recipe from one I found in the Washington Post.

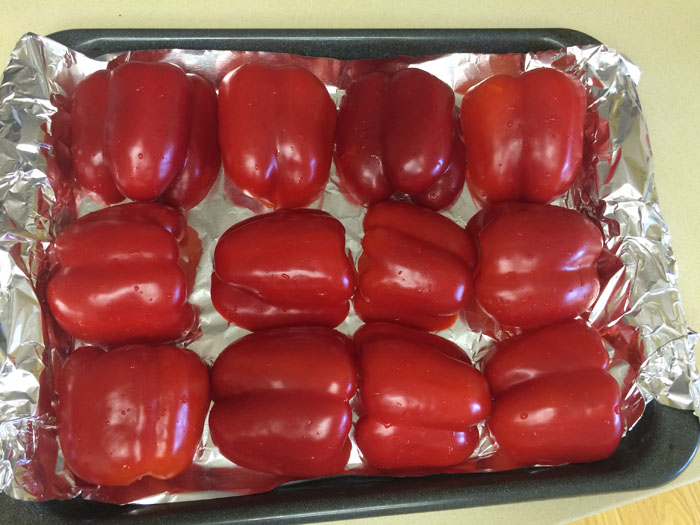
roasting red peppers_1

before

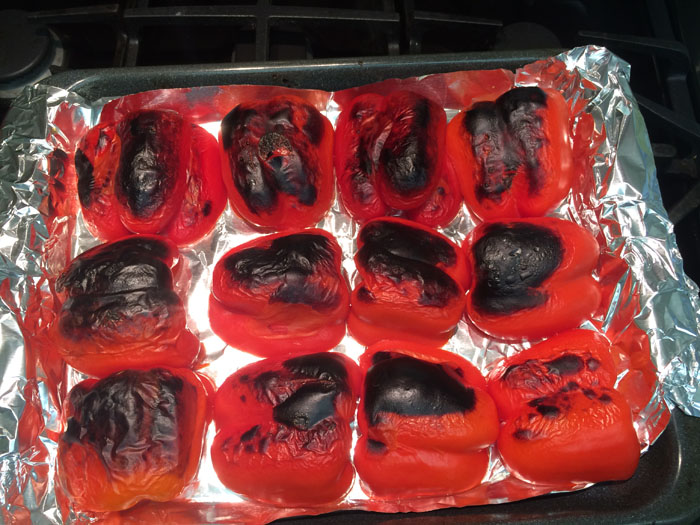
roasting red peppers_2

after 15-20 minutes under broiler’s high heat

roasting red peppers_3

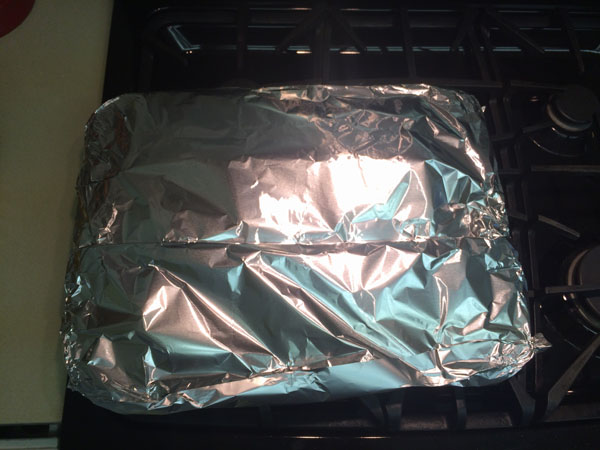
all wrapped up to steam for a while

Serve with a loaf of Mary’s Retreat Bread.

Servings: Tested size: 3-4 servings; makes 3 1/2 to 4 cups

Ingredients
1 medium shallot
1 clove garlic
5-6 red roasted peppers (directions below) ***
2 teaspoons olive oil, plus more for optional garnish
3-1/2 to 4 cups chicken broth (you get to determine the texture: soupy or thick)
1/2 cup dried orzo pastaIMG_3739

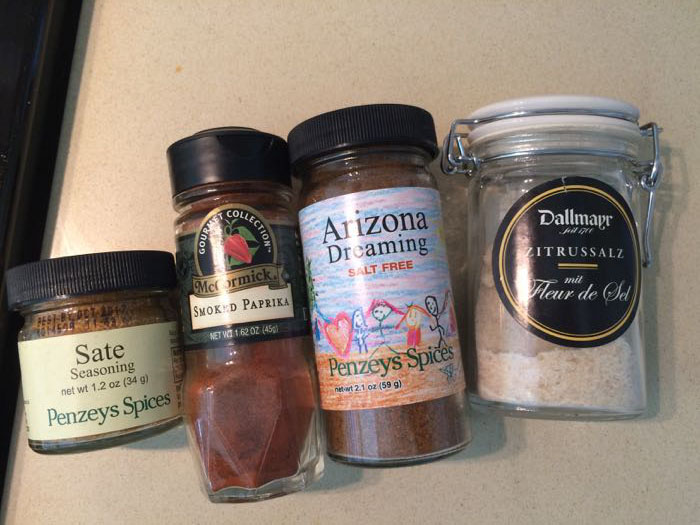
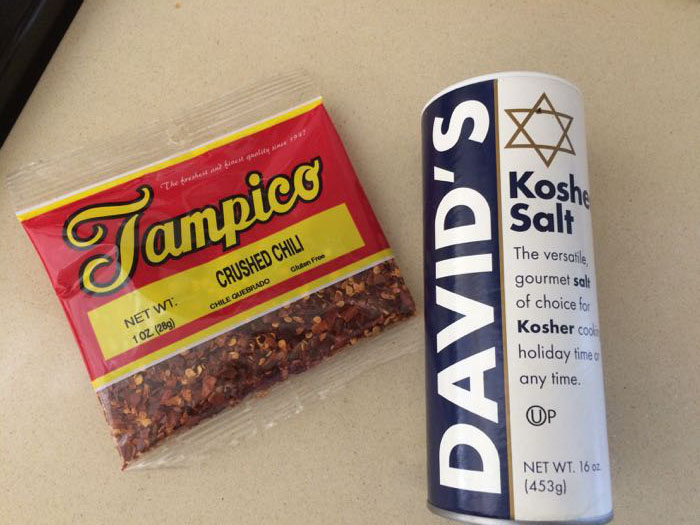
Spices for Soup_1 Spices for Soup_2
Spices to Taste:
wave of Arizona Dreaming, Sate, Smoked Paprika and [optional] a pinch of lemon-salt (use a shake of Kosher salt and 1 tsp. lemon rind, as substitute)
pinch of crushed red pepper flakes (also called “chili” flakes)

NOTE: Arizona Dreaming is my new go-to spice.  Get yourself a jar.

Directions
Peel and coarsely chop the shallot and garlic. Prepare the red peppers by broiling the seeded, washed halves for 15 minutes under high broiler heat on a prepared pan (line with tin foil).  Wrap the whole pan in foil, and let the peppers cool while they continue to steam and melt into goodness, about 30 minutes. Alternatively, you could put them into a covered bowl, and go that route.  Peel off the blackened skins and discard.

Heat half of the oil in a medium saucepan over medium heat. Once the oil shimmers, stir in the shallot and garlic. Cook for 3 or 4 minutes, until just softened.

Add the red peppers and broth; if your peppers weren’t soft after the broiling stage, let them cook a bit more in the hot broth until tender.  Using a stick blender, puree the peppers/broth until smooth. Add the spices listed above.

Bring to a boil over medium-high heat, then stir in the orzo. Cook for 7 to 9 minutes or until the orzo is tender and more visible in the pot, stirring often to keep it from sticking to the bottom. Add more broth, if needed. Taste, and adjust seasonings as needed, using spices listed above.  You can also add a Tablespoon of lemon juice to pop things up, if needed.

Red Pepper Orzo Soup_2


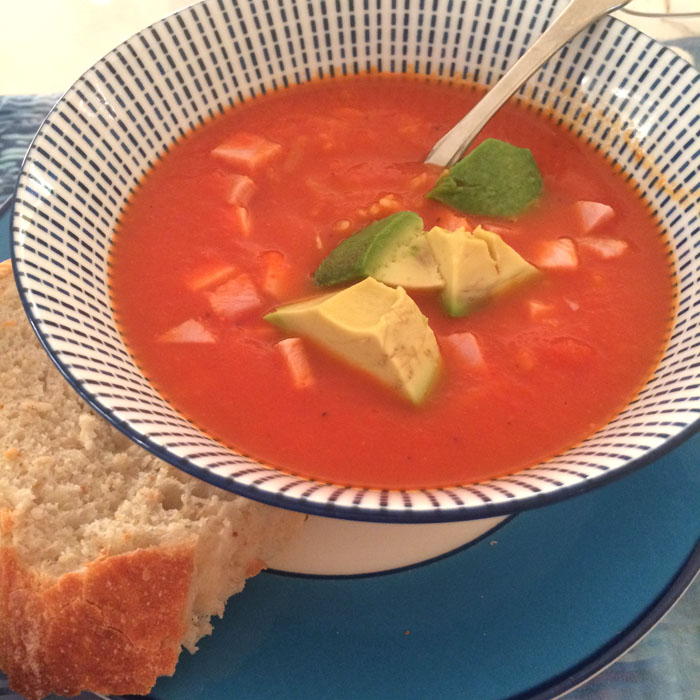
Also good with slices of avocado, if you like that sort of thing, or a really good sandwich.  We also added cubes of cooked ham, a carryover from another meal.

Other garnishes possible:
2 tablespoons pine nuts, for garnish
1 tablespoon grated pecorino Romano cheese
1 cup baby spinach
few leaves fresh basil

***COOK’S NOTE: To make this quickly, use two jars of roasted red peppers from Trader Joe’s instead of roasting up your own peppers.  Drain, then use in the recipe instead of the home-done peppers.
Braised Chard, Carrots and Rice with Brats

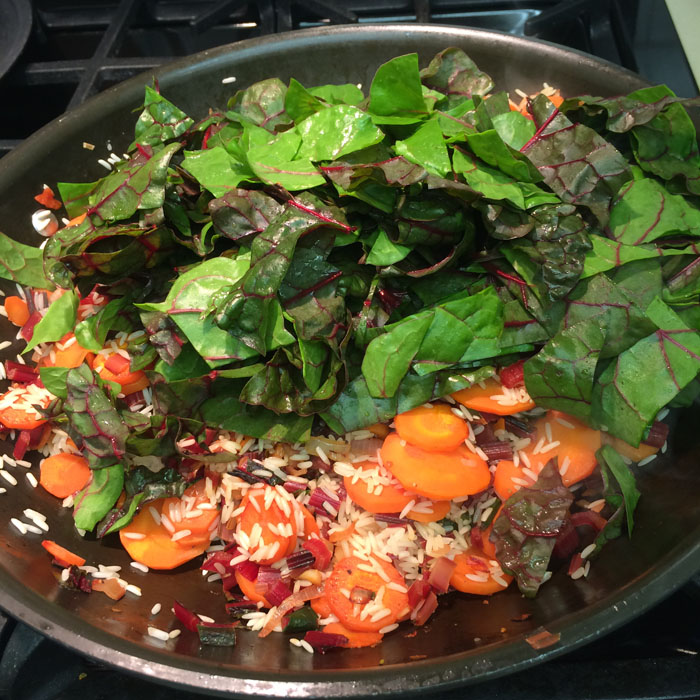
Braised Chard, Carrots and Rice_1When you have lots of chard in your garden, or it’s on sale at the green grocer’s, it’s time to make this dish.  If you don’t add the brats and use water instead of the broth, it’s vegetarian, but we like to use Apple-Chicken sausage (we buy it at Costco) and add it to this dish.  The original recipe came from Mark Bittman, but I’ve made some modifications.

Braised Chard, Carrots and Rice_5 Braised Chard, Carrots and Rice_4 Braised Chard, Carrots and Rice_3Ingredients
1 pound (or one large handful) chard, washed and trimmed
1/3 cup extra virgin olive oil
5-6 carrots, peeled, and either sliced, or roughly chopped
1 shallot, peeled and minced
2 cloves garlic, chopped
salt and pepper (this needs more than you think)
2/3 cup jasmine rice
2 cups chicken broth
Aidell’s Apple and Chicken Sausage, 5 links
juice of one lemon

Directions
Cut the stems out of the chard leaves. Line up the stems (they look like pink celery) and slice them across the bunch, then cut the leaves into wide ribbons. Keep separate.

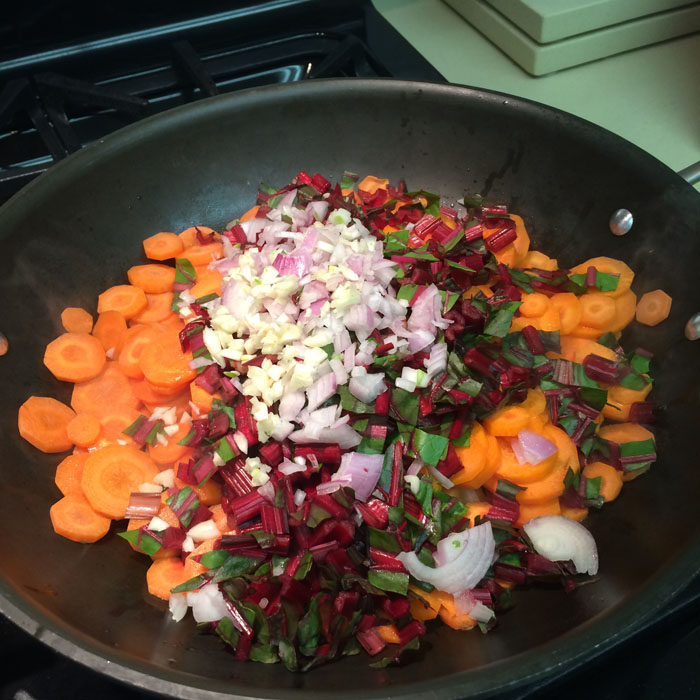
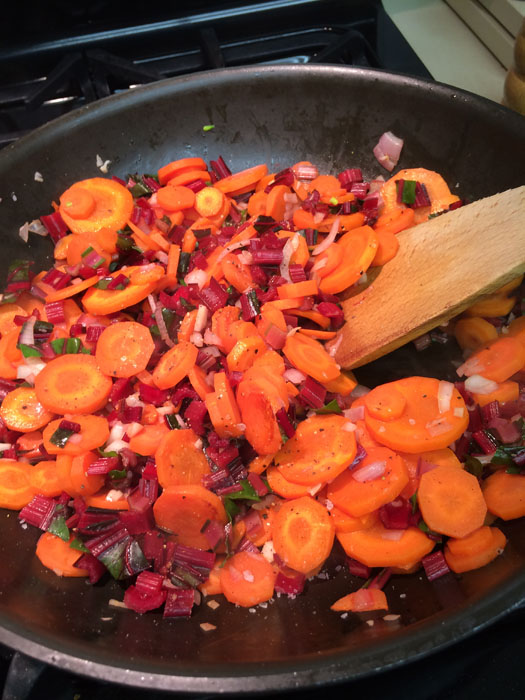
Put all but a tablespoon of the oil in a large skillet over medium heat. When hot, add the garlic, shallot, carrots and chopped chard stems, sprinkle with salt and pepper, and cook about 15 minutes, stirring occasionally.

When chard/carrots are tender, add chard leaves, more salt and pepper, the rice, and chicken broth. Cover and simmer for about 20-30 minutes, or until water is absorbed (you may have to lower the heat). Add water if needed, until rice is cooked. The mixture will be moist, but not too soupy.

Braised Chard, Carrots and Rice_6While those cook, place the sausage links into a non-stick pan, and over a low heat, cook until they are plump and slightly brown in places on the outside.

To finish the dish, add the juice of one lemon and a circle of olive oil, and if necessary, some more salt and pepper.  Slice the sausage/brats and pile on top of the rice/chard mixture. Braised Chard, Carrots and Rice_2

Spicy African Peanut Soup with Ginger and Tomato

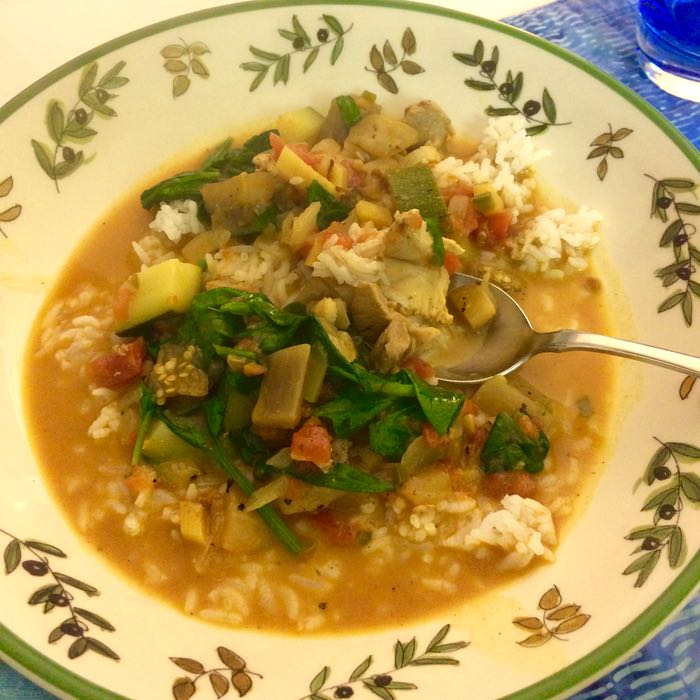
Peanut Soup_1I first found this recipe in the New York Times; one version was by Julia Moskin and the other by Mark Bittman.  I have made this several times and combined/changed things up to suit me.  I like it because it begins with eggplant, and I always use the Japanese kind (so I can skip the salting step).  It’s a good stew to serve over some rice, on a day when you just need something flavorful and hearty for dinner.

Ingredients
1 teaspoon ground cumin
1 teaspoon ground coriander
¼ teaspoon turmeric
⅛ teaspoon cayenne
2 medium-size Japanese eggplants, peeled and cut into 1-inch dice
1 teaspoon salt, plus more to taste
¼ cup good quality oil, peanut oil (if you have it)
2 shallots, thinly sliced
2 inches fresh ginger, peeled and minced
1 jalapeño chili, seeded and minced
1 onion, chopped
⅓ cup tomato paste
½ pound skinless, boneless chicken (about 2 thighs or breasts) cut into chunks
1 small (14.5 ounce) can diced tomatoes, preferably roasted
4 cups vegetable stock or water
½ cup natural unsweetened peanut butter (creamy or chunky)
1 medium-size zucchini, 6 to 8 ounces, cut in quarters lengthwise, then sliced 1/2 -inch thick
2 tablespoons freshly squeezed lemon juice (1 to 2 lemons)
2-3 cups coarsely chopped greens, such as spinach or chard
⅓ cup coarsely chopped cilantro leaves, plus whole leaves for garnish

Cooked rice, for serving

Chopped roasted salted peanuts, for garnish (optional)

Preparation

In a colander, toss eggplant with 1 teaspoon salt; set aside for 30 minutes [I skip this step if using Japanese eggplant]. Rinse, drain well and set aside. In a small bowl, combine cumin, coriander, turmeric and cayenne; set aside.

In a large pot, heat 3 tablespoons oil over medium-high heat. Add shallots and fry, stirring often, until soft, and caramelized, about 5 minutes. Add chicken and continue cooking for another 3 or 4 minutes, until just starting to turn color. Using a slotted spoon, transfer shallots and chicken to a large bowl, leaving oil in pot (may need to add some more). Raise heat to nearly high and add eggplant. Cook, stirring often, until lightly browned and just tender, about 10 minutes. Transfer to bowl with shallots/chicken.

Add remaining 1 tablespoon oil to pot and heat over medium-high heat. Add ginger and jalapeño and cook, stirring for 30 seconds. Add spices and cook, stirring, 30 seconds more. Add onion and cook, stirring to scrape up any browned bits, until softened and translucent, about 5 minutes. Add tomato paste and cook, stirring, 1 minute.

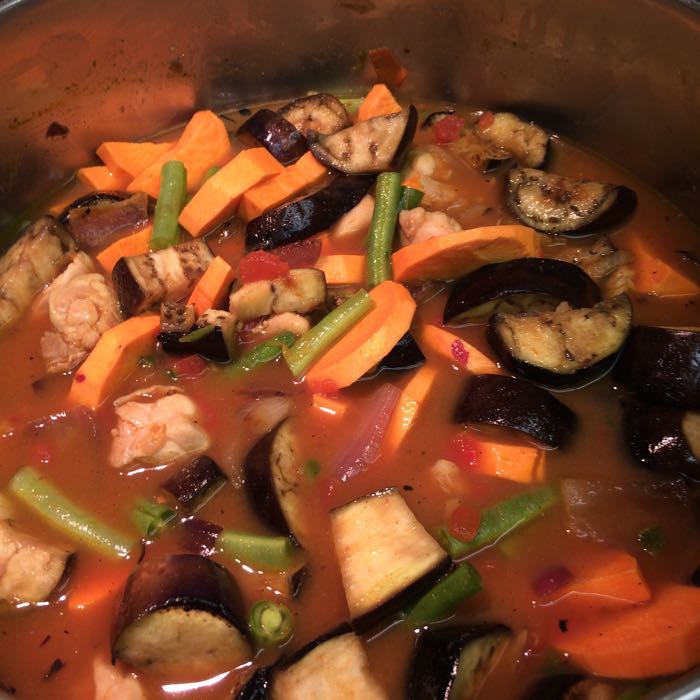
Peanut Soup Add diced tomatoes, stock or water, eggplant, chicken, shallots and a sprinkling of salt. Bring to a boil and cook 5 minutes. Place peanut butter in a medium bowl, add one or two ladlefuls of hot soup, and stir until emulsified, then pour mixture back into soup.

Reduce heat to a simmer, add zucchini, cover and cook 10 to 15 minutes, until vegetables are tender and chicken is done. Turn off heat and stir in lemon juice, chopped cilantro, greens; stir until greens are wilted. Let cool slightly and taste; add salt if necessary. Serve in bowls with rice, garnished with cilantro leaves and chopped peanuts, if desired.

Note: Can omit chicken and add 1 (15 oz.) can garbanzo beans, if desired.  Can also add 1-2 thickly sliced sweet potato (as shown in the image above).

Peanut Soup_2

Persimmons

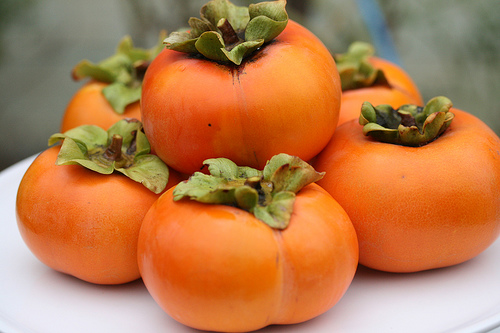
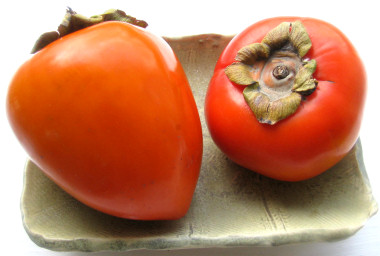
Fuyu Persimmons

Fuyu persimmons are short and round, shaped just like a large tomato.  They can be eaten raw and somewhat firm, without having a bitter, astringent taste. The Hachiya variety are larger, and teardrop shaped.  Hachiya persimmons need to ripen until they are very soft.  They contain a lot of tannins when they are immature, which make them taste very astringent as well as cause severe stomach problems if a person actually manages to eat one.  As the fruit ripens the tannin level decreases, until the taste becomes very mild. hachiyapersimmons

That’s why the hachiyas (shown above, with a pointy end) make you pucker up when they are unripe!

That website goes on to note: “Fuyu persimmons can be sliced and eaten raw, when they are soft enough so that they give just a little to the touch, like a ripe tomato.  The skin is very fibrous so you will want to peel them before cutting them up.  After peeling them they will be slippery, so slice in half and put the cut side down so they are laying on the flat edge.  This way you can slice or dice them more easily.”

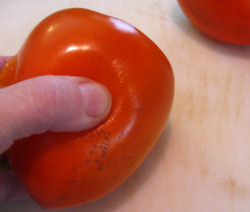
Some say to cook with the hichiya and eat the fuyus in salads, or raw, but one cook found that Fuyus work fine in making her Persimmon Bread.persimmonhachiya1

When I made my bread, I waited until my hachiyas were this soft–or as someone said, like pushing in on a water ballon! And I didn’t peel them, throwing the cored persimmon whole into my food processor with the ripe pears.  If one hachiya is not as ripe as the other, you can cheat by micowaving it until it is soft.  persimmonhachiya2
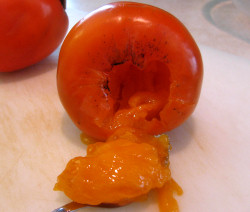
Alternatively, you can core them, then scoop out the jelly-like flesh. When I made my Pear-Persimmon bread, I simply cored them, then whirred the persimmon — skin and all — in the processor.  We sometimes refer to them as “persey-mons:” once when we were staying in Bologna, I asked the hotel breakfast lady what kind of tree was just outside the breakfast room.  “Persey-mon” was her reply, and so it stuck.Persimmons, sliced1

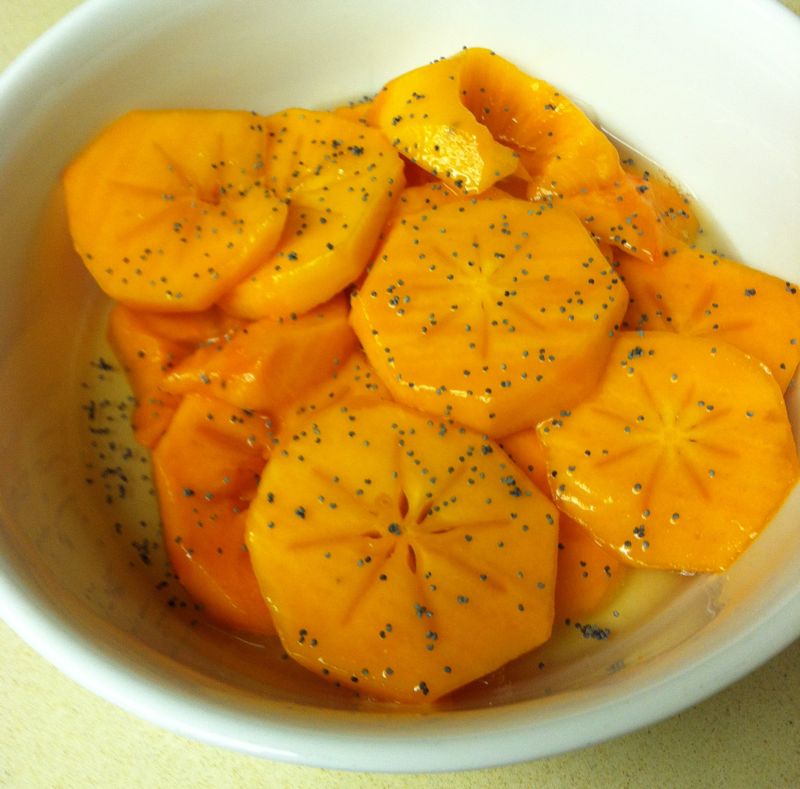
One way to serve the Fuyu persimmons raw is to core and peel them, then slice them across the width. Layer them into a shallow serving bowl.  Whisk together some white vinegar with some honey, about 2 Tablespoons of each, or until the tart-sweet taste is balanced. Test and add more honey to taste, if needed.  Pour this over the persimmons, then sprinkle with poppy seed.  This is an elegant and easy side dish.

Another recipe I found (untested by me) is to make a salad using spinach leaves as a base.  First, start by making a vinaigrette:

  • 1/4 cup rice vinegar
  • 1/4 cup orange juice
  • 4 teaspoons honey
  • 1 teaspoon sesame oil
  • 6 Tablespoons olive oil

Mix the rice vinegar, orange juice, honey and sesame oil in a small bowl.  Whisk in the olive oil in a slow stream, whisking vigorously to emulsify the ingredients.  Lay down some spinach leaves, then the cored and sliced persimmons.  Sprinkle with toasted pecans, and dried cranberries, then pour the vinaigrette over all. (If you use 2 persimmons, it will serve 4 people.)
My New Favorite Roll Recipe

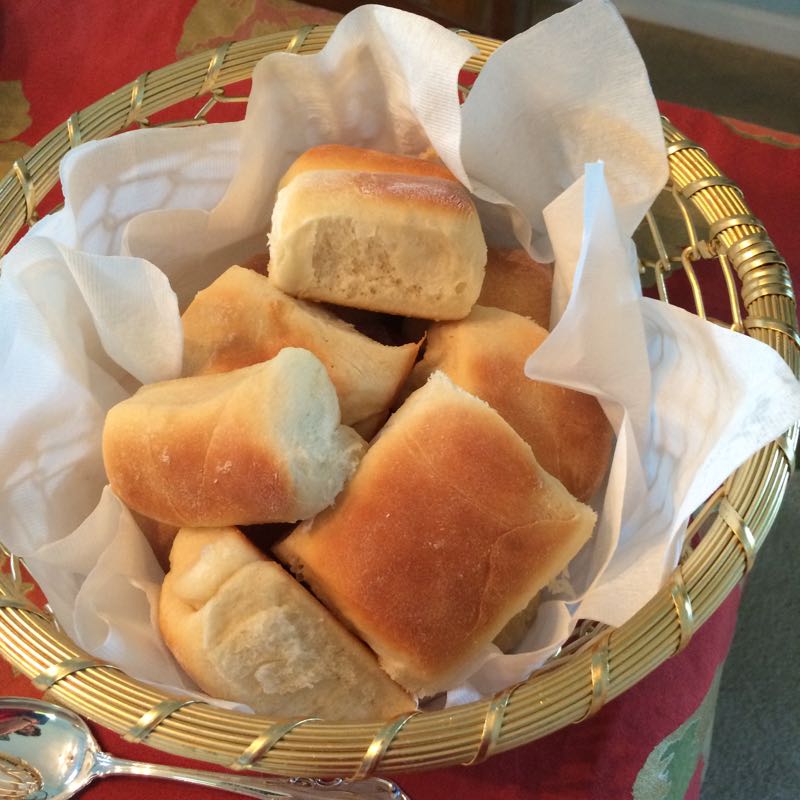
Thanksgiving Rolls_1

These are a basic roll recipe, without too much egg, so they are light, white and fluffy and taste very good.  I made them last year as well as this year, and we loved them both times.  This is from the Fleischman’s Bake It Easy Yeast cookbook, a staple in my house.  Although it was published in 1973, and retails on Amazon for $196.00 (gotta love those bots), this recipe can also be found on Breadworld by Fleischman, which has many of the recipes I love.

4-3/4 to 5-1/4 cups all-purpose flour
1/3 cup sugar
2 envelopes yeast (or 4 1/2 tsp. yeast)
1-1/2 teaspoons salt
3/4 cup milk
3/4 cup water
1/4 cup butter, melted
1 egg

For top, if desired: 1/4 cup butter, melted

Directions
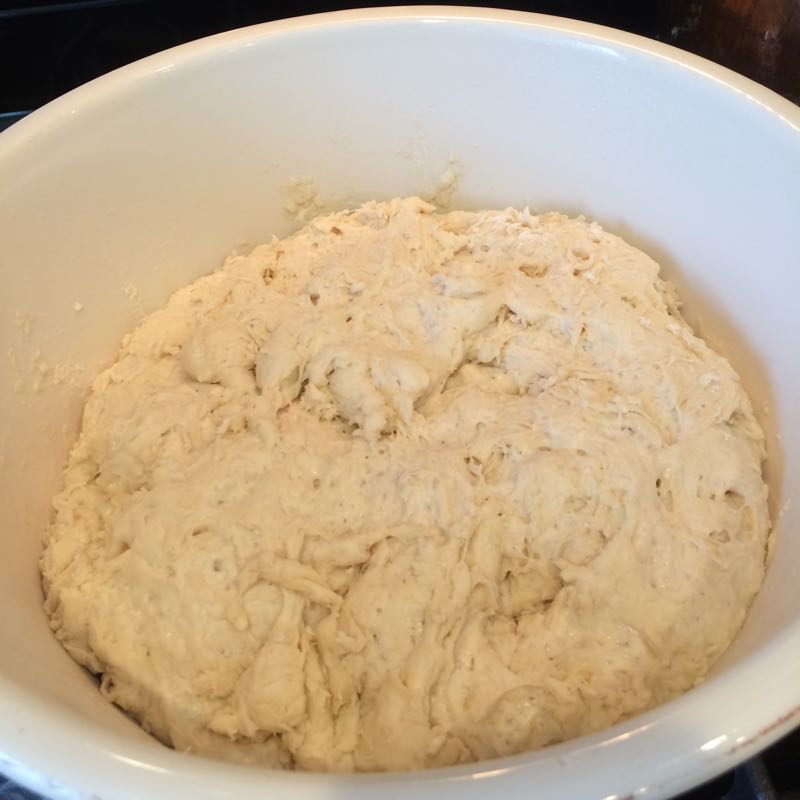
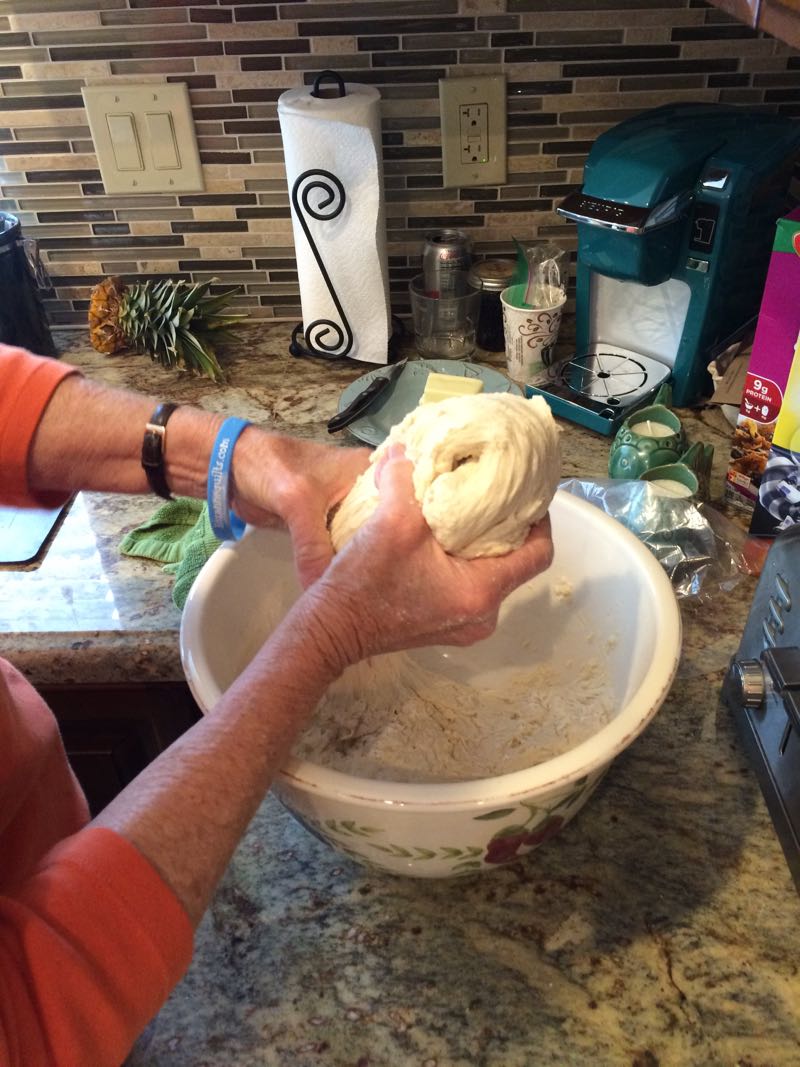
Combine 2 cups flour, sugar, undissolved yeast and salt in a large mixer bowl. Heat milk, water, and 1/4 cup butter until very warm (120° to 130°F). Stir into flour mixture. Beat 2 minutes at medium speed of electric mixer, scraping bowl occasionally. Add egg and 1/2 cup flour; beat 2 minutes at high speed. Stir in enough remaining flour to make a soft dough. Knead on lightly floured surface until smooth and elastic, about 8 to 10 minutes. Cover; let rest 10 minutes. (Or, if desired, place dough in a greased bowl, cover with plastic wrap, and allow to rise in refrigerator for 12 to 24 hours.)

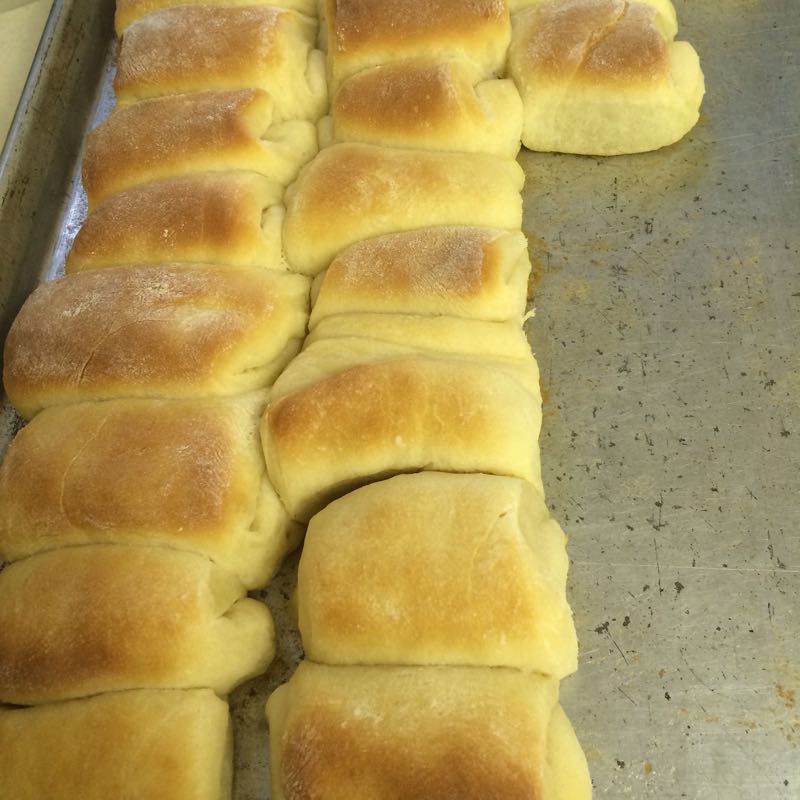
Thanksgiving Rolls_2Divide dough in half; roll each half to a 12-inch square, about 1/4-inch thick. Cut each into 6 (12 x 2-inch) strips. Cut each strip into 3 (4 x 2-inch) rectangles. Brush each rectangle with melted butter. Crease rectangles slightly off center with dull edge of knife and fold at crease. Arrange in rows, slightly overlapping, on greased baking sheets, with shorter side of each roll facing down. Allow 1/4-inch of space between each row. Cover; let rise in warm, draft-free place until doubled in size, about 30-45 minutes.  Take the time to let them get nicely risen.

Bake in preheated 400°F oven for 13 to 15 minutes or until done. Remove from sheets; cool on wire rack. Brush with more melted butter, if desired.

NOTE:  I do not like the RapidRise yeast, as I feel the breads go too stale when using that (must be the conditioners they have in there, or something).  Regular yeast is what I used, but made sure to allow a bit more time for the rising.

Mary’s Bread • from the Beachside Quilting Retreat

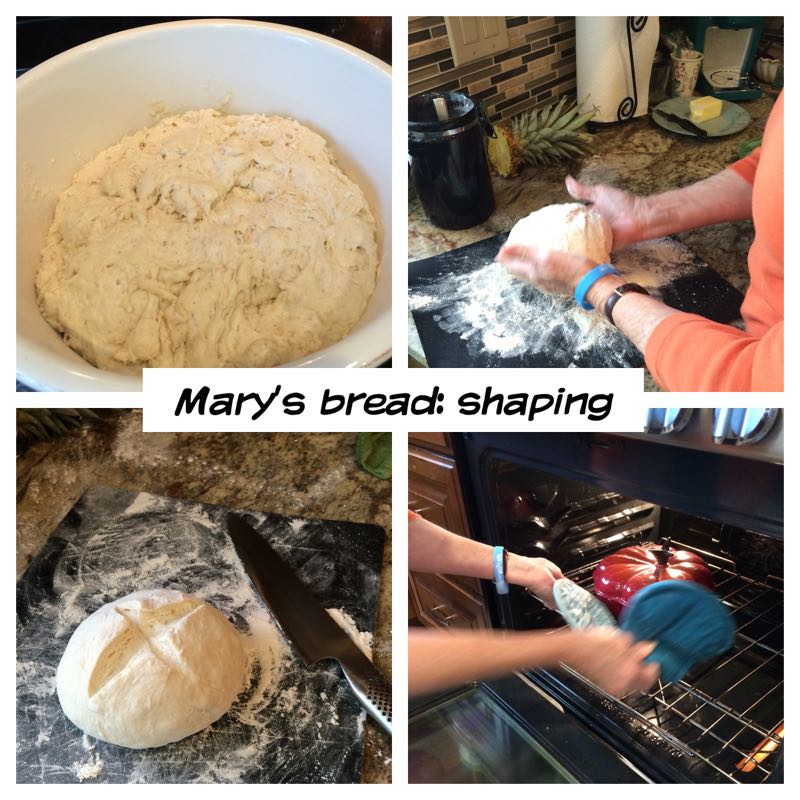
Marysbread_9At our recent Beachside Quilting Retreat, Mary — our hostess — brought a loaf of bread to serve us that first night and we all raved over it, asking her lots of questions, jotting down the recipe.  Two days later, when we went to Summerland’s antique store, where we found two pumpkin-shaped Le Creuset pots: I bought one and she bought the other, and that afternoon, we had a bread-making lesson in between all the sewing and quilting.  While the ingredients are simple and easily whipped into a ragged-looking dough, it’s her cooking method that sets this bread apart.  The heavy enameled cast-iron pot is set into a cold oven, which is then preheated for a long period of time.  This is what she calls the “brick-oven” method of baking as heat and moisture surrounds the baking dough, ensuring a nice crust.  This recipe makes three loaves.Marysbread_1
Measure out 3 cups lukewarm water.  Add 1 and 1/2 T. yeast (2 packages of regular yeast) and 1 T. kosher salt (table salt is okay); let it sit for a few minutes to “bloom.”  Stir in 32 oz. flour, roughly 6 to 7 cups.  Stir with big spoon and cover with plastic wrap, letting it rise in a corner of the kitchen. While it will rise for a total of 2 hours, after it’s risen for roughly 1 hour set the cast iron pot with its lid into a cold oven and preheat the oven for 45 minutes to a temperature of 475 degrees F.

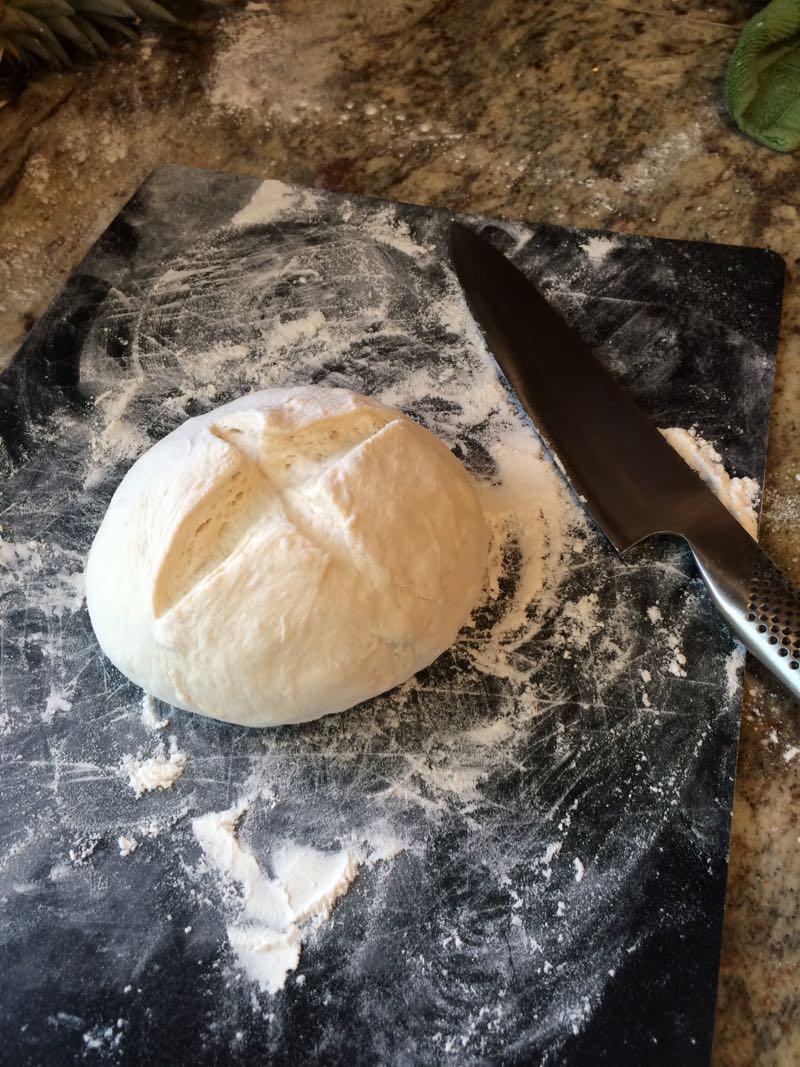
Marysbread_3When the dough has risen for two hours, divide into thirds by grabbing about one-third of the dough. Mary says it’s ragged looking, but keep going. Using lots of flour that’s been spread onto either a pastry cloth or a cutting board, shape it into a ball. Cut an “X” into the top of the dough using a sharp knife or razor blade.

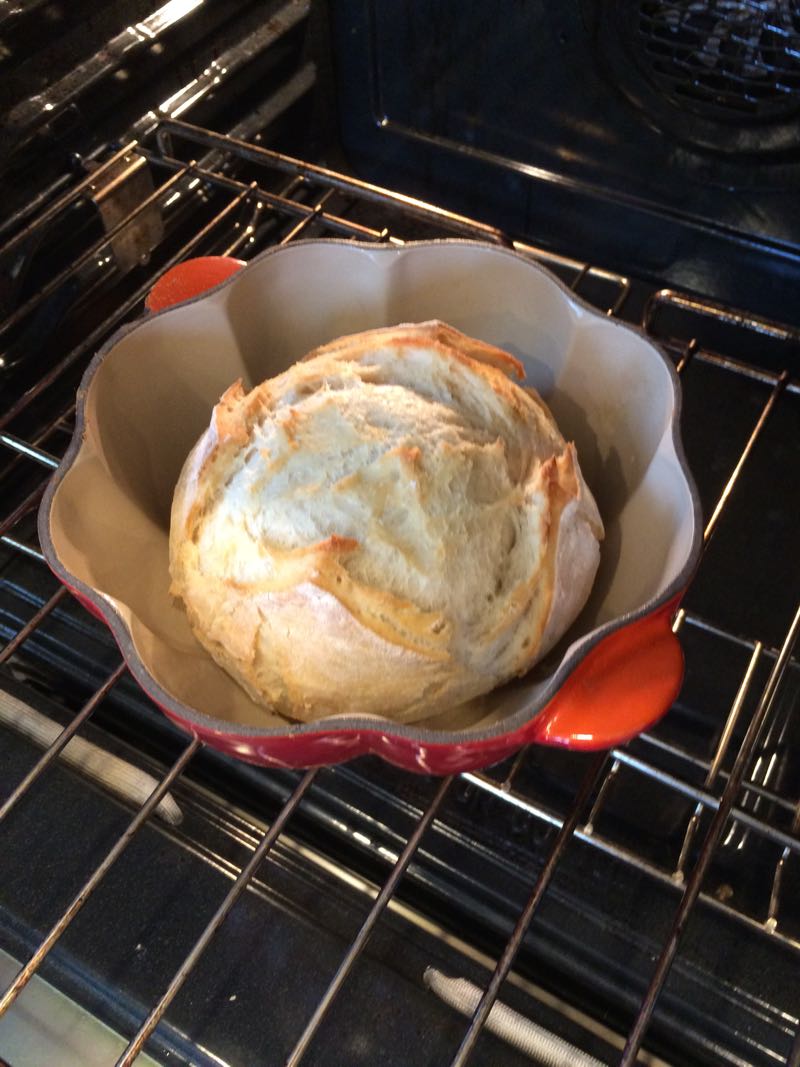
Marysbread_4 Marysbread_5Set ball into hot pan, being careful not to burn yourself. Cover with the preheated lid and cook for 20 minutes.

Marysbread_8Uncover, and cook for 10 more minutes or until it is a nice golden brown. Either tip out the bread — or grab from the pot — onto a counter and/or rack; let cool.

Cook’s Notes:
On the second and third loaf (since the dough has been in the fridge), put the dough out onto the floured surface to come to room temp while the oven heats up. Mary says she has left the dough in the fridge for as long as 12 days. The only noticeable effect has been that the dough gets more sour-tasting.

Variations:

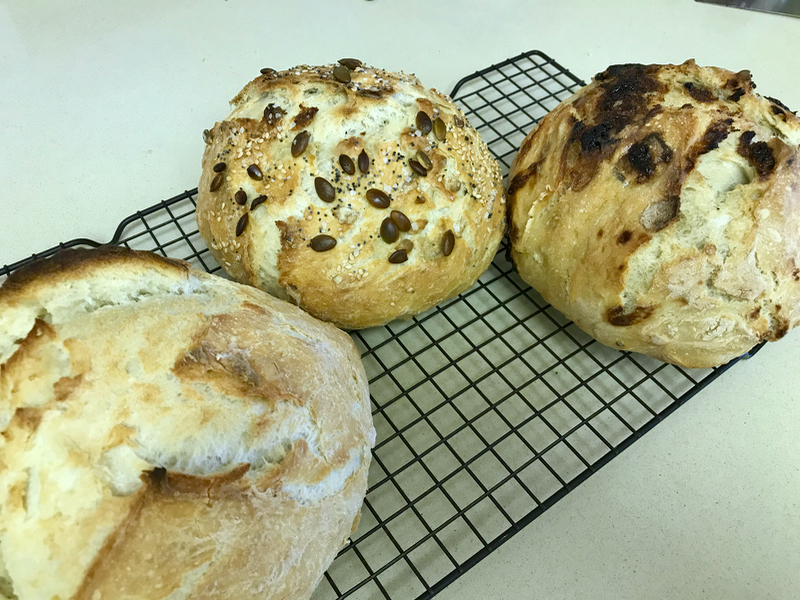
After rising, I divided the loaves into three, shaped the first one (lower left) and started it baking.  I did cut an X into this one.

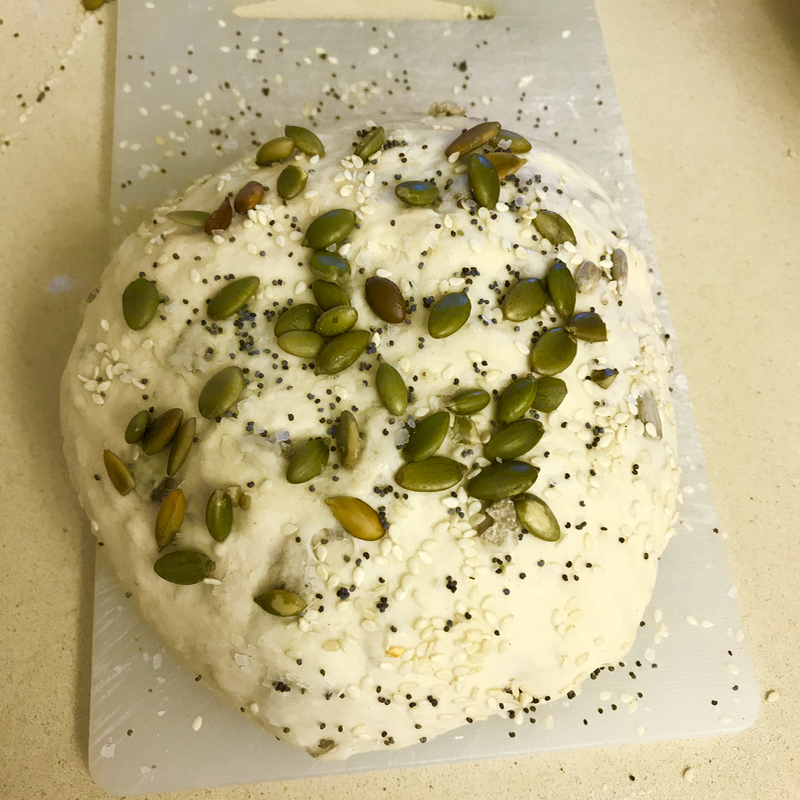
To the second blob, I added 1/3 cup sunflower seeds, massaging it through the mass.  After shaping, I then pressed onto the top: pepitas (sunflower seeds), a shake of poppy seeds, a shake of sunflower seeds, a shake of kosher salt; no cutting of an X in the top.  After the first loaf came out of the oven (I only have one pan), I baked that.

To the third blob, now quite sticky as it’s been rising a little more, I added 1/3 cup chopped high quality baking chocolate and 1/3 cup coarsely chopped pecans. (Don’t use white chocolate chips as you want the chocolate to melt into the bread, not remain intact; look for the bar type of white chocolate that has cocoa butter in it.) It’s a lot to mush into the bread dough, I admit, but when it was time to shape it, I concentrated on poking the bits back into the loaf, keeping them from emerging from the top.  When it bakes, as I also didn’t cut an X in the top.  The dark blobs (above) are the melted, baked chocolate that did emerge through while baking, but it tasted fine.

I did this loaf last in case there was residue of chocolate in the pan: there was, but it brushed right out.  That would be something to check for if you are making all three loaves with the white chocolate.

I would like to try mixing the chocolate/pecans with the flour and incorporating it that way, but this time, I wanted three different loaves.

Panzanella

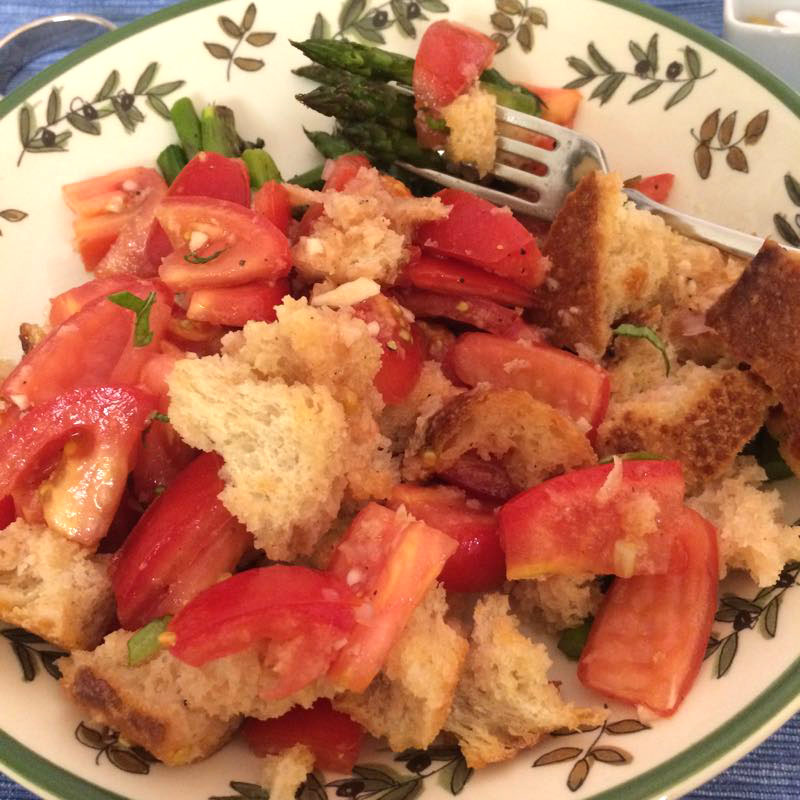
PanzanellaI’ve made all types of panzanella, but I think this recipe is really fabulous.  I was traveling in Scandinavia, where the travel author Rick Steves says their favorite vegetable is a potato, and began thinking of my garden back home, wondering how many tomatoes would be ready to pick when I returned.  In scanning the news one morning, The Washington Post published this recipe and I couldn’t wait to try it.  So the first thing I did when we climbed out of our car after our long trip was to check the garden for tomatoes.  But to my horror, the irrigation systems had been shut off while we gone, and my garden experienced the full force of 100+ degree temperatures: it was crispy and no tomatoes.  So I used some high-quality tomatoes from Costco for this dish and it was still good.  I can only imagine what it would have been with my own.

I purchased a sour dough loaf from Trader Joe’s for the bread, cutting off nearly half of to keep to the 8-ounce requirement.

Recipe adapted from recipes by chef-restaurateur Fabio Trabocchi of Fiola, and from J. Kenji Lopez-Alt, culinary director of SeriousEats.com.

Ingredients
3 cups packed, torn pieces sourdough bread (including crusts; from an 8-ounce loaf)
1/4 cup olive oil
2 1/4 pounds ripe heirloom tomatoes, hulled and cut into bite-size wedges
1 teaspoon kosher or sea salt, plus more as needed
1 teaspoon minced garlic
1 tablespoon minced shallot
1 tablespoon white wine vinegar
Freshly cracked black pepper
10 fresh basil leaves, stacked, rolled and cut into very thin slices (chiffonade)

Preheat the oven to 350 degrees.

Arrange the bread pieces on a rimmed baking sheet, then drizzle half of the oil over them and toss to coat. Bake for 15 minutes, until the bread is dried and fragrant but not browned. Let cool.

Meanwhile, place the tomatoes in a colander set over a mixing bowl. Sprinkle the tomatoes with the teaspoon of salt; let them drain for about 20 minutes (no more), gently tossing them every few minutes. Transfer the tomatoes to a serving bowl along with the cooled bread pieces; toss to incorporate. Reserve the tomato juices in their bowl; there should be a scant half-cup. [Note: I had more, and used it all.]

Add the garlic, shallot and vinegar to those juices, then gradually whisk in the remaining 2 tablespoons of oil to form an emulsified vinaigrette. Season lightly with salt and pepper. Pour over the tomato-bread mixture; use your clean hands to gently toss and coat.

Scatter the basil over the salad; serve right away.

Pasta with Burst Cherry Tomatoes

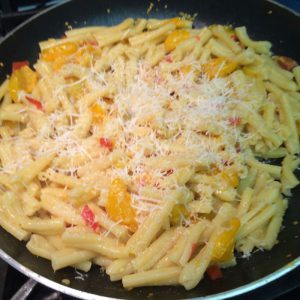
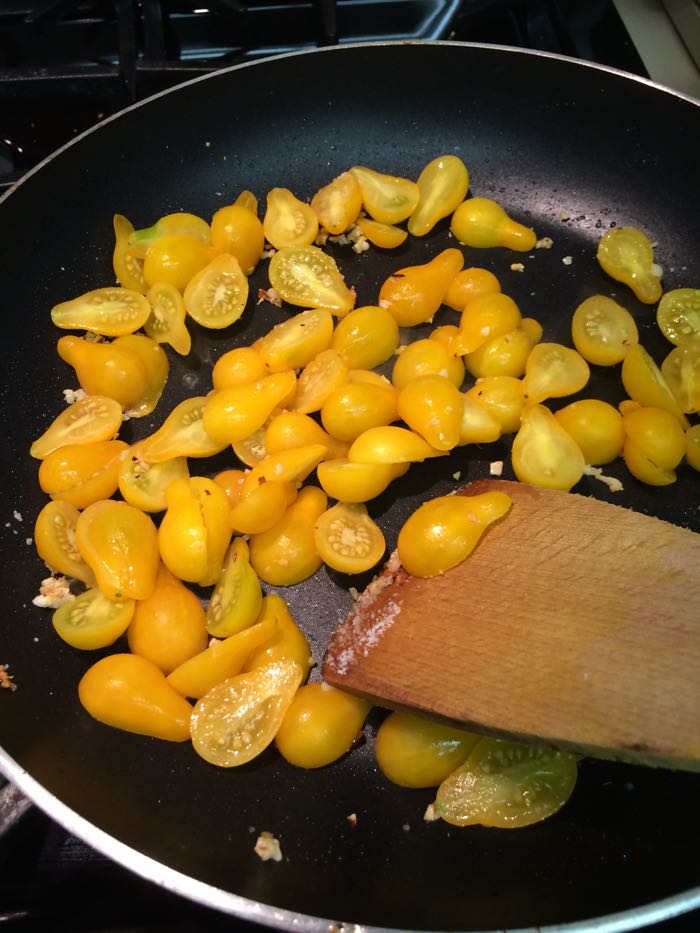
IMG_6033This recipe, found on the New York Times’ Recipe Site is a total winner, if you’ve got cherry tomatoes going gangbusters in the garden, which I do.  Melissa Clark made hers with red tomatoes, but I always plant the little golden plum cherry tomatoes and they keep going when all the other toms in the garden have given up because of the heat.  While she calls for fusilli pasta, any small shaped pasta will do.  I adjusted the ratio of tomato mixture to pasta, using a little bit less pasta than she called for.  Lastly, my garden’s mint wasn’t producing, so I omitted that as well, but I’m looking forward to trying it!

IMG_60311 pound fusilli pasta
1 tablespoon extra-virgin olive oil, more for drizzling
6 ounces pancetta, preferably thick cut, diced (available at Trader Joe’s)
4 garlic cloves, smashed and peeled
Pinch of red pepper flakes
Fine sea salt and black pepper, as needed
1 quart cherry or grape tomatoes, halved
3 tablespoons butter
Fresh ricotta cheese, for serving (optional)
3 cups whole mint leaves, torn (I didn’t use)
4 scallions, preferably red scallions for color, thinly sliced
Flaky sea salt, to finish

PREPARATION

  1. Bring a large pot of heavily salted water to a boil. Add pasta and cook until 1 minute shy of al dente. Drain pasta, reserving 1/2 cup pasta cooking water.
  2. Meanwhile, heat a large skillet over medium-high heat for 15 seconds, then add the oil and heat until it thins out and easily coats the pan when swirled. Add pancetta and cook until it starts to render its fat, about 2 minutes. Add garlic, red pepper flakes and a large pinch of salt and pepper and cook until fragrant, about 2 minutes. Add tomatoes and cook until they burst, turn golden at the edges and shrivel up slightly, about 5 to 8 minutes.
  3. Add pasta to pan and toss with tomato-pancetta mixture; if the mixture looks dry add a little pasta cooking water a few tablespoons at a time. Cook over high heat until the pasta finishes cooking in the sauce. Add the butter and toss until it melts and coats everything.
  4. Divide pasta among warmed pasta bowls. Garnish with dollops of ricotta if desired, and top with a generous mound of fresh mint and scallions. Drizzle with olive oil and sprinkle with sea salt and more pepper before serving.

Zucchini Pasta

IMG_5831

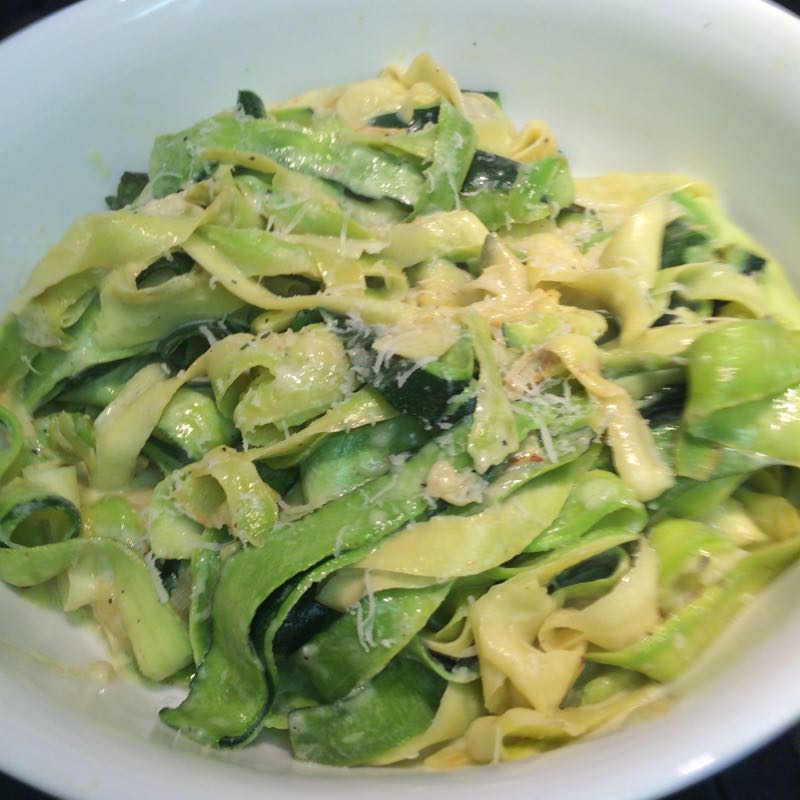
This dish came about because we had too much zucchini in our garden.  Well — instead of too much — a bounteous harvest of zucchini.  I found this recipe on the New York Times website, and followed it pretty much to the letter.

Ingredients
2 pounds zucchini
2 tablespoons extra virgin olive oil
Salt and freshly ground pepper

¼
cup freshly grated Parmesan, for serving (more to taste)
¼ cup (approximately) light cream
IMG_5826
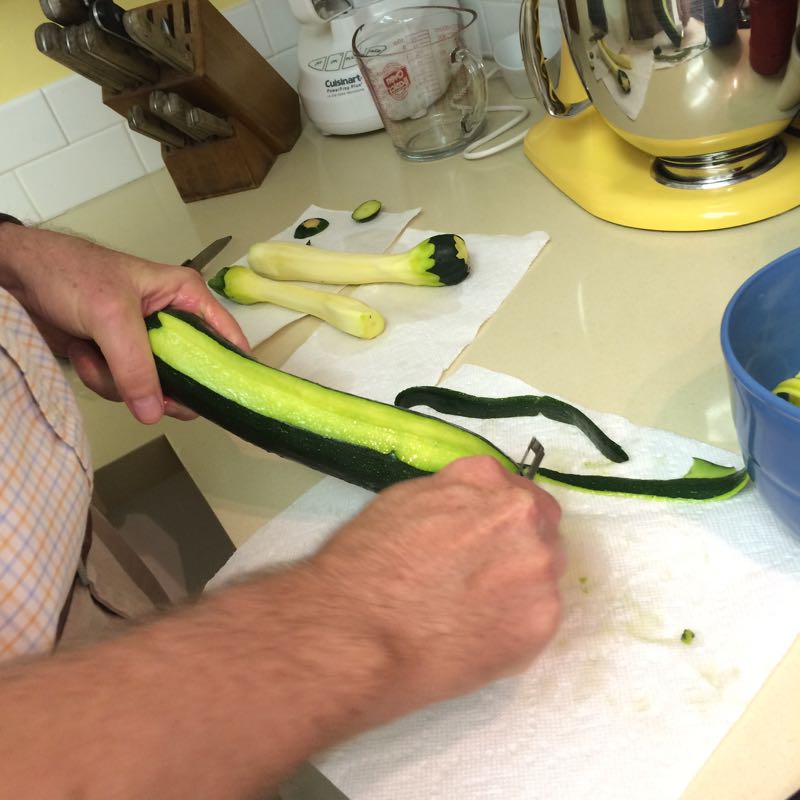
Wash several zucchini from the garden; pat dry.  Slice off lengthwise ribbons of zucchini, using a vegetable peeler.  Peel off several ribbons from one side, then turn the zucchini and peel off more ribbons. Continue to turn and peel off ribbons until you get to the seeds at the core of the zucchini. Discard the core. You can also do this on a mandolin, adjusted to a very thin slice.
IMG_5829
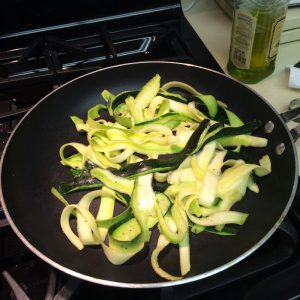
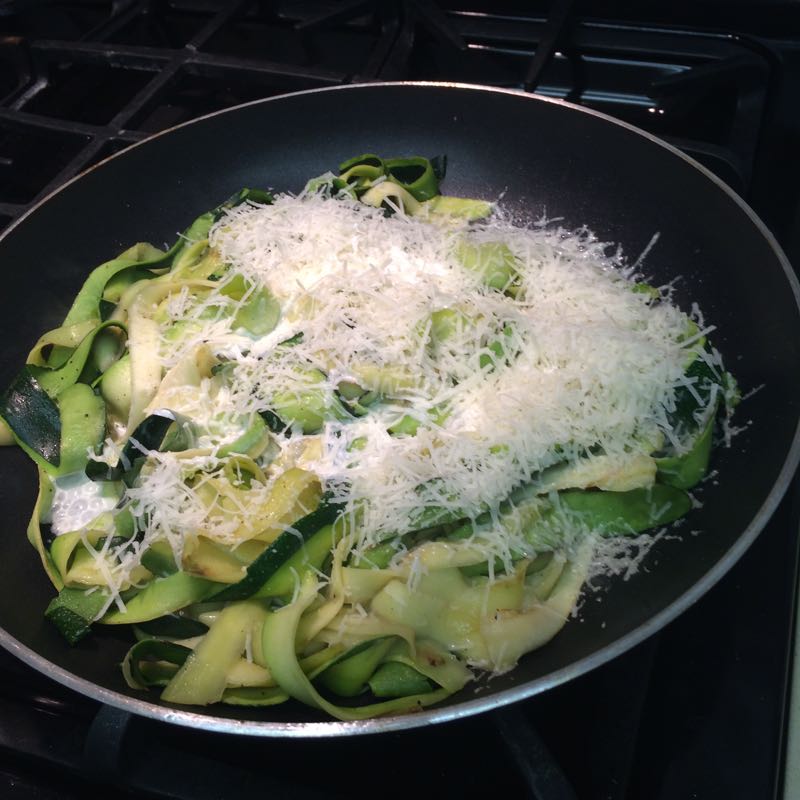
Heat 1 Tablespoon of the oil in a large non-stick pan, over medium-high heat, and when it is hot, add about half of the zucchini ribbons, salt and pepper.  Toss and cook, keeping the zucchini in motion until it is just soft and barely transluscent, but not browned (about 2-3 minutes).  Set aside, and cook the second batch.IMG_5830Put both batches back in the pan, and pour over a little bit of cream, then add the grated cheese, again tossing lightly over medium heat.  Adjust salt and add freshly ground pepper to taste, and transfer to a serving dish.We topped ours with a fresh bruschetta-type tomato sauce.

Brined Porchetta Pork Chops

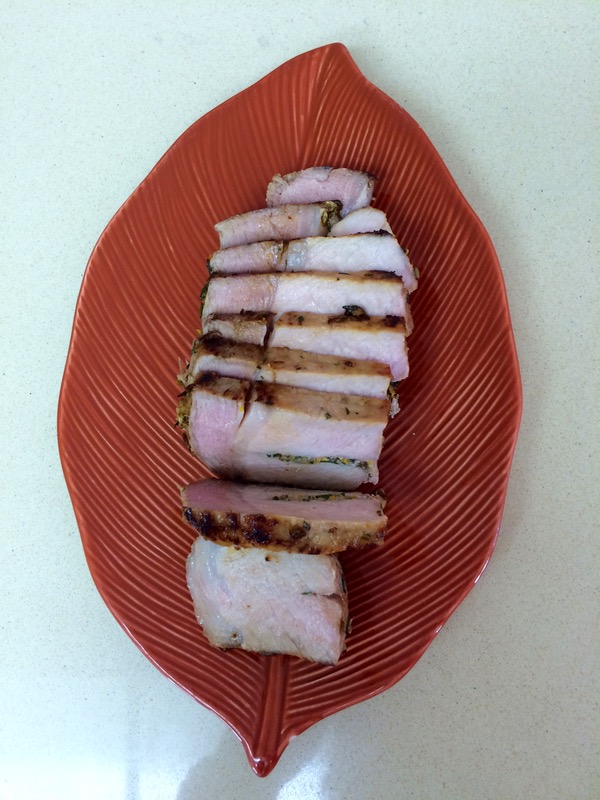
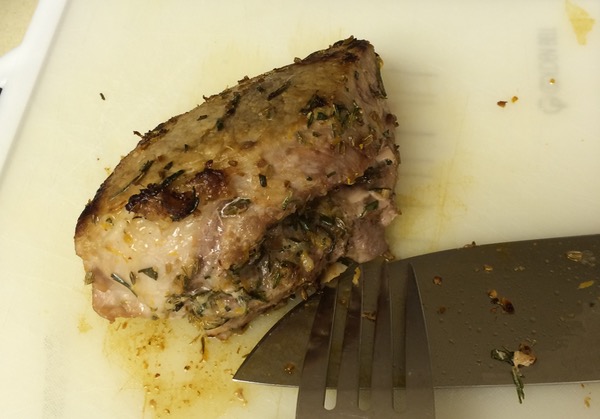
Pochetta Pork CHops_1 Pochetta Pork CHopsWhile looking for a recipe for the newly purchased pork chops from the Big Box store, I found this one.  But every caution says to use a pork chop with the bone still in. . . but mine were boneless.  So I compromised by brining them, and they turned out delicious.  The porchetta part is a variation of Melissa Clark’s recipe from the New York Times.

2 bone-in pork chops, 1 1/4 to 1 1/2 inches thick
2 teaspoon coarse kosher salt, plus a pinch–divided
1 cup apple juice
1 lemon
2 garlic cloves, minced
2 tablespoons chopped rosemary
Large pinch red pepper flakes
½ teaspoon fennel seeds, lightly crushed
2 tablespoons chopped fennel fronds, more for garnish (nice, if you have them, but the recipe will survive without them)
2 tablespoons olive oil

Preparation

To brine: Put the chops in a quart freezer ziploc bag, or a container that is fits the chops snugly.  Mix together 1 teaspoon kosher salt and the apple juice, and pour over the chops.  Let brine overnight, then discard brine and proceed with recipe.

Heat oven to 350 degrees. Pat pork chops dry and, using a very sharp paring knife, cut a large pocket into the fat-covered edge of each chop. Season chops all over with 1 teaspoon salt, including inside pockets.

Finely grate zest from lemon and put in a small bowl. Cut lemon lengthwise in quarters for serving (opt).

Using the flat side of a knife, mash garlic with a pinch of salt until you get a paste. Add to the bowl with the lemon zest and stir in rosemary, red pepper flakes, fennel seeds, 2 tablespoons fennel fronds and 1 tablespoon olive oil.

Divide filling between pork chops, stuffing some inside pockets and rubbing the rest on the outside.

Heat a large ovenproof skillet over high heat and add 1 tablespoon olive oil. Sear pork chops on one side for 5 minutes, or until golden brown. Gently turn over chops and cook for another minute, then transfer skillet to oven. Cook until meat is just done, about 5 to 10 minutes longer (internal temperature should read 135 degrees on a meat thermometer). Transfer pork chops to a plate, tent with foil, and let rest for 10 minutes before serving. Garnish with fennel fronds and lemon wedges.