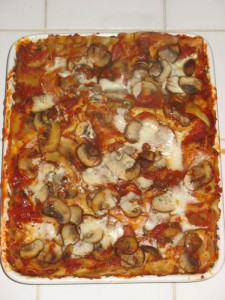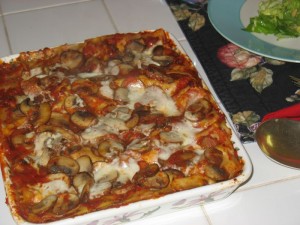
Elizabeth’s Vegetable Lasagna

I don’t know how I dreamed up this dish.  I guess it was when I had to take something to a church supper, and I didn’t want another lasagna that weighed 40 tons on the plate and would send a person into cardiac arrest.  I wanted something that had a rich taste, but didn’t have the greasy, overloaded-with-cheese experience that is germane to this dish.  Now those types have their place.  Just not on my plate.

This recipe is open to variations, and is always a winner, even though that is a cliche.  I think the inclusion of the mushrooms give it a meaty taste, the vegetables bring it juiciness and the minimal cheese brings it richness.

We make this a lot in summer and it is really good leftover in lunch containers.  I like it also in winter as it is satisfying.  Okay, enough of telling you what it is and isn’t–the recipe follows with pictures.  Make it yourself and decide.

Ingredients:
about 1 pound crimini mushrooms, also known as brown mushrooms, cleaned and sliced
1 red sweet bell pepper, julienned
1 yellow sweet bell pepper, julienned
3 medium or 2 large zucchini, scrubbed clean and sliced
9 oz package of no-boil flat lasagne noodles (I use Barilla brand in a blue box)
1 jar spaghetti sauce (I use Ragu with extra mushrooms)
1/2 to 1 cup water
less than 8 oz. whole-milk mozzerella cheese, cut in thin slices (I use Precious brand, in shrink wrap)  I can’t give you an exact amount because while I use it sparingly, you may want more.

Start by sauteeing about a pound of mushrooms in a small amount of olive oil and butter (equal parts).  Don’t crowd the pan–do it in several bathes.  Then slice up the bell peppers and do the same. The zucchini needs the same workup.

Place about 1/2 cup of sauce in the bottom of a baking dish, approximately 9 by 13-inch size.  Spread the sauce to cover the bottom, then place a layer of noodles on top of that, covering the bottom of the dish.  It’s okay to break some in half if you need to do that, now, or later on.  Add water to the top of the spaghetti sauce jar, replace lid and shake to blend.

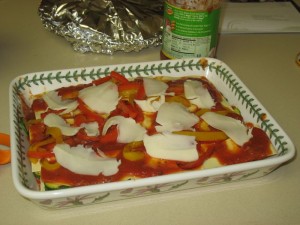
Top the noodles with about one-third of your mushrooms.  Spoon some sauce over that, then using a light touch, place the thin slices of cheese on top of that.  I do not cover the surface.  Instead it looks more like the red squares on a checkerboard, with the black squares being left devoid of cheese.

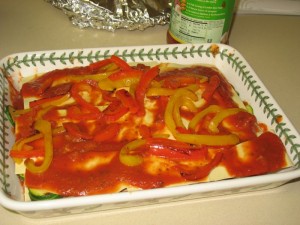
Layer in more noodles, more sauce, and then add about another 1/2 cup of water to the jar of sauce, shake to blend.  Your next layer can be the peppers, as shown above, or zucchini. There’s no set order, just alternate mushrooms, peppers, and zucchini until the pan is full.

This is how I place my cheese: sparingly. I promise you that you won’t miss the excess.

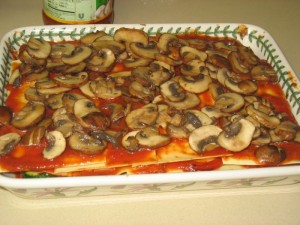
Keep layering (this is the mushroom layer–I heap those babies on) until you end with noodles.  Or mushrooms, or whatever. Place the rest of the sauce on top of that (you can always slosh in some more water if you’re running low on sauce), then cheese. Stroke the dull side of a large piece of tinfoil with a cube of butter to grease it, then place it over your lasagna, crimping to seal the edges.

Bake in a 375-degree oven until bubbly, about 50-60 minutes.  If your cheese isn’t melted (take a peek), you can uncover your lasagna and bake for about 5 more minutes, until it is.  Let it stand for a about 10-15 minutes before serving, then enjoy!

Chocolate-Almond Cake, or Reine de Saba

For my birthday, I wanted to try this cake from Julia Child’s Mastering the Art of French Cooking.  No big culinary reason, other than it looked really good in the movie (however, their cake frosting is different than this one).  Usually every year Dave makes my cake for me; it’s one reason why I married him, but he’s working on a big project and I didn’t think it was fair to spring a scratch cake on him at this time.

The first thing you have to do is buy a new cake pan.  Yep.  Our American cake pans–the kind we all use on those double-layer cakes, are too short.  The pan has to be at least 1 1/2 inches deep. I had a coupon for Michael’s and went over there and bought one, but it’s lightweight aluminum.  If you want a heavier one, try Sur La Table, or a good cooking store.  With my coupon, however, the price was right.
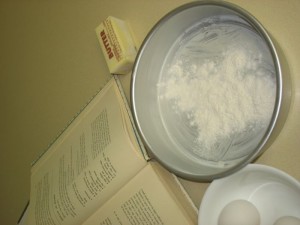
Butter the pan, using soft real butter and a corner of a paper towel, then dust it with flour, shaking out the excess.

Ingredients:
4 ounces (squares) semi-sweet baking chocolate
1 stick, or 1/4 pound softened butter
2/3 cup granulate sugar
3 egg yolks
3 egg whites
pinch of salt
1 Tbs. granulate sugar
1/3 cup ground almonds
1/4 teaspoon almond extract
3/4 cup sifted cake flour (confession: I stirred mine up to lighten it, and used regular flour)

Method:
Preheat the oven to 350 degrees.

Melt the chocolate over almost simmering water.  Julia says to add 2 Tbls rum or coffee–a problem, because in this house, we have neither. So I flipped to her page about “melted chocolate” and it says I can use water as well.  So I did.  Don’t have a double boiler?  Get creative.  I ended up using the bottom half of my juicer.  You could also throw some forks or something in the bottom of pan, bring the water just to below them, then set a metal bowl over the water.  Kmart also sells double boilers for $40, which is why I was improvising.

Cream the butter and sugar together for several minutes until the form a pale yellow, fluffy mixture.  Beat in the egg yolks until well-blended.

Beat the egg whites and  salt in a separate bowl until soft peaks are formed; sprinkle on the sugar and beat until stiff peaks are formed.

Blend the melted chocolate mixture into the butter/sugar, then stir in the almonds (Julia calls them pulverized–I call them: through them into your food processor and whirl along until they are finely ground.)  Don’t overmix.  Remove the beater, and then, with a spatula, immediately stir  in one-fourth of the stiffly beaten egg whites to lighten the batter.

Then, delicately fold in a third of the remaining egg whites, and when partially blended, sift on one third of the flour and continue folding.  Alternate rapidly with more egg white and more flour until all the eff whites and flour are incorporated.

Folding In Egg Whites Have You Nervous?
As one website described the process: Using a large spatula, cut a path down the middle of the mixture with the edge of the spatula. Then gently turn half the mixture over onto the other half. Continue cutting down the middle and turning a portion over. Don’t stir. The purpose of folding is to retain the air you have beaten into the whites. Be careful to only work the batter enough to incorporate the whites, and never use an electric mixer for this step.  You can Google “folding egg whites” to find videos on this process, if you are the type of person who likes to thoroughly understand a step before attempting it.

Julia says the whole process should “not take more than a minute and do not attempt to be too thorough.  It is better to leave a few unblended patches than to deflate the egg whites.” Okey-dokey.

Back to the cake:
Turn the batter into the cake pan, pushing the batter up to its rim with a rubber spatula.  Lick the bowl clean, because you can’t help yourself.
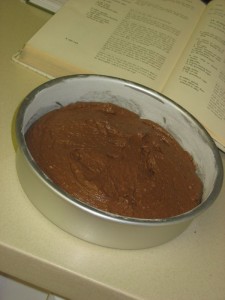
Bake in middle level of a preheated oven for about 25 minutes.  Cake is done, she says, when it has puffed and 2 1/2 to 3 inches around the circumference are set so that a tester plunged into that area comes out clean; the center should move slightly if the pan is shaken and a tester comes out oily.  We had the latter, but not the former (it didn’t move slightly).
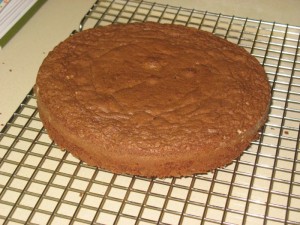
Allow cake to cool in the pan for 10 minutes.  Run a knife around the edge. and reverse the cake onto a rack.  Allow it to cool for an hour or two; it must be thoroughly cool if it is to be iced.

Chocolate-butter icing, or Glacage au Chocolat
1 ounce semi-sweet baking chocolate
1 Tbls. rum or coffee or water
3 Tbs. unsalted butter

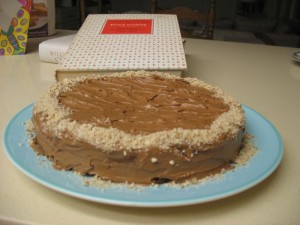
Melt the chocolate with the water, over a double boiler until chocolate has melted into a very smooth cream.  Remove from the hot water, and beat the butter into the chocolate, a tablespoon at a time.  Then beat over cold water until chocolate mixture is cool and of spreading consistency.  Spread it at once over the cake and garnish with almonds.

I have no idea why I decided to try this one.  After watching the movie where the actors ate this cake so heartily that they’d smeared the frosting all over their faces, I assumed it would be the simplest version.  Although this frosting was good, it was not so good that we wanted to smear cake all over ourselves.  I’d double the frosting amounts, for sure, or even try her Butter Cream frosting I, with powdered sugar.  Dave kind of looked funny when I told him there was no powdered sugar in this icing.
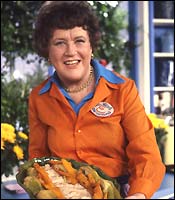
According to the Boston Globe, Julia Child writes in ‘‘The Way to Cook’’ that this was the first French cake she ever ate, prepared by her coauthor Simone Beck, ‘‘and I have never forgotten it.’’

This cake is also known as the Queen of Sheba cake, apparently in some allusion to the opera, and there seems to be a billion posts of this recipe online, some much fancier than mine.  Have fun looking. . . and baking.
Sole-Wrapped Scallops with Tomato Vinaigrette

Whenever I walk down Costco’s book table, esp. the cookbook section, I always seem to pick up a new book or four.  I now have a dedicated shelf to cookbooks, where before there were none, so thought I should open them and use them besides just reading them for enjoyment and ideas.  One book I’ve had for a while is The Williams-Sonoma Cookbook, published in 2008, and that’s where I found this recipe.  I wanted something light but impressive for my birthday dinner and this filled the bill.

When the house was full of children, we had balloons on the banister, cards and presents and chaos denoting it a different–and special–day.  Now that there’s just the two of us, I always serve birthday dinners on china.

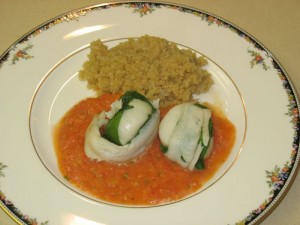
This recipe makes four servings, but you can adjust it easily.  Make the same amount of vinaigrette, and adjust the fish portions.  I served it with a butter lettuce salad with lemon vinaigrette and quinoa, with sauteed shallot (do first, then add the quinoa and chicken broth).

Vinaigrette:
2 tomatoes, peeled and seeded and chopped
2 Tbs. fresh minced tarragon or flat-leaf (Italian) parsley
1 Tbs. minced shallot
6 Tbs. olive oil (of good quality)
2 Tbs. fresh lemon juice (none of that stuff in the container–ICK)
Course salt and freshly ground pepper

In a blender or food processor, combine the tomatoes, tarragon, shallot, oil and lemon juice and season to taste with S&P.  Blend or process to make a smooth sauce.  Set aside.

Main Dish
4 sole, flounder or fluke fillets (I used sole), skinned
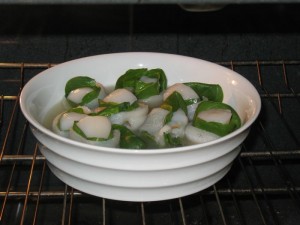
20 young spinach leaves, stemmed and halved lengthwise (you can see from my picture that I’d forgotten this step)
12 medium to large sea scallops, small muscles removed
2 cups fish stock (or equal parts of clam juice and chicken broth–which is what I used)

Preheat the oven to 400 degrees F.  Cut each fillet lenthwise into thirds.  Place thd strips on a work surface (I use a double thickness of wax paper), and season to taste with salt and pepper. Cover the strips with the spinach leaves.  Place a scallop near the slender end of the each strip, and starting from that end, roll up the fillet, enclosing the spinach leaves and scallop.  Use your two extra hands if you need to (just kidding, but I did feel like I needed a pair), then secure the roll with a toothpick.  Places the rolls in a baking dish and pour the stock over the fish.

Into the oven it goes, for about 20 minutes–just enough time to make the quinoa and assemble the butter lettuce salad.

Bake the rolls, basting occasionally (I just turned them over once), until the scallops are firm and opaque throughout (like I mentioned–for about 20 minutes).  Just before serving, heat the vinaigrette to warm, then spoon onto the plate.  Place fish rolls in the center of the viaigrette, twisting the toothpick carefully to remove it.  Garnish with more tarragon or parsley, if you want to.

It was so good, we had seconds, and didn’t feel the least bit guilty doing so.  This is an EASY dish to make, but it looks and tastes really fancy-schmancy.

Baked Cranberry Pudding

(photo to come later on–I know, I know.)

Jake, one of my blonde nephews, married Katie, a lovely dark-haired young woman, and she had a double reception with her sister?  Her cousin?  I can’t remember, but I do remember that it was in a huge house, with a balcony overlooking the main entry hall, lots of small cozy rooms off of the main living room area and many, many guests.  The bride’s mother had enlisted the help of her friends in staging this reception, and besides the usual wedding treats, they passed trays filled with cups of this warm, soggily-delicious pear-cranberry cake.  It took me a while, but I finally tracked down the recipe.  I think of Jake and Katie every time I make this.  Serve with Elizabeth’s Lemon Butter Sauce.

Baked Cranberry Pudding

2 eggs
2 cups sugar
1 and 1/2 cans (about 14 oz size) pears, juice and all
2  cups flour
2 tsp baking soda
2 cups fresh cranberries, washed and sorted
2 Tablespoons REAL butter

In a stand mixer, beat together the eggs and sugar until well-blended, about 3 minutes.  Add pears, then dry ingredients mixed together.  Stir in cranberries.  It will be slightly sloshy.

Melt butter in 9 by 13-inch pan.  Pour batter into pan.

Bake 350 degrees for 45 minutes.  (It will be slightly moist in center.)

Note: If there appears to be more juice than pears in your canned pears, hold back about 1/4 to 1/2 cup of pear juice until you see if it’s the right consistency.  Yes, I know.  You may have to guess a little the first time, but like any good recipe, this one become familiar the more you make it.

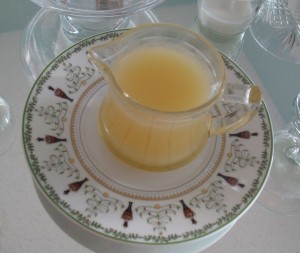
Elizabeth’s Lemon Butter Sauce

This is the kind of cake sauce that people will attempt to drink right out of the pan, it’s that good.  For many years I taught a monthly lesson in our Women’s Church Auxiliary and invariably, every December, my lesson would fall on the Sunday before Christmas.  That first time, I organized a program of stories, songs, and singing, and then brought out Gingerbread Cake with Lemon-Butter Sauce for the finale.  All of us women would sit around for the last few minutes of our meeting, eating the delicious treat and just visiting.  I would play Christmas music on a tape recorder (those were the days) while the women who had spent the better part of the last month shopping, planning, cleaning, wrapping, feeling frenzied and overwhelmed, could just sit.  Sit and enjoy each other’s company, the carols of Christmas and some warm gingerbread.  It was always one of my favorite moments of the season.

1/2 cup REAL butter

1 cup sugar

1/2 cup light cream

4 teaspoons freshly-squeezed lemon juice

1 teaspoon vanilla

1/4 teaspoon rum extract

a shake of ground nutmeg

Blend together and stir constantly while heating so it doesn’t scorch.  Cook until slightly thick.  Add the freshly-squeezed lemon juice, the rum and vanilla extracts.  Add a dash of nutmeg.  Serve warm over cake.  Try not to lick the spoon.

Note: I also serve this with the Old-fashioned Gingerbread Cake, Gingerbread Cake, Baked Cranberry Pudding, and the Apple Cake.

Apple Pudding

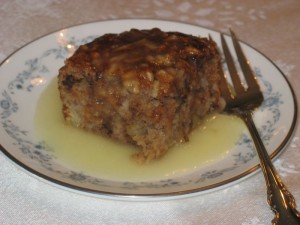
Who knows where I got this recipe, but it’s been a favorite of mine to serve at Christmas for just about forever.  For Thanksgiving it was always pumpkin and mincemeat pie, and for Christmas, it’s Gingerbread Cake and this.  It’s a moist cake with strands of fresh apple, crunchy walnuts and an old-fashioned English-cake-pudding texture.  It’s best served with Elizabeth’s Lemon Butter Sauce.

(Double the quantity for 9 x 13 pan)

1 cup sifted flour
1 teaspoon baking soda
1 teaspoon cinnamon
3/4 teaspoon nutmeg
1/4 teaspoon salt
1/4 cup butter
1 cup sugar
1 egg
3 large apples, peeled, cored and grated
1/2 to 3/4 cup chopped nuts

Sift together flour, cinnamon, salt, baking soda and nutmeg in one bowl.  In another bowl, whip together thoroughly: butter, sugar and egg until light and fluffy.

Add the grated apples to the egg mixture then blend in flour mixture.  Lastly add nuts and stir until blended.  Bake in greased 9 x 9 pan at 400 degrees F for 20-30 minutes.  Do Not Overbake!

Gingerbread Cake

(Photo here, later, but imagine a square of dark gingerbread cake)

I lived in Texas for four very warm years, as I was always surprised at how long into November I wanted to have the air conditioning running.  It made it hard to get into the “holiday spirit” when trying to bake pumpkin pies when it was 85 degrees outside.  A few of us got together one Christmas and decided to recreate An Olde English Repast for our ladies church program, figuring by going back to the Dickensian source would alleviate our homesickness for some frosty weather.  We made roast beef, Yorkshire pudding, corn pudding, a moist apple cake and of course, a Gingerbread Cake. I found the recipe in an old Sunset recipes book, which is so old, it’s falling apart.  We served it with Elizabeth’s Lemon Butter Sauce.

1 cup sugar
1/4 teaspoon salt
1 teaspoon ginger
1/2 teaspoon cinnamon
1/2 teaspoon cloves
1 cup salad oil
1 cup molasses (I use the green label kind)
2 teaspoons baking soda
1 cup boiling water
2 1/2 cups white flour
2 eggs, well-beaten

In a bowl, combine the sugar, salt, ginger, cinnamon, and cloves. Stir in the salad oil, then the molasses, mixing well.  Mix the soda into the boiling water and immediately stir into the mixture.  Gradually blend in the lfou, to prevent lumping.  Then mix in the eggs.

Turn into a greased 9×13 pan and bake in a 350 degree oven for about 40-45 minutes (Use 325 degrees for glass pans).  Makes 12 generous servings.

Bratten’s (New England-style) Clam Chowder

Bratten’s was the name of a seafood restaurant that began in Salt Lake City, but also had a satellite restaurant in Ogden Utah, where my parents used to go.

My father and mother lived for a time in Boston, New England as it was known and fell in love with their clam chowder; Bratten’s came close to what they remembered.

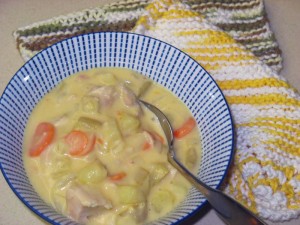
So, somehow I got the recipe (this was before the internet, so maybe from my mother?) and have made it and loved it for many years as it makes a thick chunky soup.  A niece, Lisa, asked if I had a good recipe, for she wanted to serve it on Christmas Eve.  So that’s what prompted this post.  When I get an original picture, I’ll post it, but for now, this one will have to do.

New England clam chowders are white, creamy soups.  If you want the red, tomato-based soup, that’s known as Manhattan-style clam chowder.

Bratten’s New England-style Clam Chowder

2 (6 1/2 ounce cans ) clams, or 1 pound minced clams with juice
1 cup finely chopped onion
1 cup finely diced celery
2 cups diced raw potatoes
1 quart milk
3/4 cup butter
3/4 cup flour
1 1/2 teaspoons salt
2-3 teaspoons red wine vinegar

Drain juice from clams and pour over vegetables (sometimes I have to add another can of clam juice to cover, or just use a little chicken broth or water).  Cook until tender, about 20 minutes.  Make a white sauce with the butter, flour and milk.*  Add undrained vegetables, clams (chopped, if desired) and vinegar and heat thoroughly.  Season with salt and pepper.  Cook’s Note: Don’t let it stand half warm on the stove.  After serving (immediately), stir it often to let it cool down and refrigerate.

*”Make a white sauce?”  Can you tell this is an old recipe?

To make a white sauce, melt the butter in a heavy pan, and add the flour all at once.  Cook, stirring, until this mixture–a roux–seems to become well-blended and cooked.  Add  the milk*, a little at a time, until it’s a creamy mix, then add the rest of the milk.  If the milk is cold, it will stop the cooking–that’s why I like to do it a little at a time.  Besides the Joy of Cooking Cookbook says to do it that way as well.

I always like soups better the next day.  This one is no exception.

When we were in Italy, their traditional Christmas Eve meal is a feast of many different kinds of fish.  This soup would be perfect to add that kind of celebration.  One more tidbit: we always serve this with Oyster Crackers, small round crackers found in the grocery store.  Trader Joe’s has the best ones.

*Note: Now we make our “white sauce” with chicken broth, and add a little cream at the end.

Butternut Crunch Toffee

I found this in our local newspaper, back in the day when newspapers had full-fledged cooking sections.  In the olden days, back when newspapers were read every day around the breakfast/dinner table, there were many pages devoted to Christmas cookies, delectable sweets, ways to manage the Big Day’s meal, and lots of other columns imported from other news services.  I cut it out and tried it.  My husband, whose favorite candy at the time was Almond Roca, declared this recipe A Hit.  I’ve made it just about every Christmas since.  According to the article, it came from Ann Hodgman’s Beat This! Cookbook, published in 1993.  Now you know really how old this clipping is.  I’ve made some changes: the recipe as listed below includes these changes.

1 cup (2 sticks) lightly salted butter
1 cup plus 2 tablespoons granulated sugar
1 tablespoon light corn syrup, dissolved in 2 tablespoons warm water
1 cup whole almonds
1 cup semi-sweet chocolate chips

Scatter the whole almonds over a cookie sheet and place under the broiler until lightly toasted–don’t burn!  Let cool, then chop them up in a food processor.  Scatter half of the almonds over a cookie sheet; reserve the rest for later.  [Note: I’ve always used a cookie sheet, but the recipe calls for a 9 x 13 inch pan.  Pick your poison.]

In a medium heavy saucepan, over medium to medium-low heat, melt the butter.  With a spatula kind of scoot some up on the sides so as to “butter the pan.”  As soon as the butter is melted, stir in the sugar. Continue to stir constantly until the sugar has dissolved and the mixture comes to a rolling boil (a boil that can not be stirred away).  Add the corn-syrup-water mixture and stir well; the mixture will hiss for a few seconds, but that’s all right.

With the pan still on the heat, cover the saucepan and leave it covered for 3 minutes (use a timer).  Then uncover it and stick in a candy thermometer.  Keeping the heat at medium-low, and stirring once in a while, heat the mixture to 300 degrees.  (My sister Christine also uses the paper bag test: she holds up a brown paper sack and when the toffee is that color, it’s time to yank it. *Note: for higher altitudes, for every 1000 feet above sea level, subtract 2 degrees.*)

When the candy finally reaches 300 degrees (it seems to get stuck at 220 and stays there for a long time), remove the candy from the heat immediately and pour it onto the chopped nuts, tilting the pan back and forth to cover it evenly.  The recipe says not to scrape the pan or the candy might crystallize, but I’ve been known to help down the last little ribbon of toffee mixture from the side with my spatula.  Other than that, I obey, and generally don’t scrape the pan.

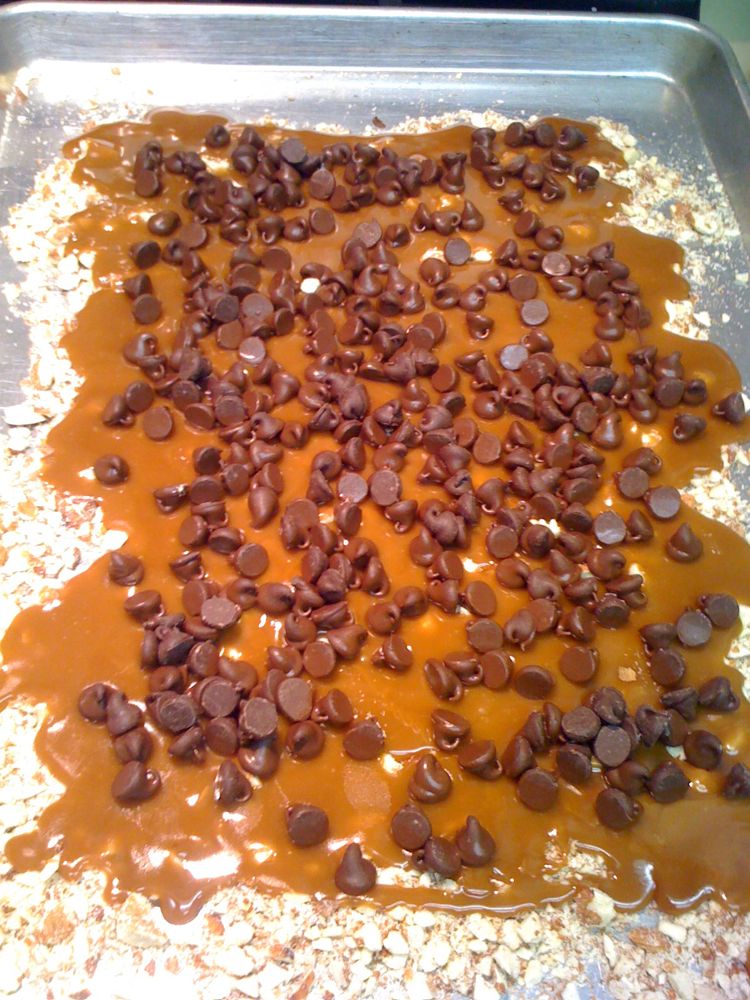
Let it cool for a few minutes, then scatter chocolate chips over the surface (another trick from my sister).  The heat from the cooling toffee will melt the chips.

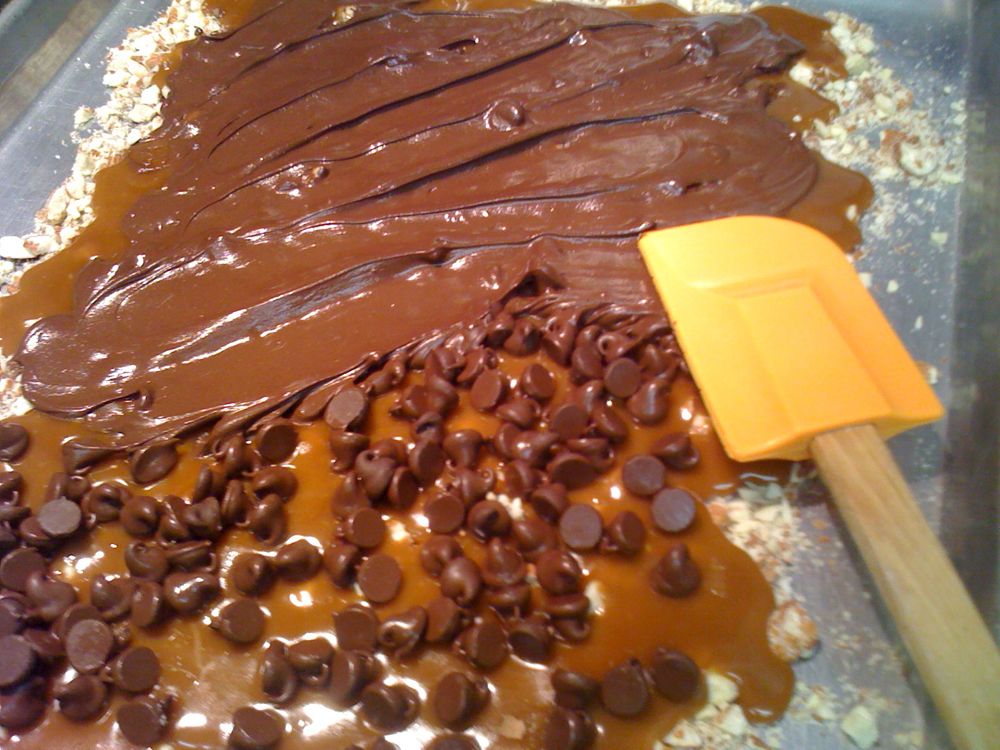
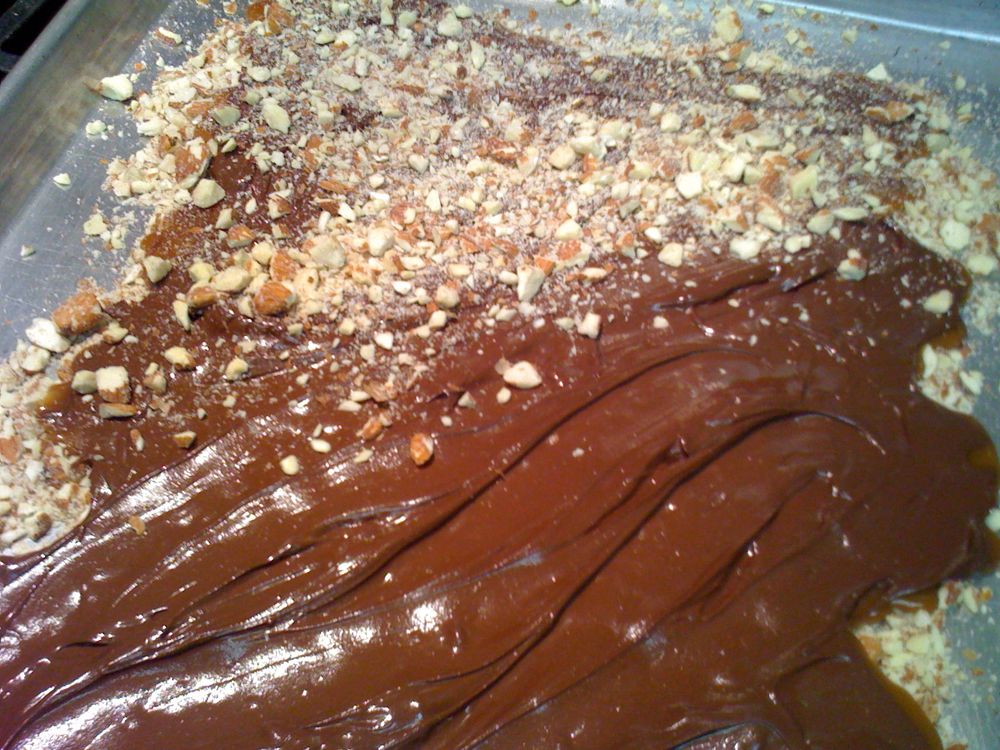
When they are melted, take a spatula and smooth out the chocolate.

Then scatter the remaining chopped almonds over the surface.

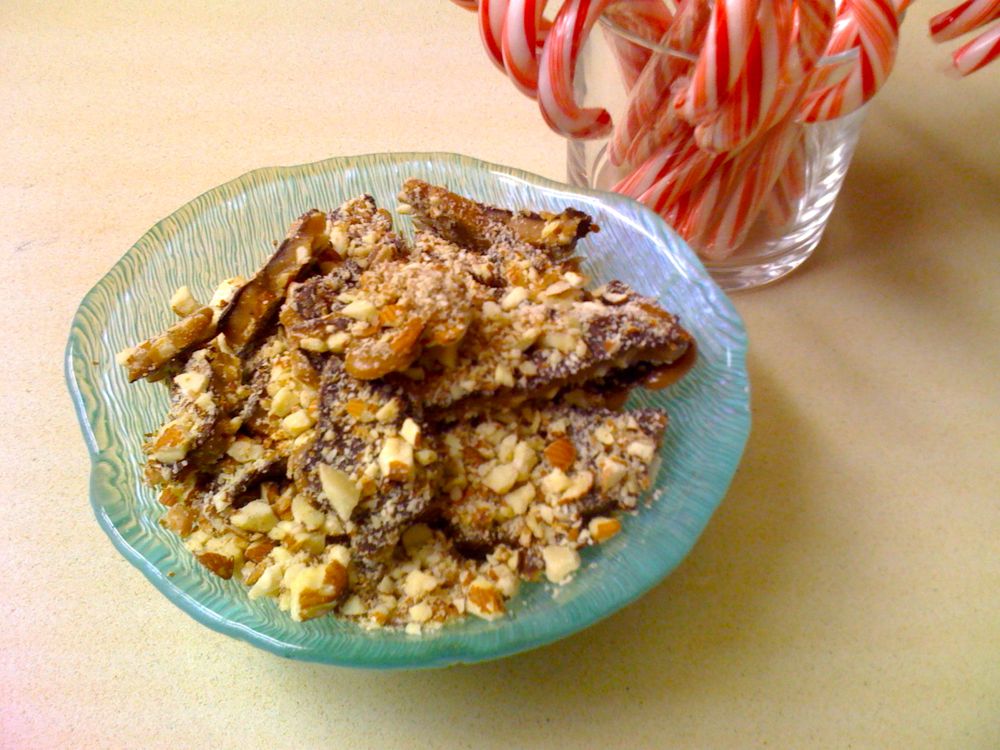
Let it really cool down.  A lot.  When the chocolate is set (about 2 hours or so), break up the toffee into pieces by “stabbing” straight down into the toffee with a paring knife until you hear it break. More stabs equals smaller pieces.  I put it into a dish, then pour the extra bits of nuts and toffee over that.  Makes about 1 pound of candy.