Glazed Lemon Cake

I remember the first time I ate this cake.  My brother’s wife, Rachel, served it for one of her parties.  Rachel is the consummate hostess, always perfectly dressed complete with accessories, her house spotless, her children well-mannered, and the table set like you were in a House Beautiful spread.  It was an Occasion–a birthday celebration–and we were invited.  The food was amazing, but when this cake came out, I wanted to drop all pretense of manners and have another piece.  And another.  I think I did eat two.  I could have eaten more, but then I wouldn’t have been a good guest.

Rachel, while formal and gracious, is warm and inviting.  I always glean ideas for decorating from her house, pick up a new recipe or two, and this was one of those.  I phoned her after we got home and she sent me a copy of the recipe.  It’s from the Silver Palate cookbook, and in her notes at the top, she writes: “Worth owning.”  So I went out and bought a copy.  So should you.

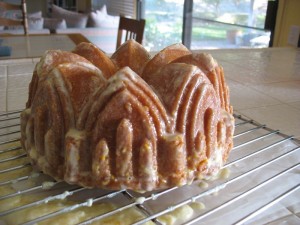
We use a fancy bundt-style pan we call “The Cathedral Pan.”  It makes for a wonderful presentation and no one knows how easy this was to make.  We bought ours from Williams-Sonoma, but I noticed that Sur La Table had some last time I was there.

Be sure to use fresh lemons and real butter for the full effect.  (Of course.)

1/2 pound (2 sticks) sweet butter, softened
2 cups granulated sugar
3 eggs
3 cups unbleached, all-purpose flour, stirred or sifted
1/2 teaspoon baking soda
1/2 teaspoon salt
1 cup buttermilk
2 tightly packed Tbls. grated lemon zest (from 1 lemon)
2 Tbls. fresh lemon juice

Lemon Icing (recipe follows)

Preheat oven to 325 degrees F.  Grease and flour a 10-inch tube pan.

Cream butter and sugar until light and fluffy.  Beat in eggs, one at a time, blending well after each addition.

Sift together flour, baking soda and salt (I just stir them together).  Stir dry ingredients into egg mixture alternatively with buttermilk, beginning and ending with dry ingredients.  Add lemon zest and juice.

Pour batter into prepared tube pan.  Set on the middle rack of the oven and bake for 1 hour and 5 minutes, or until cake pulls away from side of pan and a tester inserted in the center comes out clean.

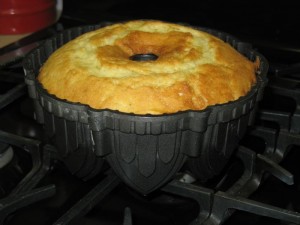
Cool cake in the pan, set on a rack, for 10-15 minutes, then gently loosen top edge of cake from pan all the way around.  Invert onto a rack, then spread immediately with the Lemon Icing, using a pastry brush to smooth out if needed.  Below is the cake, fresh from the pan.  At the very top is the cake with the lemon glaze all over it.

Lemon Icing

2 cups (1/2 pound) confectioners’ sugar (powdered sugar)
1/2 stick (4 Tbls) sweet butter, softened
2 Tbls. packed grated lemon zest (from 1 lemon)
1/4 cup fresh lemon juice

Cream butter and sugar thoroughly. Mix in lemon juice and zest; spread on warm cake.  It helps to lay down some wax paper underneath the rack where the cake sits.  This catches the drips from the frosting.  You’ll definitely have some run-off.

Quinoa Spring Salad

Basic directions for the Quinoa Salad for the Women’s Conference.

While I show the prep work for ONE batch of salad, please keep in mind that yours will be tripled, using the recipe amounts found below.

Thanks in advance for helping us out with the luncheon!

Shopping Preamble & Some Tips:

TIP #1: Quinoa (pronounced “keen-wa”) is a grain that is full of protein and is fairly mild.  You can buy it in boxes at Trader Joe’s (you’ll need 1 and 1/2 pounds or  three cups–check the box for weight; photo is above).

You can also buy it by the pound at Sprouts, up in the Mission Grove area.  Again, buy about a pound and half by the store’s scales; this gave me about 3 cups.  DON’T buy the red quinoa–we want the beige color quinoa.

Trader Joe’s also has shelled edamame, but so does Sprouts (in the back by the produce in the flat freezer cases).
SHELLED Edamame looks like smooth little lima beans. The one above is Trader Joe’s.

This is how the bag from Sprouts looks.  Again, get the shelled edamame.
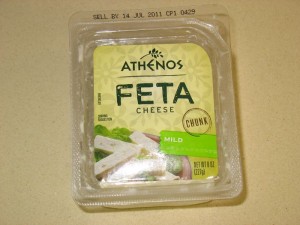
Please buy MILD Feta cheese in a block and crumble it yourself (see salad directions).  I bought this at Ralph’s–while they have it many places, I couldn’t always find the mild, as many times the feta is flavored.  Don’t buy the flavored Feta.  [Note: if you are desparate, and can’t get to Ralph’s, it is okay if you buy it pre-crumbled–you’ll need a 6 to 8 ounce package.]

TIP #2: When mincing the jalapeno, get rid of all the seeds and the membrane and then wash your hands thoroughly.  Those two parts are the “spicy-hot” parts of the jalapeno.  When I say finely minced, I mean teensy.  We don’t want any observable chunks of jalapeno in the salad.  It’s just for flavor.

TIP #3: Please use good quality olive oil.  Not that light stuff (which is blended with another vegetable oil) or any other cooking oil.  Just olive oil.  If you don’t have any, come see me.  I’ve got vats (I buy if from Costco in bulk).

If you wish to be reimbursed for your expenses, please save all your receipts–I’ll reimburse you that day, after the luncheon is over. However, we would appreciate it if you could donate your salad.

Please drop it off at the kitchen before going into the conference, and cross your name off the list, so we’ll know whose salad has arrived.  Thank you in advance for your willingness to help us out–with your contribution, this luncheon will be a big success (and delicious!).

Now to the recipe.

Recipe for Women’s Conference (The Recipe is Tripled)

SALAD:
3 cups dry quinoa
5 cups water
1 and 1/2 16 ounce bags of frozen WHITE frozen corn
1 large red onion (or about 3/4 cup), cut in small dice (about 1/4″ pieces or smaller)
3 red bell peppers, cut in small dice
1 and 1/2 cups cup thinly sliced celery, from the tender inner stalks (about 6)
12 to 15 radishes, sliced
1 and 1/2 cups fresh or thawed frozen edamame
6-8 ounces feta, crumbled.  I buy the bricks of it at Ralph’s, then crumble it.
1 and 1/2  jalapeño chile, seeds and membranes removed, minced finely
1 cup chopped cilantro

DRESSING:
1/2 cup fresh lime juice (about 3 limes, depending on size) (I have plenty of limes that were given to me.  Holler if you want then.)
3 garlic cloves, finely minced or pureed
1  cup extra virgin olive oil
Salt to taste

For Salad:
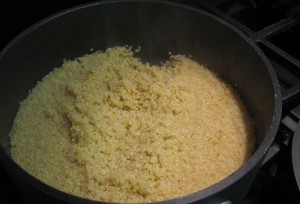
Bring the water to a boil, add quinoa and cook for about 12 minutes, or until the water is absorbed and you see the white cuticle of the grain. Set aside.
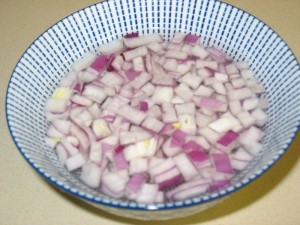
Soak the onion in cold water to cover for five minutes. Drain, rinse and drain again on paper towels.
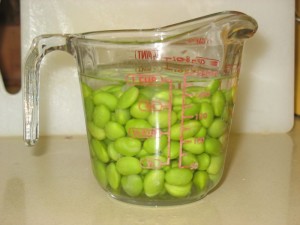
Place the edamame in hot, but not boiling, water for about 5 minutes to thaw.
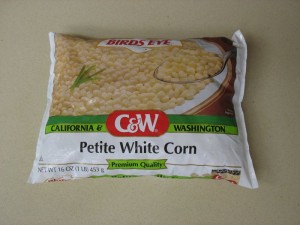
Measure out the corn and add it to a very large mixing bowl.  The corn will thaw very quickly. If yours has been kicking around in the freezer for a hundred years, perhaps you’ll want to run it under some hot water to refresh it.  Drain well.

Seed and devein the jalapenos, then mince finely.    I cut the jalapeno into slices, then turn the cutting board 90 degrees, then chop again.  I then go at it again, chopping the bits like I do nuts, over and over.
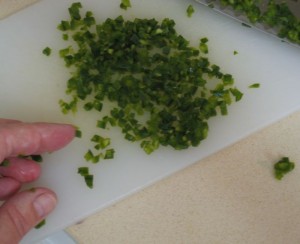
My hand is there for a guide to how small it is. If you are an experienced cook, I apologize for boring you, but I wanted to be clear on the directions. Place into bowl.
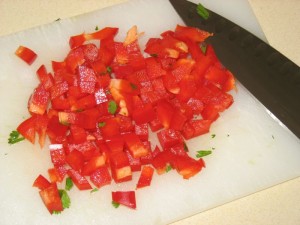
Chop the red bell pepper into fine dice (1/4 inch). Place into bowl.
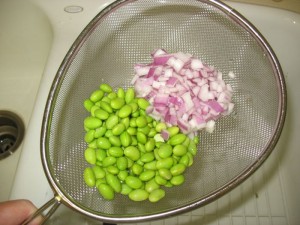
Drain the onion and the edamame, then place on paper towels to drain again, then place into bowl.
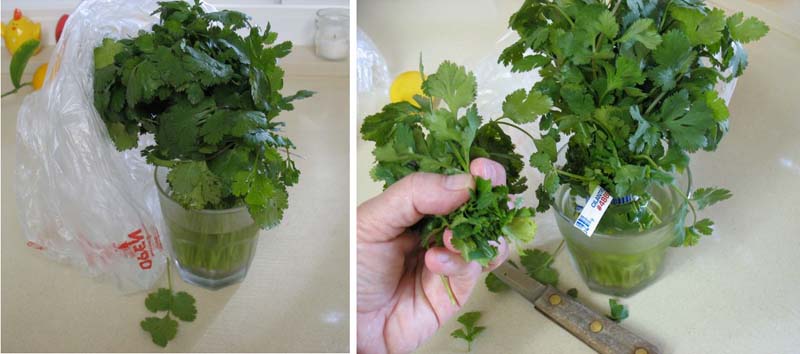
Cilantro is stored upright in the refrigerator in an glass of water, with a plastic produce bag over it to keep it fresh.  When you need some, just whack it off above the twisty-tie; a thumbs-width-worth is about 1/3 cup chopped, more or less.  For a cup, you may need about 1/2 bunch.  To measure, layer the leaves in the cup loosely–don’t pack!!  Or use the guide of three thumbs-width bunches.  Remove any gangly stems before chopping.  Add the cilantro to the bowl.
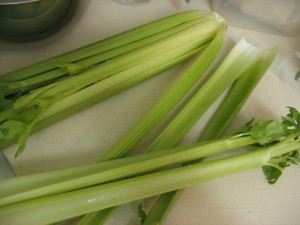
Choose celery from the inner core of the bunch; the two laying crosswise on top are representative.
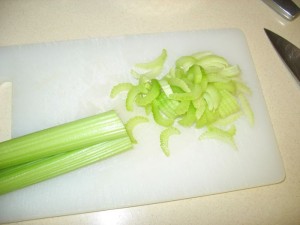
Trim off the raggedy ends and cut the rest of the stalk thinly, yielding moon-shaped slices; add to the bowl.
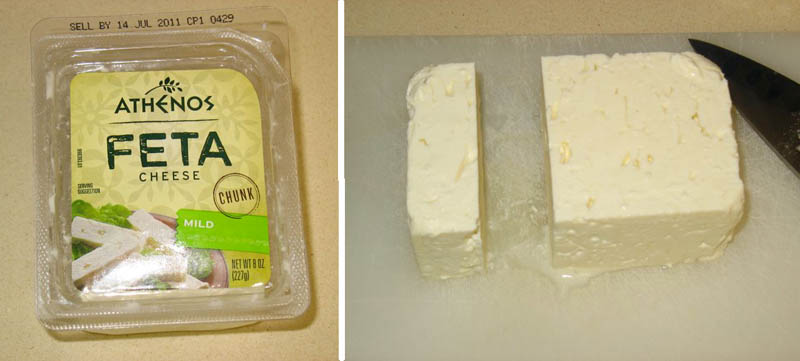
Feta cheese is sold in blocks like this: choose MILD.  Cut off what you need.
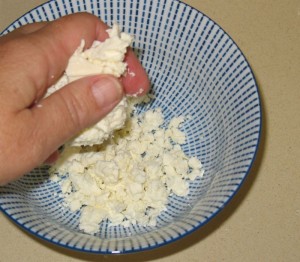
Crumble the cheese, then add to large mixing bowl.
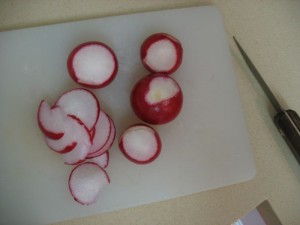
One fun thing about this salad is the amount of crunchy vegetables.  Here’s one more: radishes.  We serve this salad all through the summer!  Add these to the large mixing bowl, then toss all ingredients together lightly.

For Dressing:
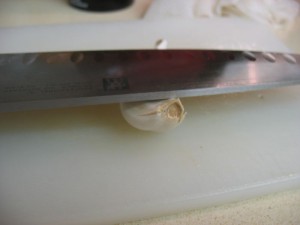
Smash a garlic clove under your knife to loosen the papery skin; peel off and discard.  You can either mince the clove finely (finer than the jalapeno), or do what I do:
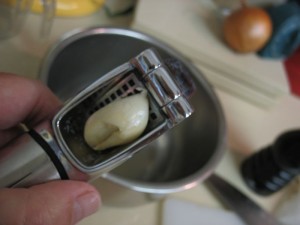
Put it in a garlic press and press it into the bowl.
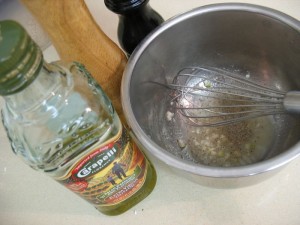
Whisk together the dressing ingredients. Please use bonafide, good quality olive oil.  See Tip #3 above.  Toss with the salad. Serve.

Advance preparation: The quinoa freezes well and the assembled salad will keep for a day in the refrigerator. It’s fine to make the whole salad a day ahead and then bring it Saturday morning.  It still tastes fresh.  Please use these proportions; we’ll add more dressing if we need to, but we don’t want soggy salads.

Thanks so much!!

Recipe yield: 45 one-half cup servings.  Yes, we are counting every serving.  We currently have 285 servings coming, so I’ll be making up a batch myself to bring it up to the 300 servings that we need for that day.

If you want to make this for your family, the amounts for a single batch can be found if you click **here**.
Two-can Tomato Soup

Every once in a while I get a craving for really good tomato soup, that is, cream of tomato soup.  Of course we all know that the best kind is made in summer when the tomatoes in the garden–that you’ve managed to keep watered, keep the birds and pests away from–ripen into some glorious explosion of flavor and then you could eat that fresh tomato soup version forever.

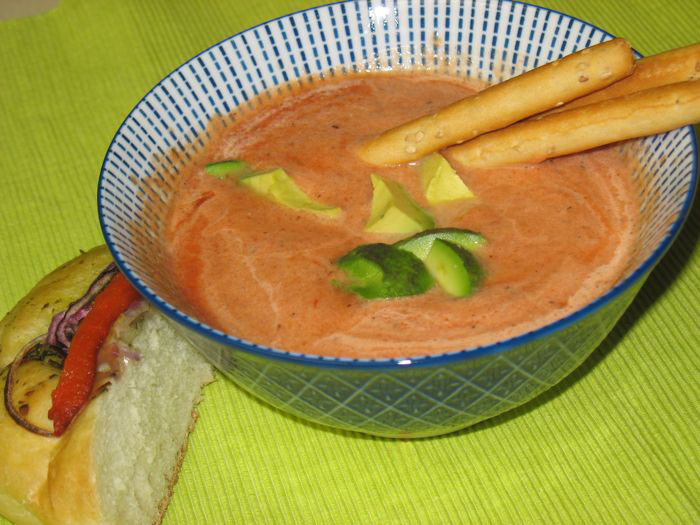
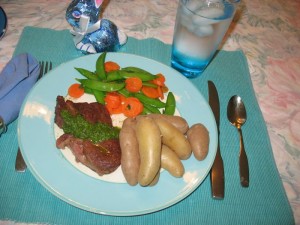
But I usually want this soup on a cold day, when the tomatoes in the grocery store look like waxed pink balls and are fairly flavorless.  So I hit on this idea: what if I got some really good canned tomatoes, added my own spices and cream and made a go of that? So I tried it and it worked, so here’s the recipe.  You’ll be eating it 20 minutes after you start. I paired mine with some breadsticks (in honor of our time in Prague, where we had a really delicious tomato soup in a small cafe overlooking the city (photo below) and some foccacia from the local bakery. I garnished this with some chopped avocado, but that’s really not necessary.
Now for the recipe.

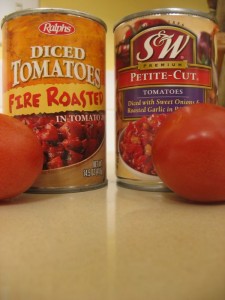
Buy one of each of these cans: 14 ounce can of fire roasted tomatoes (there’s many brands out there–my store just happened to have one) and a 14 ounce can of chopped tomatoes that have been flavored in some way.  I usually go with S & W’s petite-cut tomatoes with onions and garlic.  Dump into a saucepan, stir, and let them warm up over medium heat.
Now open your cupboards and add:
a shake of soy sauce (all shakes are about 1/4 teaspoon)
a shake of Worcestershire sauce
1 teaspoon fresh lemon juice (haven’t tried it with the bottled stuff)
3 drop of Tabasco sauce, depending on the heat of your fire-roasted tomatoes, you may need more
1/8 teaspoon powdered cloves (apparently the secret ingredient to Campbell’s Tom. Soup)
salt and pepper to taste
dash of cayenne pepper

Simmer for about 5 minutes, then transfer to a blender or food processor in batches, whirling it almost smooth (I don’t mind a little chunkiness here and there–blend it to your liking).  If you have an immersion blender, use that instead.  Return it to the pan after blending, but remove from heat.  Now add a swirl of cream to your taste, blending it as much as you’d like.  I think I used about 1/4 cup for this batch.  Eat!

Orange and Ginger Chicken

Who knows how I happened on this recipe, but given the fact that we live in the area where naval oranges are in abundance, it only made sense for me to find something to do with them besides squeeze them for orange juice. I like this recipe because it makes a lot, quickly, and it’s always a hit.  I’ve modified the originally published recipe with some of my own quirks–isn’t that how we all do things?

Ingredients
4 boneless, skinless chicken breasts
All-purpose flour
2 tablespoons (1/4 stick) butter
1 tablespoon olive oil
4 teaspoons minced peeled fresh ginger
2 tablespoons brown sugar
2 teaspoons dijon mustard
1 1/2 cups orange juice
2 teaspoons grated orange peel

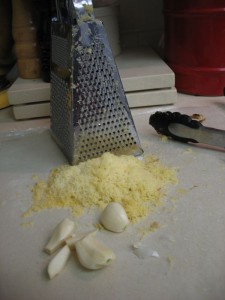
*Note: I store my ginger root in the freezer, a trick taught to me by Susan Jones, an old friend.  When I need some, I peel/scrape off the skin using a paring knife, then grate the frozen ginger using the fine-hole section of my box grater to get the amount I need.  It’s shown above with the peeled garlic, ready for mincing or putting through a garlic press (I do that interchangeably).

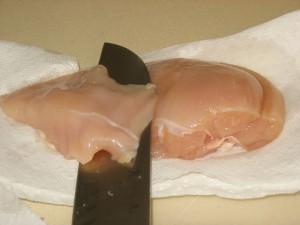
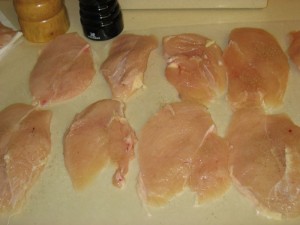
Since I believe that the chicken breasts these days have gotten out of hand, size-wise, I always “fillet” them by cutting them horizontally into thirds, as shown.

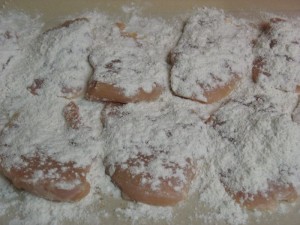
Lay out the pieces on a double-layer of wax paper.  Sprinkle chicken with salt and pepper; dust with flour.

Turn over and repeat on other side, shaking off excess flour before transferring to pan. Melt butter with oil in large skillet over medium-high heat.

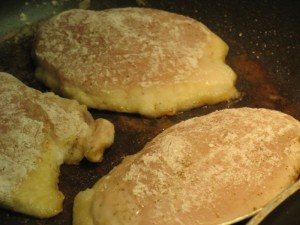
Add chicken; sauté until brown, about 3 minutes per side. (They’ll cook some more in the next step, so no worries if the chicken is a little pink in some parts.  I like to use my non-stick skillets for this step.

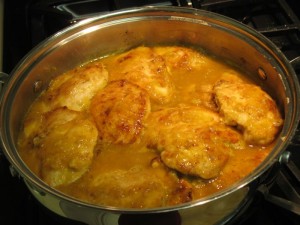
Transfer chicken to a stove-top lidded casserole pan, or other pan with sides. Add ginger to the original skillet; stir 1 minute. Add brown sugar and mustard and stir to blend into drippings. Add orange juice and orange peel. Cook until all the bits and little pieces have released from the skillet into the sauce and it is slightly thick, about 3 minutes.  Pour over the chicken in other pan and simmer until chicken is cooked through and sauce is thick enough to coat spoon.  Keep spooning it over chicken while it thickens up (anywhere from 6-10 minutes—don’t overcook chicken). Season sauce with salt and pepper. Transfer chicken and sauce to platter.

Originally published in Bon Appetit Magazine; this recipe can be prepared in 45 minutes or less.

*Yes, you can just use one skillet, if it has a lid and steeper sides.  Transfer the browned chicken to a plate, then add back to the cooked sauce and cook as above.

Confetti Pasta Salad-Women’s Conference

Basic directions for the Confetti Pasta Salad for the Women’s Conference.

While I show the prep work for ONE batch of salad, please keep in mind that yours will be tripled, using the recipe amounts found below.

Thanks in advance for helping us out with the luncheon!

Shopping Preamble & Some Tips:

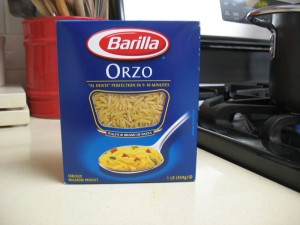
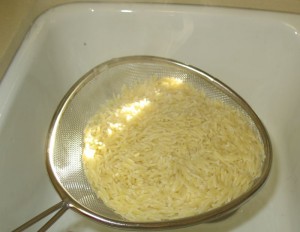
This is Orzo.  It’s a type of pasta that looks like large rice.  You’ll need a fine wire mesh strainer of some sort for draining after its cooked–it washes out of a typical colander’s larger holes.

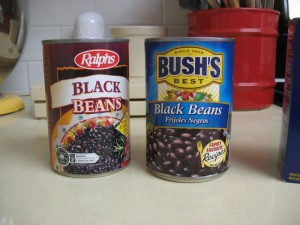
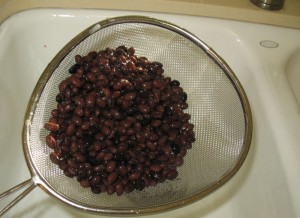
It doesn’t much matter which brand of black beans that you buy.  I’ve used both a name brand and store brand and found both to be fine.

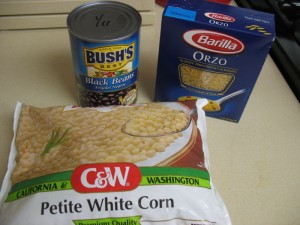
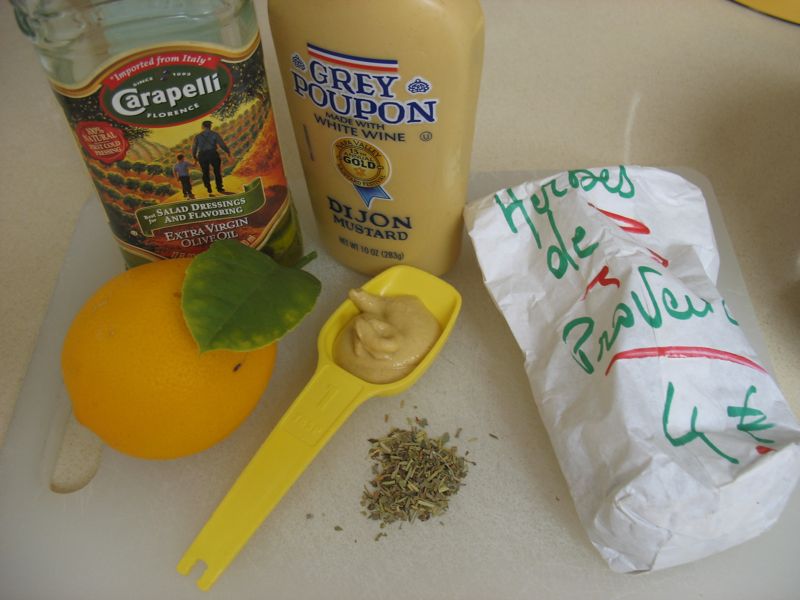
Here’s the basic round-up.

NOTE: Please use good quality olive oil.  Not that light stuff (which is blended with another vegetable oil) or any other cooking oil.  Just olive oil.  If you don’t have any, come see me.  I’ve got vats (I buy if from Costco in bulk).

If you wish to be reimbursed for your expenses, please save all your receipts–I’ll reimburse you that day, after the luncheon is over. However, we would appreciate it if you could donate your salad.

Please drop it off at the kitchen before going into the conference, and cross your name off the list, so we’ll know whose salad has arrived.  Thank you in advance for your willingness to help us out–with your contribution, this luncheon will be a big success (and delicious!).

Salad (The recipe is already tripled):

1 and 1/2 pound boxes of orzo  [NOTE: 1/2 box is about one and 1/4 cups of dry orzo.]
3 cans black beans (15 oz.), drained & rinsed
2 bags frozen WHITE tender corn, approx. 16 ounces
3 red bell peppers, finely diced
1 and 1/2 cups of red onion, finely diced (pieces are about 1/4″ size or smaller)
about 1 cup fresh cilantro leaves, chopped

Bring a large pot of water to boil; add orzo.  Cook until nearly tender (not mushy, but not crunchy).  Drain, using a fine wire mesh strainer.  This may have to be done in batches.  Place drained orzo in a large mixing bowl.  You’ll continually add ingredients to this bowl as you chop and prepare them.

Drain the cans of beans, and rinse until water is clear.  Add to bowl, along with both bags of white corn–no need to defrost. Add the rest of the ingredients:  chopped red pepper, minced onion.

A cilantro bunch is kept in a glass of water, upright and covered with a plastic bag.  To use just whack off just above the twisty tie.  It will keep like this for at least a week or two (change water as needed).  I find a thumb’s thickness yields about 1/3 cup, chopped.  To measure, place LOOSELY in a measuring cup, or use the thumb-measure method.

Add chopped cilantro to everything in the large mixing bowl; pour one batch of Lemon Vinaigrette dressing over the mixture and stir gently to mix.  This can be made one day ahead.  Please cover tightly and refrigerate.

Lemon Vinaigrette:
1 lemon (to yield about 4 tablespoons juice)
1/2 – 1 Tablespoon Dijon mustard (do NOT substitute other mustards)
2 Tablespoons water
1/2 teaspoon sugar
1 teaspoon Herbes de Provence (you can buy this in the grocery store, or see me)
salt and pepper to taste

First, squeeze the juice of 1 lemon into a medium bowl.

Add the Herbes de Provence, a few grinds (or shakes) of salt and pepper, water and sugar.

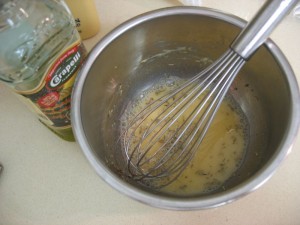
Whisk to blend, then add the Dijon mustard (a healthy squirt) and whisk again.

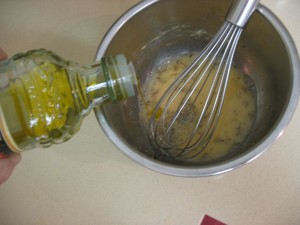
Keeping that whisk going, dribble in olive oil until it starts to thicken, then add some more.  I probably use about 1/3 to 1/2 cup in total.  Cconcentrate on it going from watery looking to slightly thicker as it emulsifies, while you are continually whisking and dribbling.  The success of this is in the two actions: dribbling and whisking.  It takes about a minute or two.

Recipe yield: 45 one-half cup servings.  Yes, we are counting every serving.  We currently have 285 servings coming, so I’ll be making up a batch myself to bring it up to the 300 servings that we need for that day.

If you want to make this for your family, the amounts for a single batch can be found if you click **here**.

Scallop Gumbo

When I saw this recipe in the New York Times (recipe by Mark Bittman), I knew it would work beautifully with what I’d planned to serve for Super Bowl Sunday: Cajun Jambalaya.

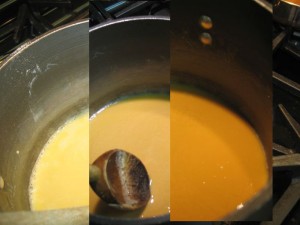
Bittman said it was  lighter gumbo, and the seafood was scallops, rather than the shell fish and bivalves I’d seen in other recipes.  The only place I wondered about was where he said to cook the roux, stirring constantly, until it darkened.  Really?  How dark?  Chocolate brown? Mud-colored?  In the end, I went with his timer advice, cooking and stirring for about 15 minutes.  It did darken (see photos below), but I’ll never know if it was dark enough.

The gumbo was a lighter version of a soup, flavorful, a bit spicy (but not uncomfortable) and I actually liked dumping spoonfuls of the Cajun Jamalaya into the soup, enjoying the rice, shrimp, chicken and sausauge all together in my bowl.  It’s a fine gumbo on its own.

My advice? Prep all the ingredients before you start, because you are stirring the roux and won’t have time to stop and chop.

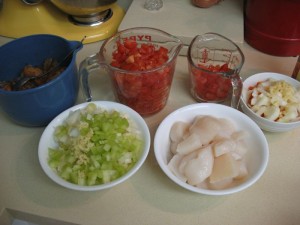
This is the prep for both dishes, the gumbo and the jamalaya.

Ingredients:
1/4 cup olive oil
2 tablespoons butter
1/3 cup flour
1 onion, chopped
1 green bell pepper, chopped
2 celery stalks, chopped
2 tablespoons minced garlic
Salt and black pepper
2 to 3 cups vegetable or chicken stock, or water
2 cups chopped tomatoes with their juice (canned are fine)
1 tablespoon fresh thyme, or 1 teaspoon dried
1 tablespoon fresh oregano, or 1 teaspoon dried
2 bay leaves
Cayenne to taste
1 pound scallops
Chopped fresh parsley, for garnish.

Method
1. Put oil and butter in a large pot or Dutch oven over medium-low heat. When butter is melted, add flour and cook, stirring almost constantly, until roux darkens and becomes fragrant, about 15 to 20 minutes; as it cooks, adjust heat as necessary to keep mixture from burning.

These are the stages of the roux as it darkened over 15 minutes.  I dumped in the vegetables when it was mud-colored.

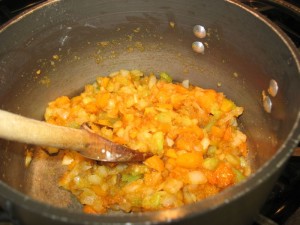
2. Add onion, bell pepper, celery and garlic and raise heat to medium. Sprinkle with salt and pepper and cook, stirring frequently, until vegetables have softened, about 10 more minutes.

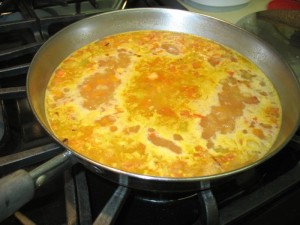
2. Stir in the stock, tomatoes, thyme, oregano, bay leaves and cayenne. Cover, bring to a boil, then reduce heat so soup bubbles steadily. Cook for about 20 minutes or until flavors meld. Add scallops and cook until they are no longer translucent, about 2 minutes. Remove bay leaves. Taste, adjust seasoning and serve, garnished with parsley.

Cajun Jambalaya

When I lived in Washington, DC for a year, the Washington Post newspaper had a really good food section that I loved to read.  When it was Mardi Gras time, they had Emeril Lagasse contribute one of his recipes to give us all a taste of “N’arlins” style food for our own celebrations.

I made this today in honor of the Saints football team getting into the Super Bowl.  I don’t follow football but I was cheering for the team that had come from New Orleans only because that city needed a boost in their fortunes.  I also found a recipe from Mark Bittman’s column this week for Scallop Gumbo and served it also.  I found I liked the two mixed together for some strange reason–try it some day.

Recipe courtesy of Emeril Lagasse

Recipe Summary
Prep Time: 15 minutes
Cook Time: 35 minutes

Yield: 4 servings

12 medium shrimp, peeled, deveined and chopped
4 ounces chicken, diced
1 tablespoon Creole seasoning, recipe follows
2 tablespoons olive oil
1/4 cup chopped onion
1/4 cup chopped green bell pepper (I used orange, because I don’t like the green)
1/4 cup chopped celery
2 tablespoons chopped garlic
1/2 cup chopped tomatoes
3 bay leaves
1 teaspoon Worcestershire sauce
4-6 drops hot sauce (the original recipe called for 1 teaspoon, if you like it hot, go with it)
3/4 cup uncooked rice
3 cups chicken stock
5 ounces Andouille sausage, sliced
Salt and pepper

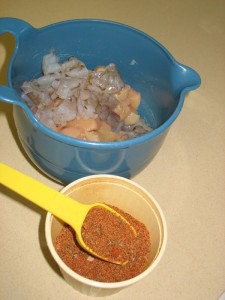
In a bowl combine shrimp, chicken and Creole seasoning, and work in seasoning well. In a large saucepan heat oil over high heat with onion, pepper and celery, 3 minutes. Add garlic, tomatoes, bay leaves, Worcestershire and hot sauces. Stir in rice and slowly add broth.

Reduce heat to medium and cook until rice absorbs liquid and becomes tender, stirring occasionally, about 15 minutes. I leave the lid off in order for the liquid to evaporate enough. When rice is just tender add shrimp and chicken mixture and sausage. Cook until meat is done, about 10 minutes more. Season to taste with salt, pepper and if desired, more Creole seasoning.

Emeril’s ESSENCE Creole Seasoning (also referred to as Bayou Blast):

2 1/2 tablespoons paprika
2 tablespoons salt
2 tablespoons garlic powder
1 tablespoon black pepper
1 tablespoon onion powder
1 tablespoon cayenne pepper
1 tablespoon dried oregano
1 tablespoon dried thyme

Combine all ingredients thoroughly.
Yield: 2/3 cup

Cheese Soup

I was at a ladies auxiliary meeting for our church in Racine, Wisconsin.  It was a soup smorgasbord, and I was sort of picking and choosing which soup I’d like to try.  Marianne said to me: “Try this one.  You’ll love it.  It has Cheez Whiz in it.”  Even then I must have been a food snob because I said, “I’ll never eat anything with Cheez Whiz in it,” and passed it by.  Marianne started laughing.  “Go on, try it.  It won’t kill you.”

I tried it, and have been making it ever since, even though it has Cheez Whiz in it.  I know, I know.  But it’s amazingly good, and it hasn’t killed me yet.

Ingredients
1 8 oz. jar of Cheez Whiz
3 carrots, peeled and cut into nickel slices
2 or 3 potatoes, skinned and diced (depends on the size of your potatoes)
1/2 onion, chopped
1/4 butter
1/4 cup flour
2 cans low-salt chicken broth (I use Swanson’s)
about 2 cups rotisserie chicken, cut into 1″ chunks

Place the vegetables into a pan and pour a can of chicken broth over  them, just to cover.  Cook until tender, but not mushy.

In another pan, melt the butter then add the flour, cooking the roux until well-blended. Add the remaining can of chicken broth a little at a time to this pan, stirring to keep it smooth.  Dump in the vegetables, liquid and all into this pan, stirring to blend.  If it’s too runny, blend a little cornstarch with some cold water and add it to this mixture, stirring until it thickens.  If it’s too thick, add a little water.

Stir in the Cheez Whiz, promising not to make a face while you do it.  Then at the last minute, stir in the chicken.  We serve this with either oyster crackers from Trader Joe’s, or a loaf of La Brea bread.

Elizabeth’s Vegetable Lasagna

I don’t know how I dreamed up this dish.  I guess it was when I had to take something to a church supper, and I didn’t want another lasagna that weighed 40 tons on the plate and would send a person into cardiac arrest.  I wanted something that had a rich taste, but didn’t have the greasy, overloaded-with-cheese experience that is germane to this dish.  Now those types have their place.  Just not on my plate.

This recipe is open to variations, and is always a winner, even though that is a cliche.  I think the inclusion of the mushrooms give it a meaty taste, the vegetables bring it juiciness and the minimal cheese brings it richness.

We make this a lot in summer and it is really good leftover in lunch containers.  I like it also in winter as it is satisfying.  Okay, enough of telling you what it is and isn’t–the recipe follows with pictures.  Make it yourself and decide.

Ingredients:
about 1 pound crimini mushrooms, also known as brown mushrooms, cleaned and sliced
1 red sweet bell pepper, julienned
1 yellow sweet bell pepper, julienned
3 medium or 2 large zucchini, scrubbed clean and sliced
9 oz package of no-boil flat lasagne noodles (I use Barilla brand in a blue box)
1 jar spaghetti sauce (I use Ragu with extra mushrooms)
1/2 to 1 cup water
less than 8 oz. whole-milk mozzerella cheese, cut in thin slices (I use Precious brand, in shrink wrap)  I can’t give you an exact amount because while I use it sparingly, you may want more.

Start by sauteeing about a pound of mushrooms in a small amount of olive oil and butter (equal parts).  Don’t crowd the pan–do it in several bathes.  Then slice up the bell peppers and do the same. The zucchini needs the same workup.

Place about 1/2 cup of sauce in the bottom of a baking dish, approximately 9 by 13-inch size.  Spread the sauce to cover the bottom, then place a layer of noodles on top of that, covering the bottom of the dish.  It’s okay to break some in half if you need to do that, now, or later on.  Add water to the top of the spaghetti sauce jar, replace lid and shake to blend.

Top the noodles with about one-third of your mushrooms.  Spoon some sauce over that, then using a light touch, place the thin slices of cheese on top of that.  I do not cover the surface.  Instead it looks more like the red squares on a checkerboard, with the black squares being left devoid of cheese.

Layer in more noodles, more sauce, and then add about another 1/2 cup of water to the jar of sauce, shake to blend.  Your next layer can be the peppers, as shown above, or zucchini. There’s no set order, just alternate mushrooms, peppers, and zucchini until the pan is full.

This is how I place my cheese: sparingly. I promise you that you won’t miss the excess.

Keep layering (this is the mushroom layer–I heap those babies on) until you end with noodles.  Or mushrooms, or whatever. Place the rest of the sauce on top of that (you can always slosh in some more water if you’re running low on sauce), then cheese. Stroke the dull side of a large piece of tinfoil with a cube of butter to grease it, then place it over your lasagna, crimping to seal the edges.

Bake in a 375-degree oven until bubbly, about 50-60 minutes.  If your cheese isn’t melted (take a peek), you can uncover your lasagna and bake for about 5 more minutes, until it is.  Let it stand for a about 10-15 minutes before serving, then enjoy!

Chocolate-Almond Cake, or Reine de Saba

For my birthday, I wanted to try this cake from Julia Child’s Mastering the Art of French Cooking.  No big culinary reason, other than it looked really good in the movie (however, their cake frosting is different than this one).  Usually every year Dave makes my cake for me; it’s one reason why I married him, but he’s working on a big project and I didn’t think it was fair to spring a scratch cake on him at this time.

The first thing you have to do is buy a new cake pan.  Yep.  Our American cake pans–the kind we all use on those double-layer cakes, are too short.  The pan has to be at least 1 1/2 inches deep. I had a coupon for Michael’s and went over there and bought one, but it’s lightweight aluminum.  If you want a heavier one, try Sur La Table, or a good cooking store.  With my coupon, however, the price was right.

Butter the pan, using soft real butter and a corner of a paper towel, then dust it with flour, shaking out the excess.

Ingredients:
4 ounces (squares) semi-sweet baking chocolate
1 stick, or 1/4 pound softened butter
2/3 cup granulate sugar
3 egg yolks
3 egg whites
pinch of salt
1 Tbs. granulate sugar
1/3 cup ground almonds
1/4 teaspoon almond extract
3/4 cup sifted cake flour (confession: I stirred mine up to lighten it, and used regular flour)

Method:
Preheat the oven to 350 degrees.

Melt the chocolate over almost simmering water.  Julia says to add 2 Tbls rum or coffee–a problem, because in this house, we have neither. So I flipped to her page about “melted chocolate” and it says I can use water as well.  So I did.  Don’t have a double boiler?  Get creative.  I ended up using the bottom half of my juicer.  You could also throw some forks or something in the bottom of pan, bring the water just to below them, then set a metal bowl over the water.  Kmart also sells double boilers for $40, which is why I was improvising.

Cream the butter and sugar together for several minutes until the form a pale yellow, fluffy mixture.  Beat in the egg yolks until well-blended.

Beat the egg whites and  salt in a separate bowl until soft peaks are formed; sprinkle on the sugar and beat until stiff peaks are formed.

Blend the melted chocolate mixture into the butter/sugar, then stir in the almonds (Julia calls them pulverized–I call them: through them into your food processor and whirl along until they are finely ground.)  Don’t overmix.  Remove the beater, and then, with a spatula, immediately stir  in one-fourth of the stiffly beaten egg whites to lighten the batter.

Then, delicately fold in a third of the remaining egg whites, and when partially blended, sift on one third of the flour and continue folding.  Alternate rapidly with more egg white and more flour until all the eff whites and flour are incorporated.

Folding In Egg Whites Have You Nervous?
As one website described the process: Using a large spatula, cut a path down the middle of the mixture with the edge of the spatula. Then gently turn half the mixture over onto the other half. Continue cutting down the middle and turning a portion over. Don’t stir. The purpose of folding is to retain the air you have beaten into the whites. Be careful to only work the batter enough to incorporate the whites, and never use an electric mixer for this step.  You can Google “folding egg whites” to find videos on this process, if you are the type of person who likes to thoroughly understand a step before attempting it.

Julia says the whole process should “not take more than a minute and do not attempt to be too thorough.  It is better to leave a few unblended patches than to deflate the egg whites.” Okey-dokey.

Back to the cake:
Turn the batter into the cake pan, pushing the batter up to its rim with a rubber spatula.  Lick the bowl clean, because you can’t help yourself.

Bake in middle level of a preheated oven for about 25 minutes.  Cake is done, she says, when it has puffed and 2 1/2 to 3 inches around the circumference are set so that a tester plunged into that area comes out clean; the center should move slightly if the pan is shaken and a tester comes out oily.  We had the latter, but not the former (it didn’t move slightly).

Allow cake to cool in the pan for 10 minutes.  Run a knife around the edge. and reverse the cake onto a rack.  Allow it to cool for an hour or two; it must be thoroughly cool if it is to be iced.

Chocolate-butter icing, or Glacage au Chocolat
1 ounce semi-sweet baking chocolate
1 Tbls. rum or coffee or water
3 Tbs. unsalted butter

Melt the chocolate with the water, over a double boiler until chocolate has melted into a very smooth cream.  Remove from the hot water, and beat the butter into the chocolate, a tablespoon at a time.  Then beat over cold water until chocolate mixture is cool and of spreading consistency.  Spread it at once over the cake and garnish with almonds.

I have no idea why I decided to try this one.  After watching the movie where the actors ate this cake so heartily that they’d smeared the frosting all over their faces, I assumed it would be the simplest version.  Although this frosting was good, it was not so good that we wanted to smear cake all over ourselves.  I’d double the frosting amounts, for sure, or even try her Butter Cream frosting I, with powdered sugar.  Dave kind of looked funny when I told him there was no powdered sugar in this icing.

According to the Boston Globe, Julia Child writes in ‘‘The Way to Cook’’ that this was the first French cake she ever ate, prepared by her coauthor Simone Beck, ‘‘and I have never forgotten it.’’

This cake is also known as the Queen of Sheba cake, apparently in some allusion to the opera, and there seems to be a billion posts of this recipe online, some much fancier than mine.  Have fun looking. . . and baking.