Pear, Cranberry and Gingersnap Crumble

I regularly haunt Smitten Kitchen’s website as she cooks food that I can make, with only a few photos here and there, which makes it an easy read. (I don’t particularly object to a raft of photos, as they are helpful when a new technique is being presented, but occasionally they can get out of hand.)  But I’d have to say it’s her combination of ingredients that are the usual standouts.  She just has a way with food.  Summer Strawberry Cake is one of hers, too, and if you haven’t made that this summer, then you’ve really missed out.

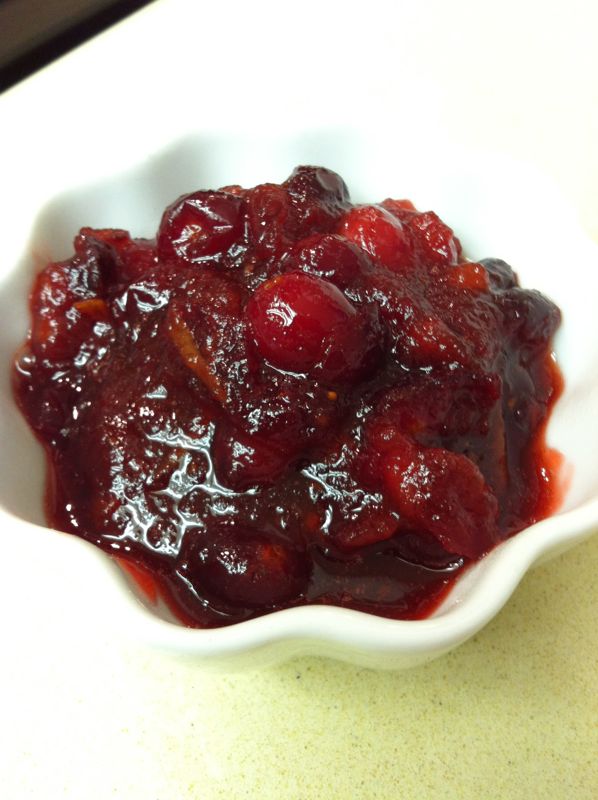
Anyway, here’s a fall treat, made beautiful with three kinds of pears and cranberries and an interesting crumble on top, made from gingersnap cookies.  I bought a box in the grocery store and on first glance, I thought I’d bought a box of brown thin hockey pucks.  I snapped them (with some effort) into fourths then whirled the 16-18 cookies in my food processor to make the crumbs (although a ziploc bag and a swift firm hand with a kitchen mallet would also do the trick).  Amazingly, with the suggested addition of the ginger and pepper, those hideous store-bought cookies turned out okay atop the steaming, juicy pears and cranberries.

Adapated from Smitten Kitchen, who adapted it from Sweet Melissa Patisserie

Crumble
1 cup (125 grams) all-purpose flour
1/4 cup (50 grams) granulated sugar
3 tablespoons (37 grams) packed dark or light brown sugar
1 cup gingersnap crumbs (4 ounces or 113 grams or about 16 storebought cookies)
1/8 teaspoon ground ginger
1/8 teaspoon table salt
Pinch of white pepper, especially if your gingersnaps aren’t particularly snappish
1/4 cup (1/2 stick  or 113 grams) butter, melted and cooled

Beauty shot of the pears.
From left to right: Bartlett (yellowish), Anjou, and Bosc.
The Anjou and Bosc are a little crisper than the Bartlett, but cook up well.

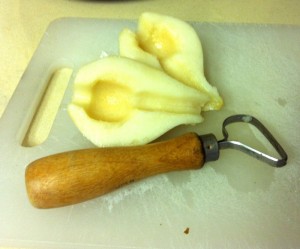
And here’s my trick for coring pears: a clay tool from an art supply store.

Filling
2 pounds (about 4 to 5) large ripe pears (I used combination of Anjou, Bartlett and Bosc) peeled, halved, cored and sliced 1/4 inch thick
1 1/2 cups (6 ounces or 170 grams) fresh cranberries
1 tablespoon (15 ml) lemon juice
1/2 teaspoon finely grated lemon zest
1/2 teaspoon vanilla extract
1/2 cup (100 grams) granulated sugar
2 tablespoons (14 grams) cornstarch

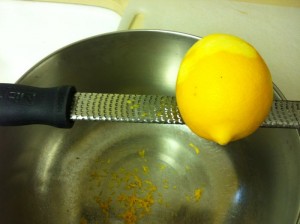
Do you have one of these microplanes for zesting?  I figure I used about 1/2 of the lemon for this recipe.  You can freeze the remainder, wrapped up in a square of wax paper, then into a ziploc baggie.  Label it, please, before you stick it in your freezer. (You’ll thank me later.)

Preheat the oven to 350°F.

Stir together the flour, granulated sugar, brown sugar, gingersnap crumbs, ginger and salt. Stir in the melted butter until large crumbs form.

In a large bowl, mix the pears, cranberries, lemon juice, lemon zest and vanilla. In a small bowl, whisk the sugar and cornstarch together then toss it with the fruit mixture.

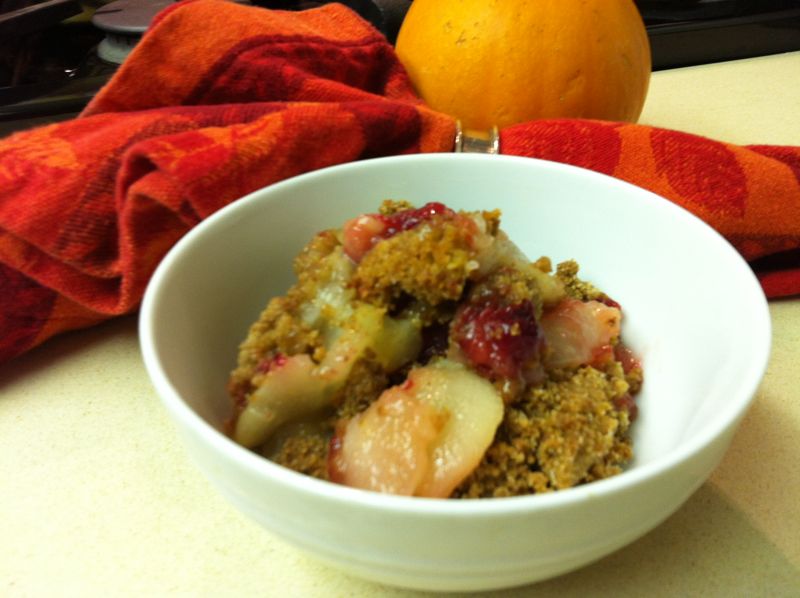
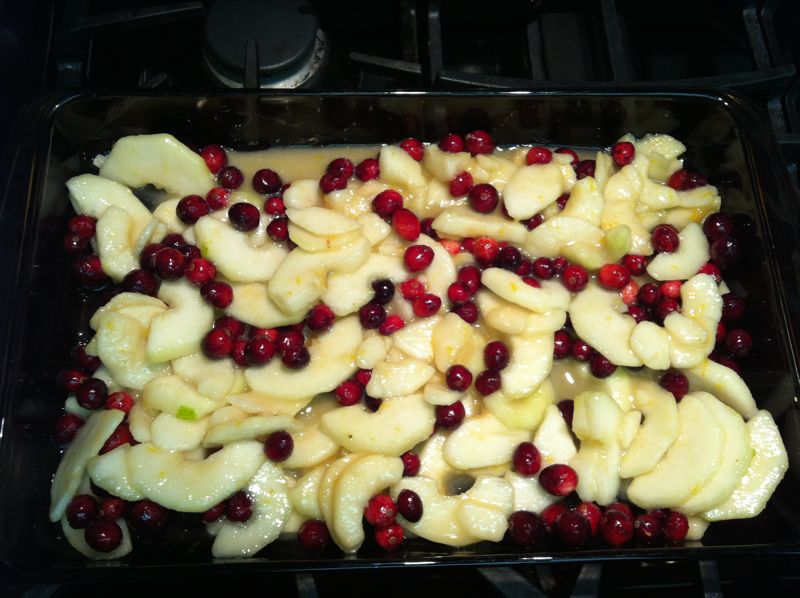
I just had to show you a picture of this before I sprinkled on the gingersnap topping.  Positively holiday-ish! I made this, doubled, for serving to the ladies in church.  Aside from the time taken to peel the pears, it’s a quick and easy recipe.

In a 1 1/2 to 2 quart baking dish, layer in the pear-cranberry mixture, then sprinkle the gingersnap crumble over the fruit. Set the crumble on a foil-lined baking sheet (if you are worried about it  bubbling over—I baked mine in a 9×13 pan and had no troubles) and bake it for about 45 minutes, until the crumble is a shade darker and you see juices bubbling through the crumbs. Let cool a little bit, then enjoy.

Cook’s Notes: The original recipe called for 1/2 cup [unsalted) butter in the gingersnap crumb topping; if you use that amount then the crumble will probably stay crisper an extra day.  Ours became softer the second day, but the flavor was still amazing—I wonder if it is the combination of the three pears together?  (The original merely asked for Anjou.)

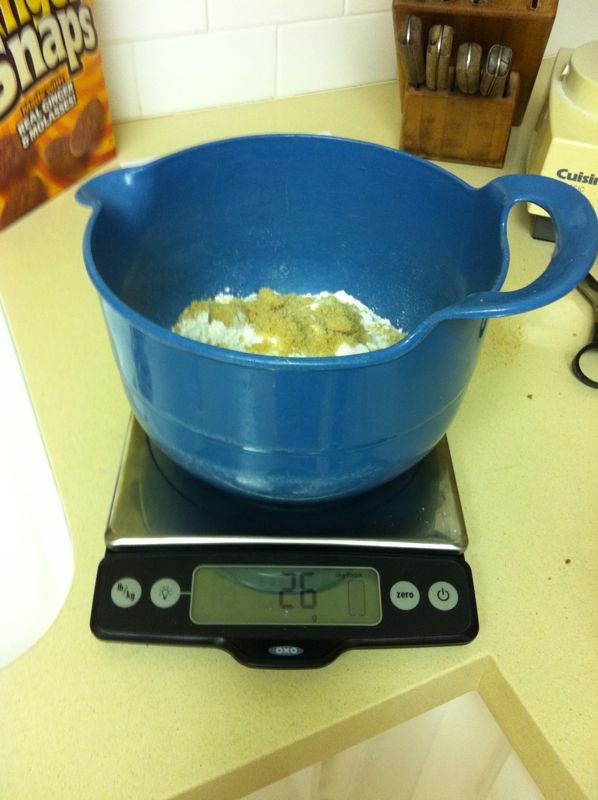
And what am I doing in the photo above?  Weighing the ingredients.  You’ve noticed that all of her ingredients have a weight listed next to them.  She predicts that this will be the wave of the future, similar to what they do it in Europe. I decided to try it.  I placed the bowl on, zero-ed it out, then added each ingredient, zero-ing out after each.  I can change to kilograms from ounces on my scale; I suggest if you are going to try this, you look for that feature as well.  Instead of multiple cups and bowls, it’s just one-bowl-mixing for the dry ingredients.  Nice.

Pumpkin Spice Bundt Cake with Buttermilk Icing

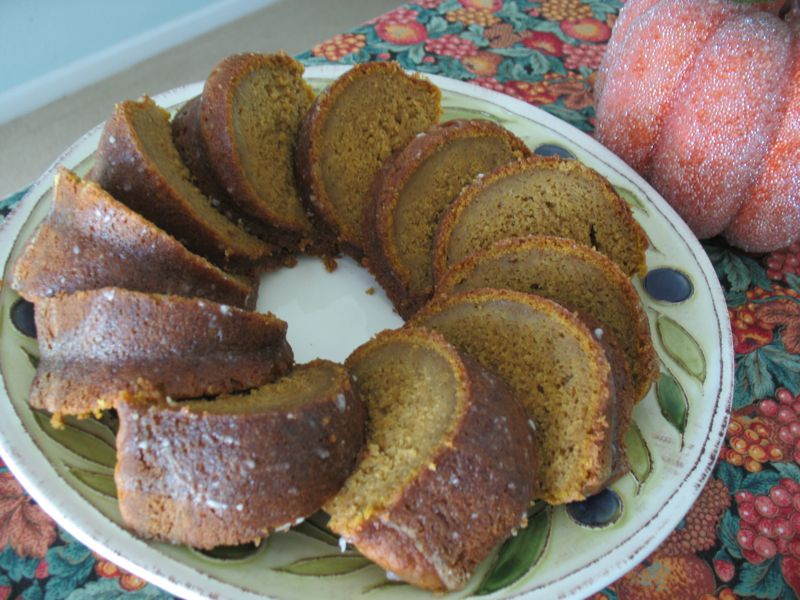
I found this on the web, by a librarian who was having her own personal Bundt Cake Pan challenge: a new cake a day made in her much, un-used bundt pan.  I think I happened on her post right on this day, downloaded the recipe, which originally came from Gourmet Magazine in November 2005.  It is a very moist cake, mild on the spices and it is good for fall baking, leaving a delicous aroma of pumpkin in the air.

For cake
1 1/2 sticks (3/4 cup) unsalted butter, softened, plus additional for greasing bundt pan
2 1/4 – 2 1/2 cups all-purpose flour, plus additional for dusting pan
2 teaspoons baking powder
1 teaspoon baking soda
1 teaspoon cinnamon
3/4 teaspoon ground allspice
1/2 teaspoon salt
1 1/4 cups canned solid-pack pumpkin (from a 15-ounce can; not pie filling)
3/4 cup well-shaken buttermilk
1 teaspoon vanilla
1 1/4 cups granulated sugar
3 large eggs
For icing
2 tablespoons plus 2 teaspoons well-shaken buttermilk
1 1/2 cups confectioners sugar
Special equipment: a 10-inch nonstick bundt pan (3 quart)

Preparation

Make cake:
Put oven rack in middle position and preheat oven to 350°F. Butter bundt pan generously, then dust with flour, knocking out excess.

Whisk together flour (2 1/4 cups), baking powder, baking soda, cinnamon, allspice, and salt in a bowl. Whisk together pumpkin, 3/4 cup buttermilk, and vanilla in another bowl.

Beat butter (1 1/2 sticks) and granulated sugar in a large bowl with an electric mixer at medium-high speed until pale and fluffy, 3 to 5 minutes, then add eggs and beat 1 minute. Reduce speed to low and add flour and pumpkin mixtures alternately in batches, beginning and ending with flour mixture and mixing until batter is just smooth.

Spoon batter into pan, smoothing top, then bake until a wooden pick or skewer inserted in center of cake comes out clean, 45 to 50 minutes. Cool cake in pan on a rack 15 minutes, then invert rack over cake and reinvert cake onto rack. Cool 10 minutes more.

Make icing:
While cake is cooling, whisk together buttermilk and confectioners sugar until smooth. Drizzle icing over warm cake, then cool cake completely. Icing will harden slightly.

Cooks’ note: Cake can be made 3 days ahead and kept in an airtight container at room temperature.  I used the 2 1/4 cups flour it called for, but I believe 2 1/2 cups would be better.  I substituted in 3/4 whole wheat flour for a like amount of the white flour.

Corn and Shrimp Soup

After doing lesson prep for my classes for so long that my eyes hurt, I wandered downstairs to figure out dinner.  It was a colder day, the first not-hot day we’ve had this fall and some rain was falling here and there all afternoon.  I wanted something warm for dinner, but not heavy.  Something traditional but with a bit of kick.  The soup cookbook fell out and after looking through it I chose a recipe to start in on.  But I took a huge turn off their recipe highway onto something wholly my own.  We enjoyed it and I hope you will too.  Oh, that red pepper?  It’s for looks.  You leave it in, but to add some heat, use Sriracha sauce at the table.

Although this looks complicated, get everything ready at the beginning as it goes together quickly.

1 Tablespoon olive oil
1 Tablespoon butter
1 1/2 sweet bell peppers (I used 1 red and 1/2 yellow), chopped
1 shallot, peeled and chopped
2 cloves garlic, minced (or put through a garlic press)
2 stalks lemon grass
2 dried red pepper pods (more if you want more heat)
2 knuckle-sized chunks of fresh ginger
about 2 cups white frozen corn (can add more at the end if you like your soup with more “stuff”)
1 lb. uncooked shrimp, peeled, deveined, rinsed and drained
2 cans chicken broth (14 oz each)
1 can coconut milk (about 14 oz.)
1 Tablespoon sugar
juice of 1 lime (about 2 Tablespoons)
pinch or two of red pepper flakes
1/3 cup chopped fresh cilantro
1 teaspoon salt (or to taste)

Melt butter and oil together in heavy soup-sized pan, saute peppers, shallot and garlic for 2-3 minutes.  Add chicken stock, broken-in-half lemon grass stalks, dried red peppers and the pieces of ginger.  Let simmer for 10 minutes.

Add in the shrimp and corn.  Let simmer for 2-3 minutes.

Fish out lemon grass and ginger.  Add sugar, lime juice, pinch of red pepper flakes, and cilantro.

Add coconut milk.  Adjust seasonings (add more salt?) and serve with Sriracha (Rooster) sauce at the table.

Note: I keep lemon grass stalks in my freezer.  I simply smacked them over the edge of the counter to break them in half, then threw them in.  Ditto the ginger (for keeping it in the freezer), but tonight I set it on a cutting board, and lopped off one of its chunks to throw in.

Pumpkin Nut Bread

I found this recipe in a (Sunset?)  magazine when I was 17, and since I was a pretty good baker by that time, I decided to make it for my family.  I used up a good amount of nuts, real butter and got to talking on the phone with a friend while I mixed up the rest and put it in the oven.  The smell was really yummy and we were all looking forward to a slice of my newest recipe.  I pulled it out of the oven, and what?  Something was wrong.  It was flat, and hadn’t raised at all.  It tasted. . . terrible.  My mother came in and started to try and help me find the source of the problem.  Did you put in the salt?  Salt? I said.  I don’t think so.
Okay, then what about the baking powder?  Baking soda?  They need to sugar to help with their chemical and culinary reactions, she said.
Sugar!  I’d forgotten the sugar.  And probably one of the other three ingredients, judging from the height of the loaf.

Since then I have made it many many times. I never talk on the phone while mixing up the ingredients, and it has turned out perfectly every time.  You can increase the batch easily as one large can of pumpkin makes three loaves.  Tonight I made a plain loaf, a nut loaf and a loaf with mini-chocolate chips (add in about 1 cup).  We have family coming and we’ll be ready.

Pumpkin Nut Bread
3/4 cup milk
1 cup canned pumpkin
1 egg
1/4 cup melted butter
2 1/2 cups unsifted all-purpose flour (I substituted in 1/2 cup whole wheat flour for part of this)
1 cup sugar
2 teaspoons baking powder
1 teaspoon each soda, cinnamon, and nutmeg
1/2 teaspoon each salt and ground ginger
1 cup chopped pecans or walnuts or filberts or a mix of all three
[for the chocolate chip loaf, substitute 1 cup mini-chocoate chips for the nuts]

In a large mixing bowl, combine milk, pumpkin, egg and melted butter.  Mix to combine.  Add in sugar.

In a separate bowl, combine 1/2 cup flour with spices, soda, salt and baking powder.  Mix well and add to the pumpkin mixture.  Then add in the rest of the flour and blend only until dry ingredients are moistened.

Pour into a lightly greased 5″ x 9″ load pan; bake in a moderate oven (350F) for 1 hour and 15 minutes or until inserted toothpick comes out clean.  Makes 1 loaf.

Shortbread Cookies

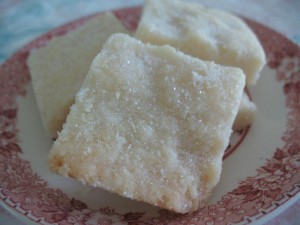
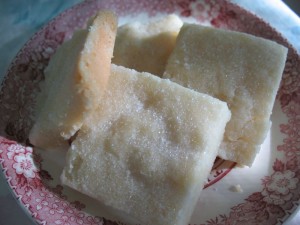
A long time ago in a galaxy far away, I pulled a recipe for shortbread cookies out of a newspaper.  It was just another one of those recipe blurbs in a Food Section in a small newspaper (I think it was in upstate New York where I ripped this out). For a while, I lost the recipe and tried to duplicate its perfect proportions and always failed.  Happily, I found it again. While I see lots of shortbread cookies out there, many of them are rolled cookies, which forces you to handle the dough in extra steps.  I think the secret to the tenderness of these cookies is the lack of dough-handling: mix, dump, press, bake.

I also liked the recipe because it was always fabulous (providing you use REAL butter), I could made it in one pan, and it made a lot of cookies.  When the children didn’t have any cookies for their lunches, I could have enough for the week in under an hour. And when I take them to church and serve them to the ladies, they LOVE them.  So do I.

Scottish Shortbread

Preheat oven to 325 degrees F.

Cream 1 pound butter (4 sticks) with 1 cup sugar until light and fluffy.  Stir, or sift together, 4 cups flour and 2 teaspoons salt (can use 2 1/2 if your butter is unsalted).  Blend into butter mixture with a light touch.  Don’t overmix–you want it barely stirred in.

Press dough into a rimmed cookies sheet, moistening your fingers with cold water if you find it too sticky.  Bake for 30 minutes, or until edges are just browning (don’t overbake) and immediately after pulling from oven, shake a hearty amount of granulated sugar over the entire surface.

Cut into “fingers,” 1″ by 3″.  Of course, you can also make them square-shaped, which is what I did.  For a pretty cookie, before baking use a cookie press to stamp a design over the top in a grid.

Scallops with Peppers and Corn

It had been a long, hot day and I didn’t feel like throwing a meal on the table.  I had earlier found this recipe in my new favorite publication: Sunset’s Fast and Fresh (go and get it) and knew I had the basic ingredients. I only had to find corn.  Corn?  No problem, right?  It’s summer–corn is cheap, right?  Wrong.  I must have hit the week that all the corn was shipped to China, or that the first harvest was finished and the second hadn’t begun.  I gave my money to the lady at the register, thinking it was the most expensive ears of corn I’d ever purchased.  Note to self: make this dish when corn is on sale.

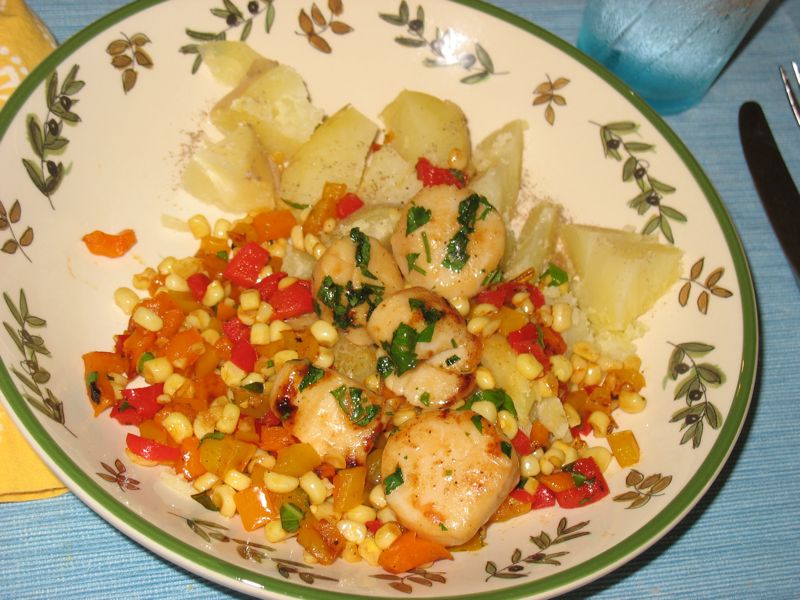
At any rate, make a note to yourself: make this dish anytime.  They suggest serving it with couscous, pasta or rice, but somehow I had boiled New England supper on my mind, with the combo of the seafood, vegetables and corn.  We served ours with boiled white rose potatoes. I placed those in our individual bowls, cut them up, then over that spooned the vegetable mixture, and then the scallops.  It was delicious, easy and refreshing.

Ingredients

3 ears corn (about 2 1/2 lb. total), husked, silks removed
1 1/4 pounds sea scallops
Salt and pepper
2 tablespoons butter
2 tablespoons olive oil
2 red bell peppers rinsed, stemmed, seeded, and finely chopped (I used three: one yellow, one orange and one red)
1 large clove garlic, peeled and minced
1/4 teaspoon ground cumin
1/3 cup chopped fresh basil leaves
1/3 cup chopped fresh cilantro

Preparation

1. Holding each ear of corn upright in a deep bowl, cut kernels from cobs. Rinse scallops and pat dry; sprinkle lightly all over with salt and pepper.

2. Melt 1 tablespoon butter with 1 tablespoon olive oil in each of two 10- to 12-inch nonstick frying pans over high heat. Add corn, bell peppers, garlic, and cumin to one pan; add scallops to the other. Cook, stirring both pans often, until vegetables are crisp-tender, about 3 minutes, and scallops are browned on the outside and barely opaque in the center (cut to test), about 5 minutes.

3. Just before serving, stir basil into the vegetable mixture and cilantro into the scallops. Add salt and pepper to taste to both. Mound vegetables in a wide, shallow bowl; top with scallops (and any pan juices).

Warszawa’s Cold Borscht

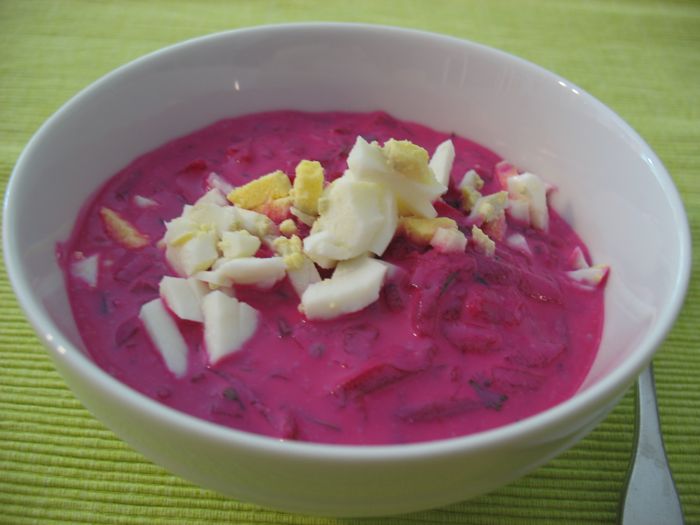
I loved this soup–a thick, rich beety soup with a brilliant color.  It’s perfect on a hot, hot day–and it made the Los Angeles Times’ Top Ten recipes of 2010 list!

Total time: About 1 hour, plus cooling time for the beets

Servings: 4
Note: Adapted from Warszawa in Santa Monica

Ingredients:

1/2 pound red beets, tops and roots trimmed but unpeeled (it’s about three medium to large beets)
2 cups buttermilk or yogurt
3/4 cup sour cream
2 tablespoons sugar
1/4 cup fresh lemon juice, about half a lemon
2 teaspoons salt
1/3 cup thinly sliced green onions, green part only
1 large cucumber, peeled, not seeded, and diced into small pieces
1/4 cup finely chopped fresh dill, plus more for garnish
1/4 cup finely chopped Italian parsley

1 hard-boiled egg, peeled and sliced crosswise or diced

1. Cook the beets in a medium saucepan with enough water to cover them by 1 inch. Simmer the beets until they are tender, about 45 minutes. Remove from heat, drain the beets and set them aside until cool enough to handle.

2. Peel and grate the beets, saving any liquid produced when grating. You should have at least 1 cup of beets (any extra can be used as a garnish for salads and will keep, refrigerated, for up to 1 week).

3. In a large bowl, combine 1 cup grated beets and reserved liquid, buttermilk, sour cream, sugar, lemon juice and salt using a large spatula.

3. One hour before serving, gently stir in the green onions, cucumber, dill and parsley. Cover and refrigerate to allow the flavors to marry. This makes a scant 5 cups of soup.

4. Serve each bowl with a sprinkling of dill and slices of hard-boiled egg.

Each of 4 servings: 179 calories; 6 grams protein; 21 grams carbohydrates; 2 grams fiber; 8 grams fat; 5 grams saturated fat; 24 mg cholesterol; 18 grams sugar; 1,361 mg sodium.

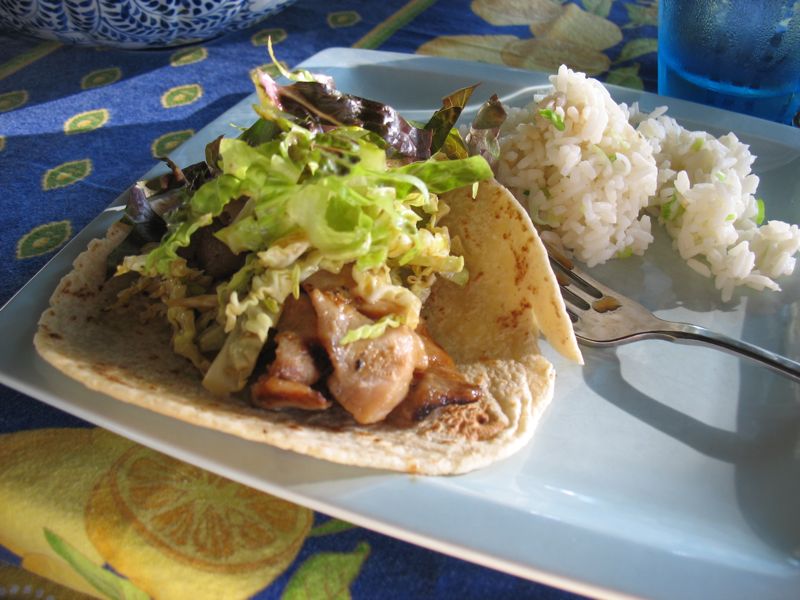
Korean Tacos

This post is for Lynne, my fabulous mail lady, who takes a personal and friendly interest in all of us on the mail route.  She and her sister are getting together on Fourth of July with their families and she wanted to grill something, rather than order in a pizza.  Couple that impetus with my visit some time ago to the LA County Museum of Art (LACMA) where parked out front along the street, were all kinds of food trucks.

I was delighted because I’d heard about this phenomena, but since I am from a neighboring city we would probably never have such a gourmet delight.  We tried the Korean Tacos–a hybrid of Asian-flavors wrapped up in a tortilla.  Not cheap, so we shared one, and besides we were saving our hunger for Chinese Dumplings.  But I searched for a recipe, finding one that had been printed in the now-defunct Gourmet Magazine.

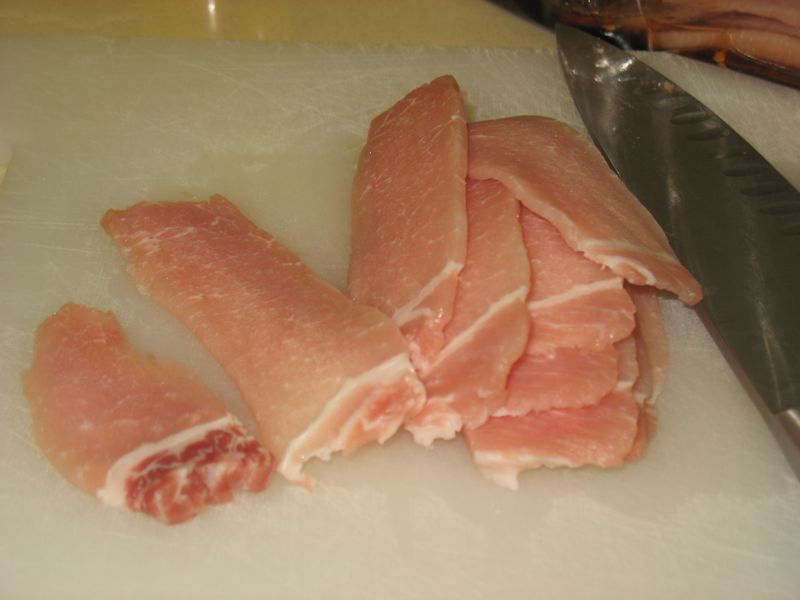
For meat, I had some really thick boneless pork chops (1″ thick) in the freezer.  I let them partially thaw which allowed me to get a really thin slice on the meat.  I used two pork chops,  which served two amply with leftovers for another meal.  Guessing? They probably weighed together about 3/4 pound.  Place them in a zip-lock bag, then add the marinade:

2 tablespoons soy sauce
1/4 cup sugar
1 tablespoon minced garlic
2 teaspoons Asian sesame oil (available at grocery stores–get a smaller bottle if you don’t plan to use it a lot, and store it in your fridge)
1 Tablespoon rice vinegar
1 Tablespoon water
1/4 teaspoon dried hot pepper flakes (the kind you get to put on your pizza)

Marinate at least 2 hours or up to 24 hours.  I did this in the morning, then pulled it out of the refrigerator about an hour before grilling.

On a fairly hot (but not scorching) grill, lay out the slices of pork a few at a time, then go back and flip them over.  They will cook REALLY quickly since they are so thin.

Warm some tortillas, either by wrapping in foil and placing at the back of the grill over indirect heat, or by warming them in a frying pan.  We use the thicker white corn tortillas, which don’t fall apart and are more like the Korean tacos we tried. I think we bought these at Von’s in the plaza, but I’ve seen them other places, too.  Place the pork in the tortilla, layer some slaw on top, and if you like a little more heat, pass some siroche red pepper sauce for the top.

Napa-Romaine Slaw

Makes about 6 cups, enough for many tacos, with leftovers

For the dressing:
1 tablespoon soy sauce
1-1/2 teaspoons lime juice
1-1/2 teaspoons toasted sesame oil
1/4 teaspoon sugar

For the salad:
4 cups (5 ounces) shredded romaine lettuce
2 cups (3 ounces) shredded Napa cabbage
1/2 cup (2 ounces) thinly sliced onion
toasted sesame seeds for garnish

Toss the salad in a large bowl with 1 tablespoon of the dressing. Add more dressing to taste and garnish generously with sesame seeds.

We served our tacos with some rice, into which I’d added some sliced green onions, about a teaspoon of sesame oil, and a dash of soy sauce.  You could just make extra of the slaw dressing and toss with that.

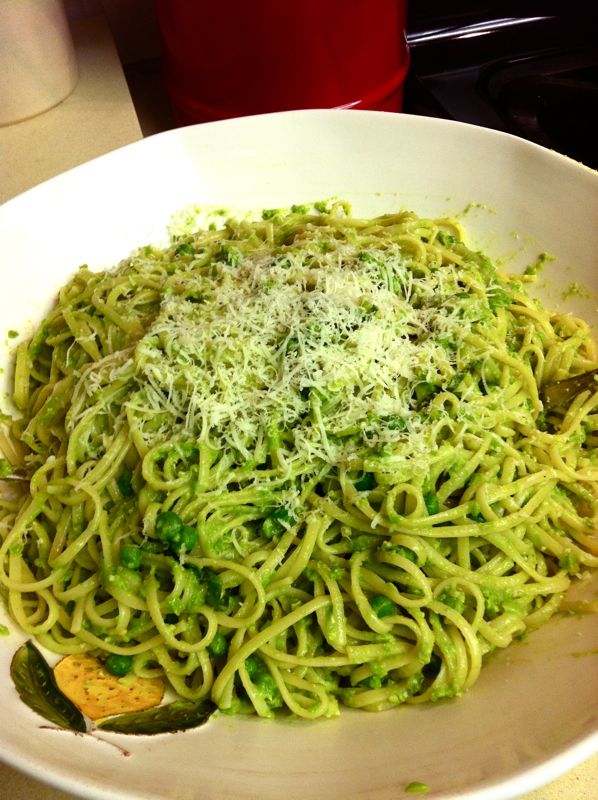
Linguine with Pea Pesto

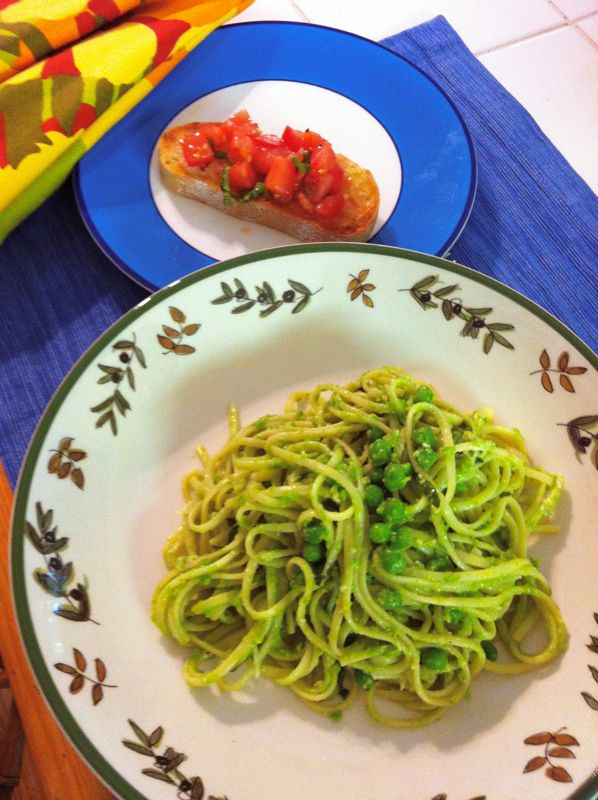
This recipe is from Smitten Kitchen (link to the right), but my sister Christine says she’s made it, so I know it’s been around a while.  Basically you puree some peas, add the rest of the pesto ingredients and toss cooked linguine with this and some of the pasta water, and you have a quick and delicious summer meal.  I mean it was so delicious I’ve had it every day this week and I’m still not tired of it.  It’s creamy without being high-fat-high-calorie.  I used the frozen peas, but did buy a fresh bag so we didn’t have to use that bag that’s been kicking around the back of the freezer all winter.  We served it with fresh tomato bruschetta on crostini--a perfect meal.

Ingredients
1 1/2 cups (from approximately 1 1/2 pounds peas in pods) fresh pea or a 10-ounce package frozen peas (I didn’t defrost mine–just dumped them into the boiling water.)
1 small garlic clove, minced
2 tablespoons pine nuts, toasted and cooled
1/2 cup (1 1/8 ounces) finely grated parmesan cheese
1/4 teaspoon table salt, plus more for pasta water
1/3 cup olive oil
1 pound dried linguine
Garnish (optional): thinly slivered basil leaves

Prepare an ice bath, a large bowl filled with ice water. Bring a small saucepan of lightly salted water to a boil. Add peas and cook for 2 minutes (this leaves them with a bit of structure). Drain peas then add them to the ice bath (if using) and drain again. If you haven’t used an ice bath, let your peas cool to lukewarm before making the pesto.

Set aside 1/2 cup of your cooked peas. Whirl the remaining cup of peas in the work bowl of a food processor with garlic, pine nuts, 1/3 cup parmesan and salt until smooth, about 2 to 3 minutes, scraping down the bowl as necessary. With the machine running, drizzle in olive oil.

Cook your linguine until al dente. Reserve about two cups pasta cooking water, as the pea pesto will be surprisingly thick, then drain linguine and return it to pot. Over moderate heat, toss pasta with pesto, reserved peas and as much reserved pasta water as needed to smooth and distribute pesto; let cook for one minute so that the pesto adheres. Adjust salt to taste, add freshly ground black pepper if desired. Serve immediately, garnished with fresh herbs, if using, and remaining parmesan.

Gazpacho


Maybe it was because Dave brought home another sack of beautifully ripe tomatoes when I already had a sack of beautifully ripe tomatoes in the fridge.  Maybe it was because we finally got a warm spring day, after a long string of cool spring days. (I’m not complaining about this–just stating a fact.)  I don’t know–but I know I wanted some gazpacho.  I found this recipe on Epicurious.  Not content with that, I perused my existing recipes, checked out Pioneer Woman, and in the end went with the Epicurious recipe.  I’ve tried many over the years–but I think I’ve found a winner.  This is a thicker version of gazpacho (apparently the ones from Spain are thinner), but I quite like this one.  It is best made the day before but refrigerating for 4 hours is a minimum.


I used Safeway store brand of juice and it was just fine.  I also used a red and yellow bell pepper–upping the quantity to one total pepper.

Mom’s Gazpacho • Epicurious | May 2001 • by Elizabeth Shepard
Yield: Makes 8 servings

Ingredients:
1 egg
2 cloves garlic, finely chopped
Salt

2 cups chopped fresh plum tomatoes
1/2 cup chopped green or yellow pepper
1 cup chopped cucumber, seeds removed
1/2 cup finely chopped red onion
1/4 cup finely minced parsley
2/3 cup olive oil

Juice of 1/2 lemon (approximately 2 tablespoons)
1 can (14 ounce)  beef broth
1/4 cup red wine vinegar
1 teaspoon dried oregano
2 tablespoons Worcestershire
Pepper, coarsely ground
1 46-ounce can tomato juice
1/2 cup plain bread crumbs (I made some on the spot by whirling a couple of slices of good-quality  bread in my food processor.)

Tabasco and salt/pepper to taste

Garnish (optional): croutons and chunks of avocado

To Prepare:
Place egg in small pot of cold water, bring to boil, and let simmer for 10 minutes–don’t overcook. While this cooks, chop garlic finely–really really fine.  I even used the side of the blade of my knife to smash it some more.  Place this in a small bowl, add a pinch of salt (or a shake, if you are using Kosher salt).

When egg is finished cooking, run under cold water, remove shell, add to garlic and salt mixture, and mash together with fork.  Set aside until for later.

In a large bowl, combine tomatoes, pepper, cucumber, red onion, olive oil, lemon juice, beef broth (optional), red wine vinegar, parsley, oregano, Worcestershire, and coarsely ground black pepper to taste. Stir.

Pour tomato juice over the vegetables, and add garlic, egg, and salt mixture. Add bread crumbs and stir so that they dissolve into liquid.

Taste for seasoning and add salt, pepper, and Tabasco to taste. Chill for at least 4 hours and serve. Garnish with chunks of avocado and croutons.  Pass extra croutons.

At the end, the cook had included some of her notes:

· My recipe serves eight, and it’s a lot of trouble to prepare this soup for one (I disagree). But like homemade tomato sauce, its flavor improves with age—you can store it in the refrigerator and eat it for about a week.

· Why mash the garlic with egg and salt? To make a garlic-infused paste that adds body and substance to the tomato broth.

· Use kosher salt to bring out the flavors of the vegetables.

· Try to chop the vegetables so that they’re small but not minced or pulverized, and don’t worry if the sizes aren’t uniform. The pieces should be small enough to chew but big enough to recognize.

· If you prefer a more elegant presentation, emulsify the chilled mixture before serving. Seasoning is a very personal matter. I tend to like my gazpacho pungent and sharp, with salt, lemon, and onion flavors lingering on the palate. If you prefer milder soup, reduce the onion, garlic, and vinegar quantities by half. If you want a spicier soup, add 2 teaspoons of minced jalepeño peppers. To make vegetarian gazpacho, substitute vegetable broth for beef broth.