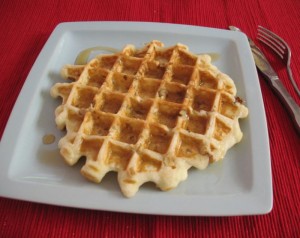
Buttermilk Waffles

Maybe I had some leftover buttermilk that first time I made these, or maybe I just wanted some waffles.  Who knows?  These waffles are from the pages of a well-used, splattered and worn cookbook: The Joy of Cooking.  It was  my go-to cookbook when I was a young bride of 19-and-a-half, alongside the red-checkered Better Homes and Gardens Cookbook. Years later I laughed out loud when in the movie Julie/Julia, the actress playing Irma S. Rombauer, the cookbook’s author, admits to not testing all the recipes.  I’d say this one’s been well-tested in my kitchen and it is a success every time.

Recently we had the grandchildren over and Alex told me he didn’t like waffles.  “But, Alex,” I said.  “You haven’t had MY waffles.”  Above is his response to tasting them: a hearty thumb’s up.  He had nearly three.  We like them drizzled with warm REAL maple syrup, not that fake stuff in the grocery store (check Trader Joe’s).  That habit–of real syrup–was inherited from my father, who had shipped to him six 1-quart tins of real maple syrup from a farm in Vermont every year when we were growing up, and for many years after that.

Plug in your preferred waffle iron to heat.  If you are using it for the first time, have a bowl with some shortening in it along with a stiff pastry brush to season the grids.  As the Joy of Cooking notes: “Once conditioned, the grids are neither greased nor washed.  You may brush the iron out to remove any crumbs.  After use, merely wipe down the outside with a cloth well wrung out in hot water.”  Last thing from the cookbook: “You may think our waffle recipes heavy in fat.  But the richer the waffle dough, the crisper it becomes.  With the butter flavor baked in, there is then no reason for butter on top of it.”  Amen.  Just some warm syrup in a cute little pitcher.

In a large bowl, whisk together:
2 cups flour
1 and 1/3 teaspoons double-acting baking powder
1/2 teaspoon salt
1 tablespoon sugar
1/4 teaspoon soda

In a small bowl, beat until stiff, but not dry:
2 egg whites.  Set aside.

Using the same hand mixer and beaters, beat in another (separate) bowl until light:
2 egg yolks.
Add and beat:
1 and 3/4 cups buttermilk
6 tablespoons melted butter

Fold the egg yolk/buttermilk mixture into the dry ingredients with a few swift strokes.  Fold in the egg whites.

Bake in a prepared waffle iron, using a spoon to catch any excess that may ooze out.  After baking, there’s a temptation to open it too soon, and to split the waffle in half.  I usually watch to see if it is still steaming, and try and catch it at the end.  I lift the upper part with a light touch, and if there is too much resistance, I let it bake a little longer.  The only caveat is: if you haven’t seasoned the grids much, it may stick on the top as you raise the lid.  Have a fork handy to help it off, then put some shortening on the upper lid to season it some more.

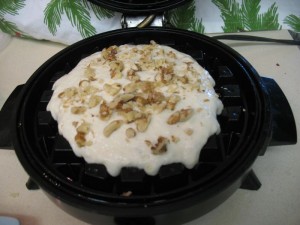
I show above a tradition of my mother’s: adding chopped walnuts, sprinkled over the top of the dough just before closing the lid to bake.  She has also added mini-chocolate chips on occasion, but the nuts are my very favorite.  Shown above is a Belgium-style waffle iron with big fat grids.  Not my favorite.

So, for my birthday my husband gave me an old-fashioned waffle iron with normal grids–more pockets for the syrup to collect in without the waffle getting soggy.  The yield in the big waffle iron (shown above) is about 5-6, but they break into fourths, so you can feed a few at once.  (But I usually always double the batch for a crowd.)  I keep the baked, but not yet eaten, waffles in the oven at about 200 degrees while I’m serving breakfast, then throw the uneaten ones directly into the freezer.  After they are frozen, I place them in ziploc baggies and we toast them in our toaster whenever we want a waffle.
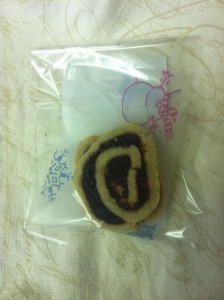
Cranberry-Cherry Pinwheels

A few years ago I bought this sliver of a book, Joy of Cooking Christmas Cookies, and thumbed through it to find a cookie or two to try.  I placed little pieces of torn paper as bookmarks–which the book still has.  But I don’t need one for this page, as I’ve made it so much, it opens by itself exactly here.  I like these cookies because you can make them ahead of time and store them in the freezer.  Some slicing and a quick bake and they’re ready to go.  They are also one of the few things on the holiday table that is lower in fat, but they still have a delicious flavor with the sweet-tangy cherry-cranberry filling and the dough with its grated orange zest. There are a few steps to this recipe, but it’s not difficult.

Filling
Combine in a medium saucepan:
1 and 1/2 cups dried cranberries ( 6 ounces)
1 jar (10 ounces) cherry preserves
1/4 cup water
1/2 teaspoon ground cinnamon

Simmer, stirring frequently, for 5-8 minutes, or until the mixture is soft and most liquid is absorbed.  Transfer to a food processor and process until smooth.  Cover and refrigerate until cool.  Filling may be stored up to 48 hours.  Let return to room temperature and stire well before using.

Dough
Using a wire whisk, thoroughly stir together and set aside:
3 and 1/3 cups all-purpose flour (16.75 ounces)
3/4 teaspoon baking powder
1/8 teaspoon baking soda
1/2 teaspoon ground cinnamon

Using an electric mixer, beat together until very well blended:
1/4 cup butter, softened (2 oz.)
3 tablespoons corn or canola oil
1 and 1/4 cups sugar (8.75 oz.)
3 large egg whites
2 tablespoons milk
2 teaspoons vanilla extract
1-1/2 teaspoons grated orange peel (about 1 small orange)

Beat in half of the dry ingredients until just incorporated, then stir in the remainder until well blended.

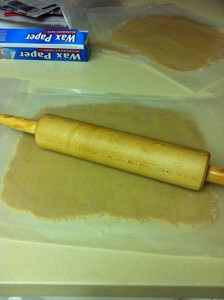
Divide the dough in half.  Form each half into a rough oblong shape about 6 inches long.  Center each log on a 12-inch-long sheet of wax paper.  Cover with a second 12-inch-long sheet of wax paper.  Press, then roll each log into an even 11-inch square, occasionally checking the underside of the dough and smooth out any creases.  Patch the dough as necessary to make the sides relatively straight.

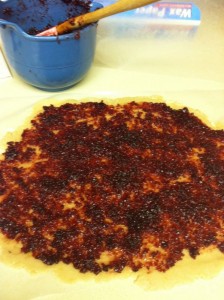
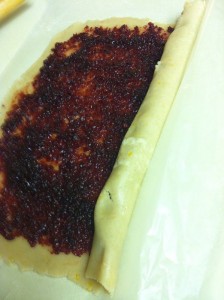
Working with one square of dough at a time, peel away and discard the top sheet of wax paper.  Spread half of the filling evening over the entire surface of the dough; the filling layer will be thin.

Using the second sheet of wax paper, roll up the pinwheel, by easing the dough onto itself; use the paper to assist you.

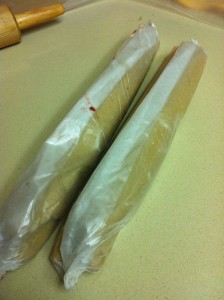
Wrap the roll in wax paper (I use the existing sheet), and twist the ends to prevent unrolling.  Place on a tray or cookie sheet.  Repeat with the remaining dough.  Freeze for at least 2 and 1/2 hours or until the rolls are firm enough to be cut neatly.  (If you wish to bake them much later, place the rolls in a plastic bag for up to a month.)

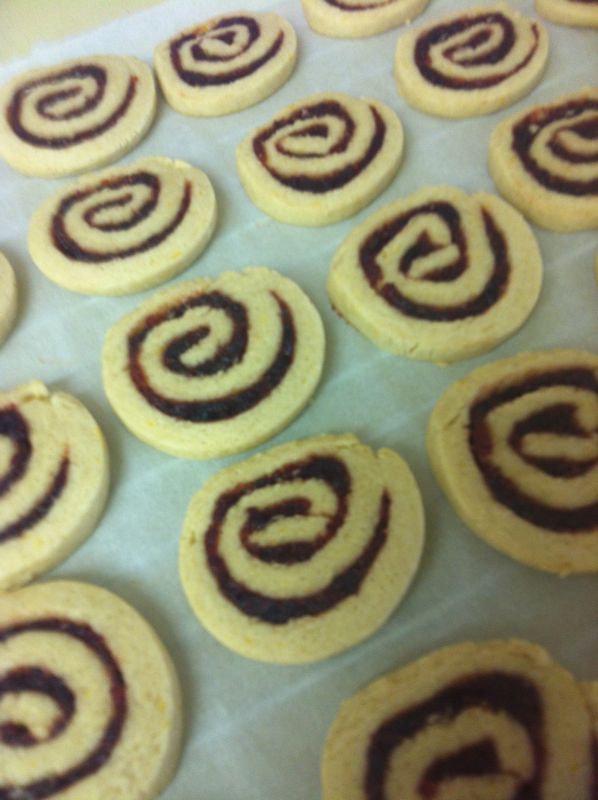
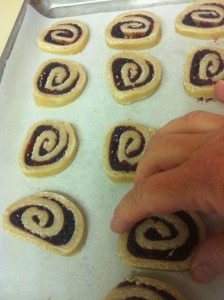
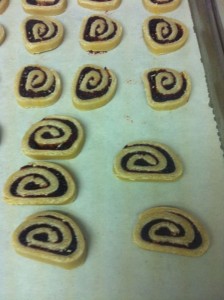
Preheat the oven to 375 degrees F.  Line a cookie sheet with a sheet of parchment paper.  Cut the rolls crosswise into scant 1/4″ slices.  Place them on the prepared cookie sheets, spacing them about 1 1/2 inches apart.  Try as I might, my cookies are always misshapen, so I kind of squeeze them into shape at this point.   Bake in the upper third of the oven for 10-12 minutes, or until the edges are browned and the tops are VERY lightly colored.  One of the attractions for this cookie is that they are pale with that brilliantly colored red filling.

Drag the entire sheet of parchment paper from your baking sheet to a cooling rack, and let them cool.  Store, airtight, for 10 days, or freeze for up to one month.  I promise you no one will complain that yours are as lopsided as mine.

I made them up into favors for my lesson to the church ladies at Christmastime.  Here’s the front, and then the back.

Some time ago I had purchased 8 1/2 by 11- inch sheets of “sticker” paper.  I print out what I want to say, cut them into shape then peel and stick them on the treat bags.  The filling is kind of sticky sometimes, so I sandwiched a piece of fancy wax paper between the two cookies.